In this article, you’ll discover how to respond to customers’ first message immediately and manage customers’ expectations on your business response time.
When customers starts messaging your business, you can automate a welcome and an away message to ensure they receive an immediate response even when no agent is available to attend to their inquiries. This can help reduce customer wait time and set customers’ expectations on business hours and response times.
Benefits of Automated Welcome and Away Messages
Use automated welcome and away messages to:
improve customer experience by providing a prompt response 24/7.
provide assurance to customers that their messages are received, which can prevent them from sending the same messages multiple times.
manage customers’ expectations by providing information such as business hours and response times.
Methods for Sending Automated Welcome and Away Messages
Send a welcome or an away message when a Contact opens a conversation
Use this method to immediately send a greeting or an away message when a Contact messages you.
In the Workflows module, click + Add Workflow and choose your template:
To send a welcome message, click Welcome Message > Click Use Template.
To send an away message, click Away Message > Click Use Template.
The Workflow template is set up with a Trigger and Send a Message step. You can configure the messages as needed.
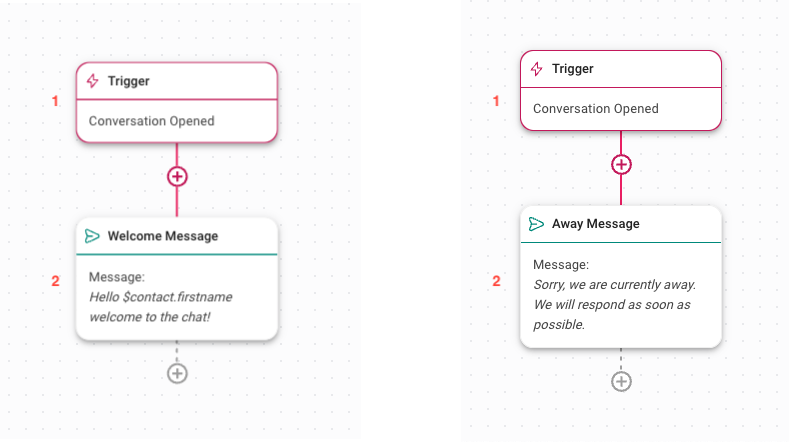
Trigger: The Workflow starts when a conversation is opened by a Contact.
Welcome Message or Away Message: Sends a message to greet your Contact, or inform your Contact that you’re currently not available and when they can expect a reply.
Once you have completed the setup, click Save and Publish to activate the Workflow.
Send welcome and away messages based on business hours
Use this method to send a welcome message during business hours and an away message outside of the business hours.
In the Workflows module, click + Add Workflow > Click Away Message with Business Hours > Click Use Template.
The Workflow template is set up with a Trigger, Business Hours step and Send a Message step.
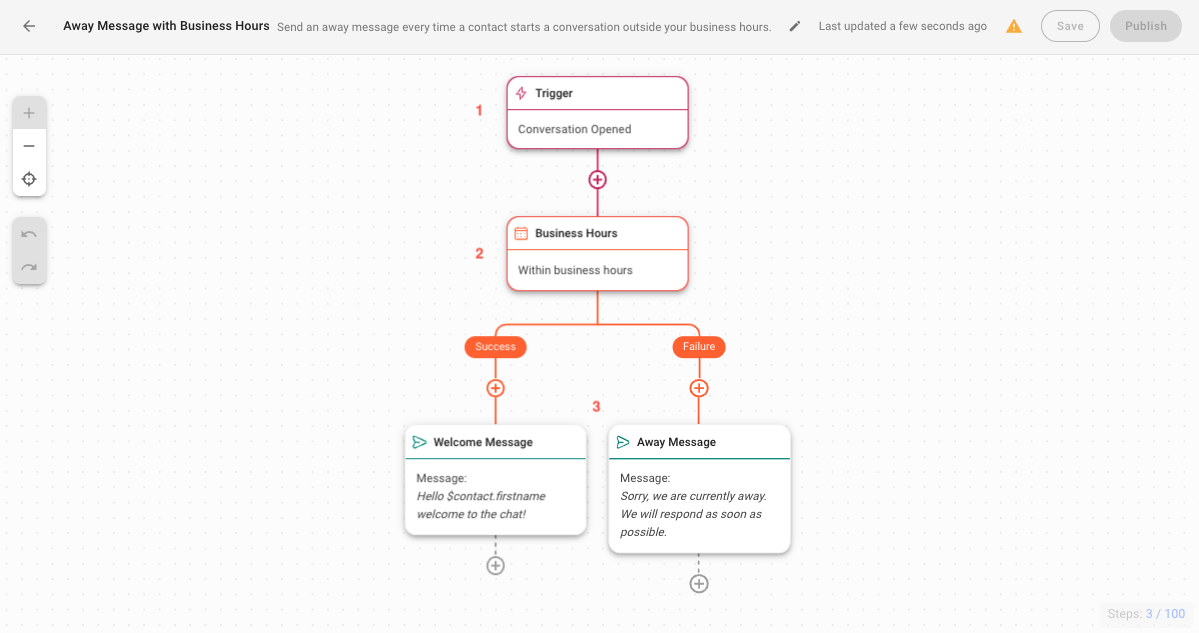
Trigger: The Workflow starts when a conversation is opened by a Contact.
Business Hours: Set up your business hours. Once configured, this step will route Contacts based on the date and time conditions.
Welcome Message or Away Message: If the conversation is opened within the business hours, a welcome message will be sent. If the conversation is opened outside of the business hours, an away message will be sent. This step lets you configure the messages, if needed.
Once you have completed the setup, click Save and Publish to activate the Workflow.


