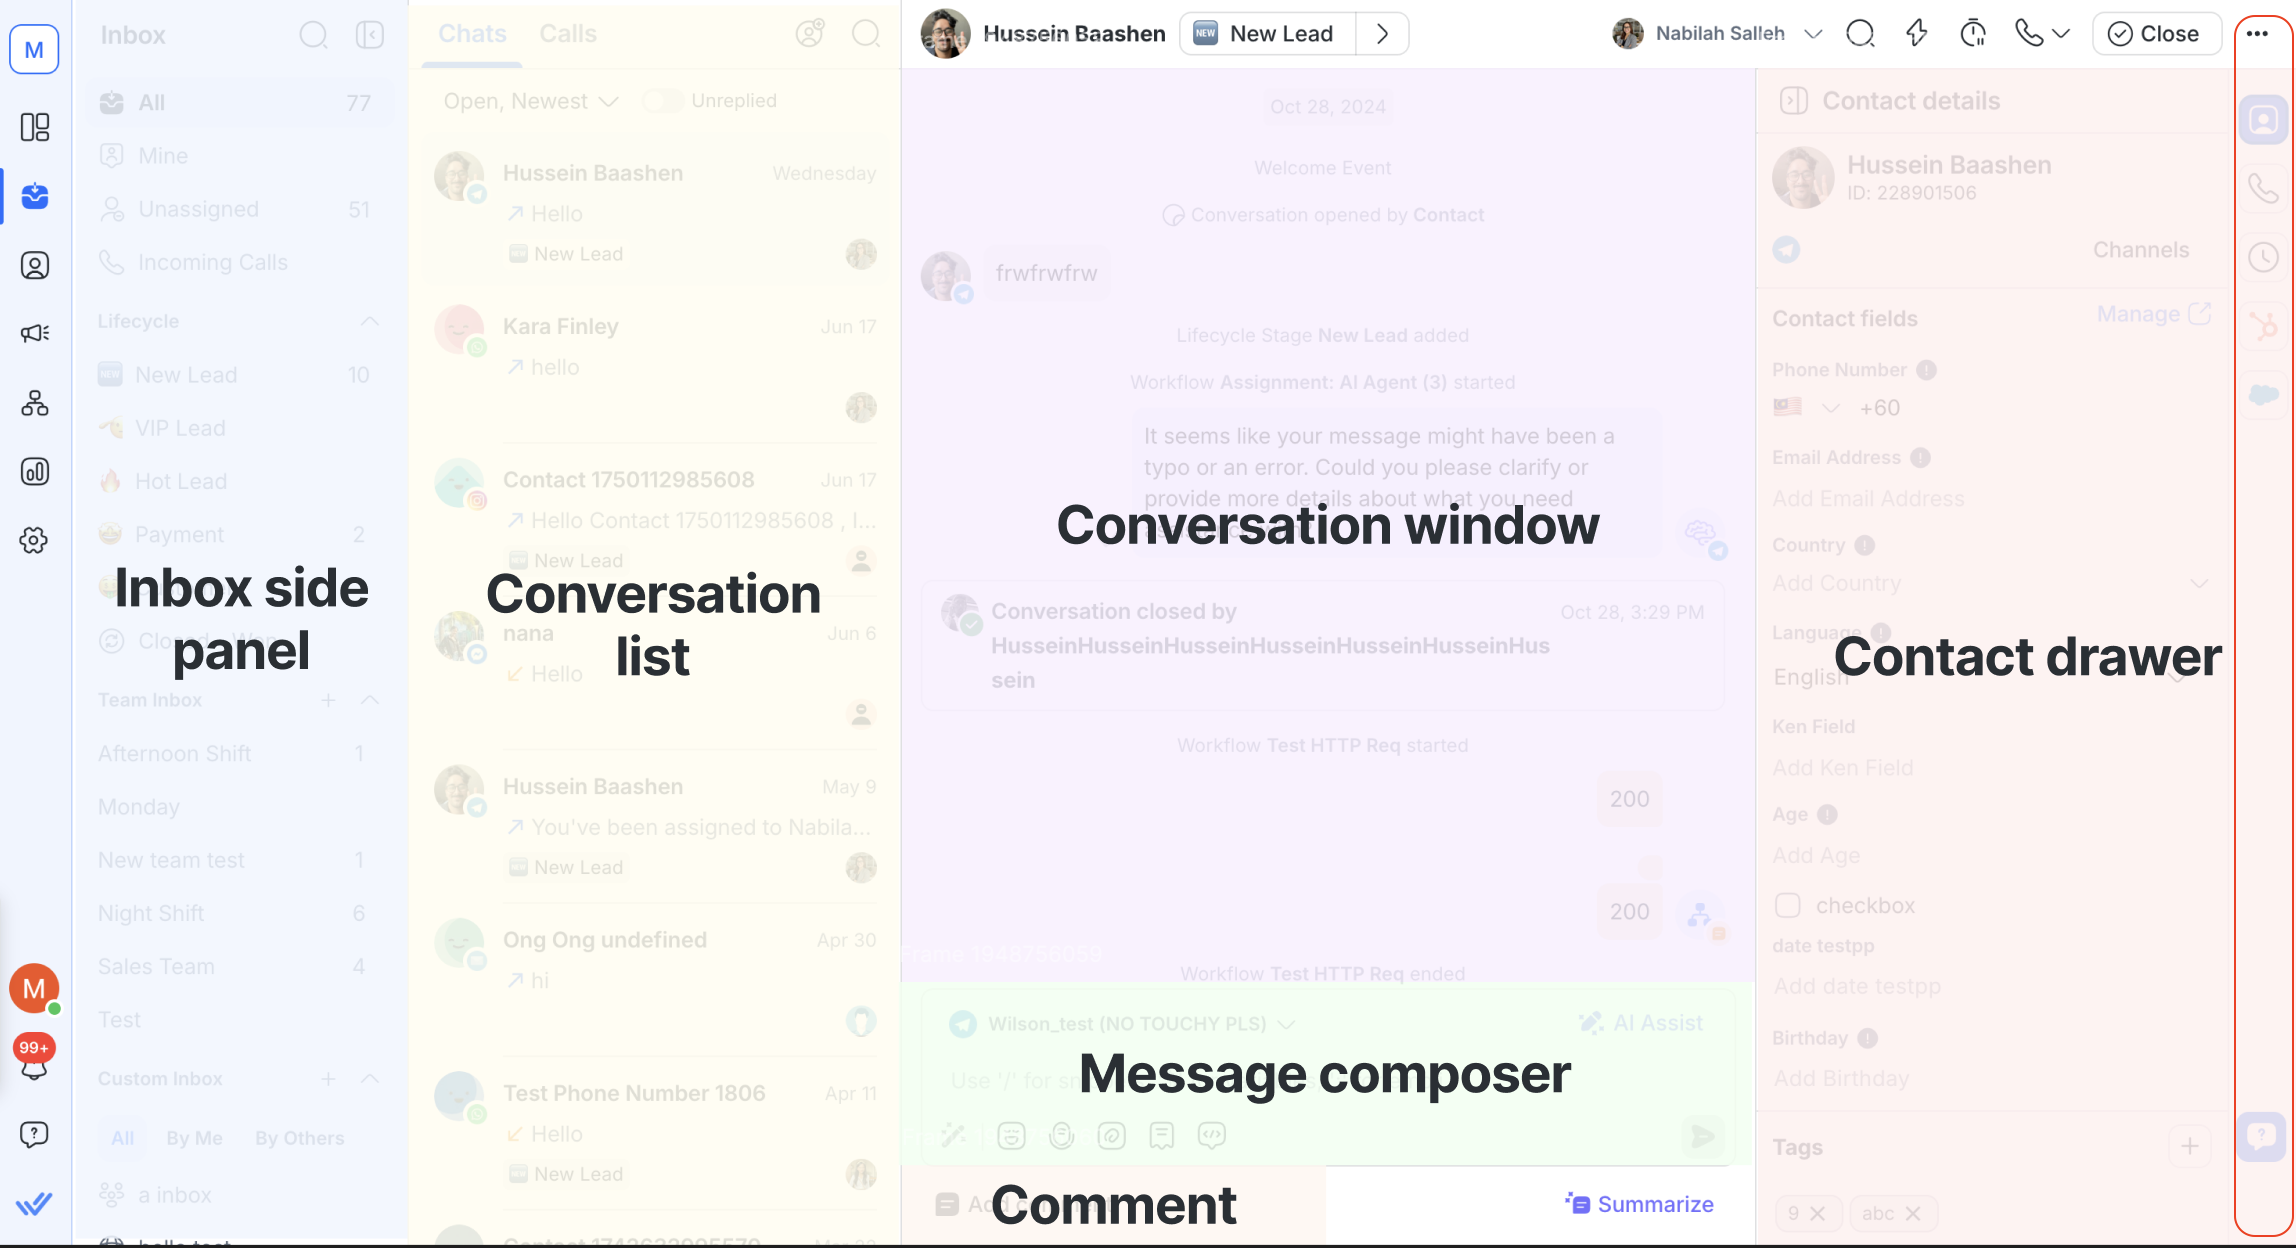
The Inbox module is where you manage conversations with your customers across all Channels. In this article, you’ll learn how to navigate the Inbox and understand its key features.
The Inbox is made up of several key areas that work together to support different parts of a conversation.
Side panel
The side panel is where you can search for a specific inbox or select your preferred Inbox view.
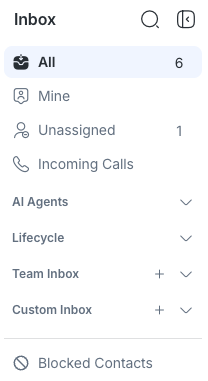
There are 4 inboxes to choose from:
Standard Inbox
There are 3 filters within the Standard Inbox:
All: Shows all conversations on the platform.
Mine: Shows Contacts and conversations assigned to the user only.
Unassigned: Shows conversations that haven’t been assigned.
Agents with restricted Contact Visibility can only see the Mine Inbox. Owners, Managers and Agents with unrestricted access are able to view all Standard Inboxes.
Team Inbox
The Team Inbox shows inboxes for all teams in your Workspace. What each user can see depends on their access level, which is configured in user settings.
Here’s how access levels affect what users can see in the Team Inbox:
If an agent is restricted to “View Contacts assigned to User only”, they won’t be able to view any Team Inbox.
Agents with unrestricted access or with “View Contacts assigned to User’s team” can see their own team’s Inbox.
Owners and Managers are able to view all Team Inboxes.
Custom Inbox
This section shows all Custom Inboxes you’ve created, as well as those that other users have shared with you.
Custom Inboxes let you save filtered views of conversations, so you don’t need to reapply filters each time.
You can use the following options to filter the list of Custom Inboxes:
All: Shows all Custom Inboxes you’ve created and those shared with you.
By me: Shows only the Custom Inboxes you’ve created.
By others: Shows only the Custom Inboxes that other users have shared with you.
Only the person who created the Custom inbox can change its settings. Learn how to create a Custom Inbox and manage its sharing settings.
Blocked Contacts Inbox
The Blocked Contact Inbox shows conversations with Contacts that have been blocked.
Agents, Owners and Managers can access this Inbox. It will only appear if you have permission to view conversations with blocked Contacts and there is at least one blocked Contact in the Workspace.
Indicators
Indicators provide quick visual cues in the Inbox side panel to help you identify new activity and track open conversations at a glance.
New message indicator
The new message indicator is a blue dot that shows when a conversation has a new incoming message.
The number in the blue dot counts conversations, not messages. If a Contact sends multiple messages in the same conversation, it is still counted as one.
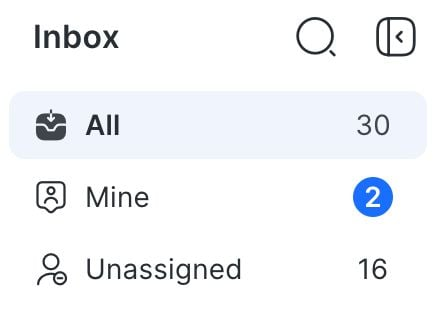
Once you open the inbox, the blue dot disappears.
The new message indicator (blue dot) is only available in Standard and Team Inboxes.
The blue dot follows this priority order when marking new messages: Mine > Team > Unassigned > All
For example, if a new message comes into your Mine Inbox, the blue dot appears there only. It will not show up in the Team or All Inboxes. This same priority order applies across all Inboxes.
Open conversation count
The open conversation count indicates the number of open conversations in an Inbox.
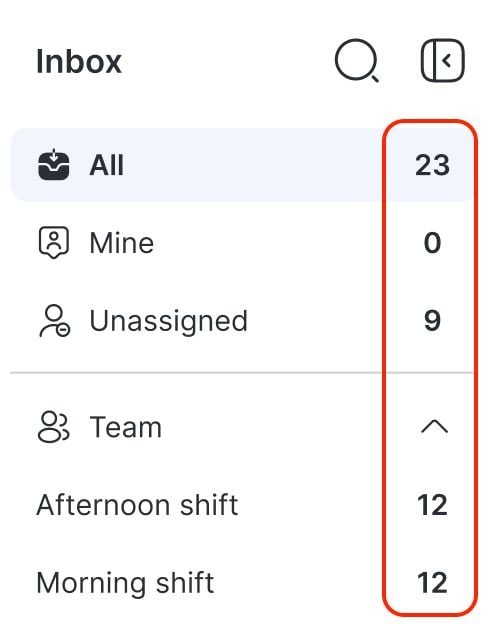
The open conversation count is only available in Standard and Team Inboxes.
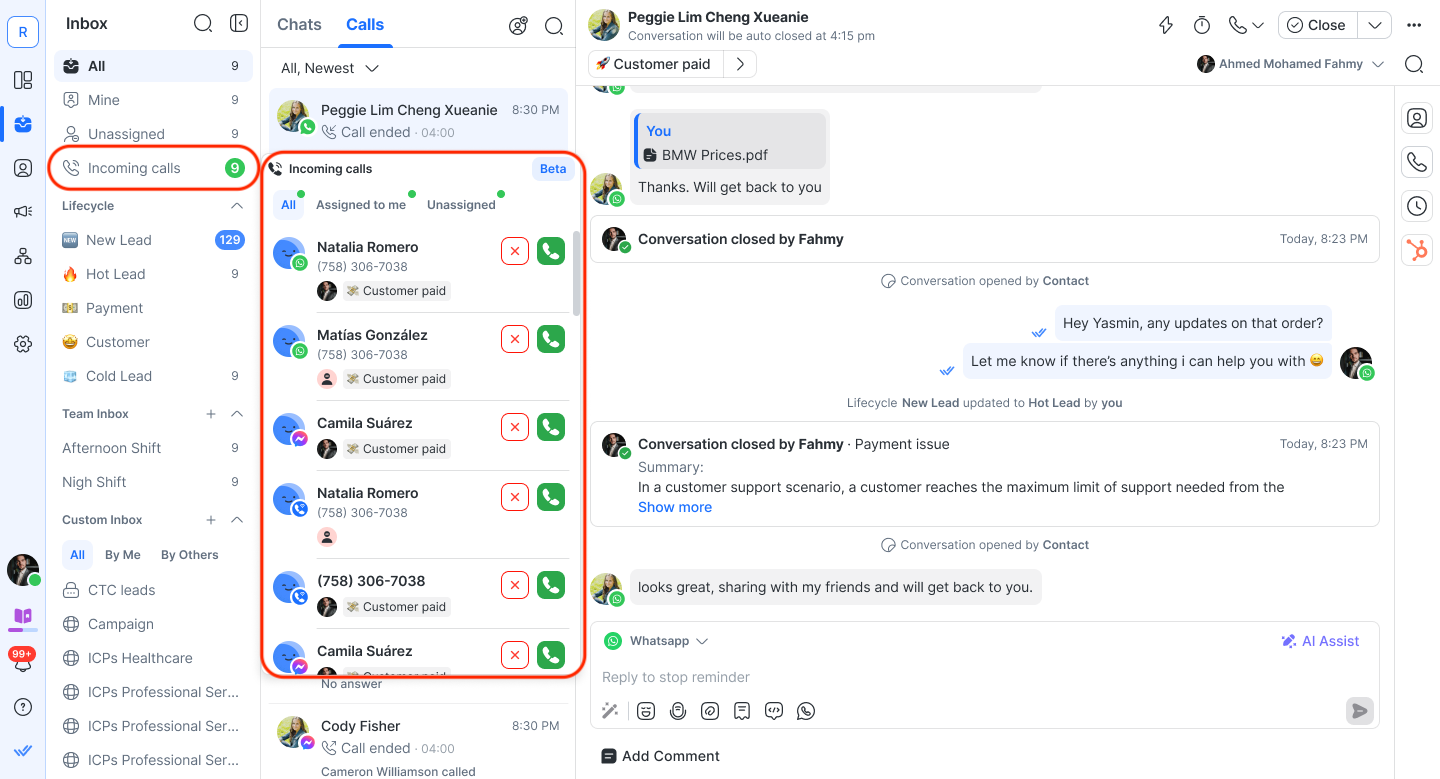
Incoming Calls
Agents with access to calling features will see an Incoming Calls tab in the Inbox side panel.
This menu helps agents stay organized and respond to calls efficiently, while respecting assigned permissions.
Visibility of Incoming Calls
The visibility of incoming calls depends on the Contact Visibility restriction applied to the agent:
No restrictions: Agent can view all incoming calls, including those from unassigned Contacts or those assigned to other agents.
Restricted to team: Agent sees calls only from Contacts assigned to themselves or their team members.
Restricted to self: Agent only sees calls from Contacts assigned directly to them. Other tabs (e.g. All) may be hidden.
The Incoming Calls menu includes three tabs (if permitted by the agent’s restriction level):
All: Shows all visible calls, including unassigned and those assigned to others (if unrestricted).
Assigned to me: Shows calls from Contacts assigned directly to the agent.
Unassigned: Shows calls from Contacts without an owner.
Each call entry displays the Contact’s name, Channel icon, assignment status, and—for WhatsApp calls—phone numbers (which may be masked if masking is enabled).
If there are no incoming calls for a specific tab, an empty state message will appear.
Ongoing calls
Once a call is active, the Inbox will display a call card showing key details of the ongoing conversation.
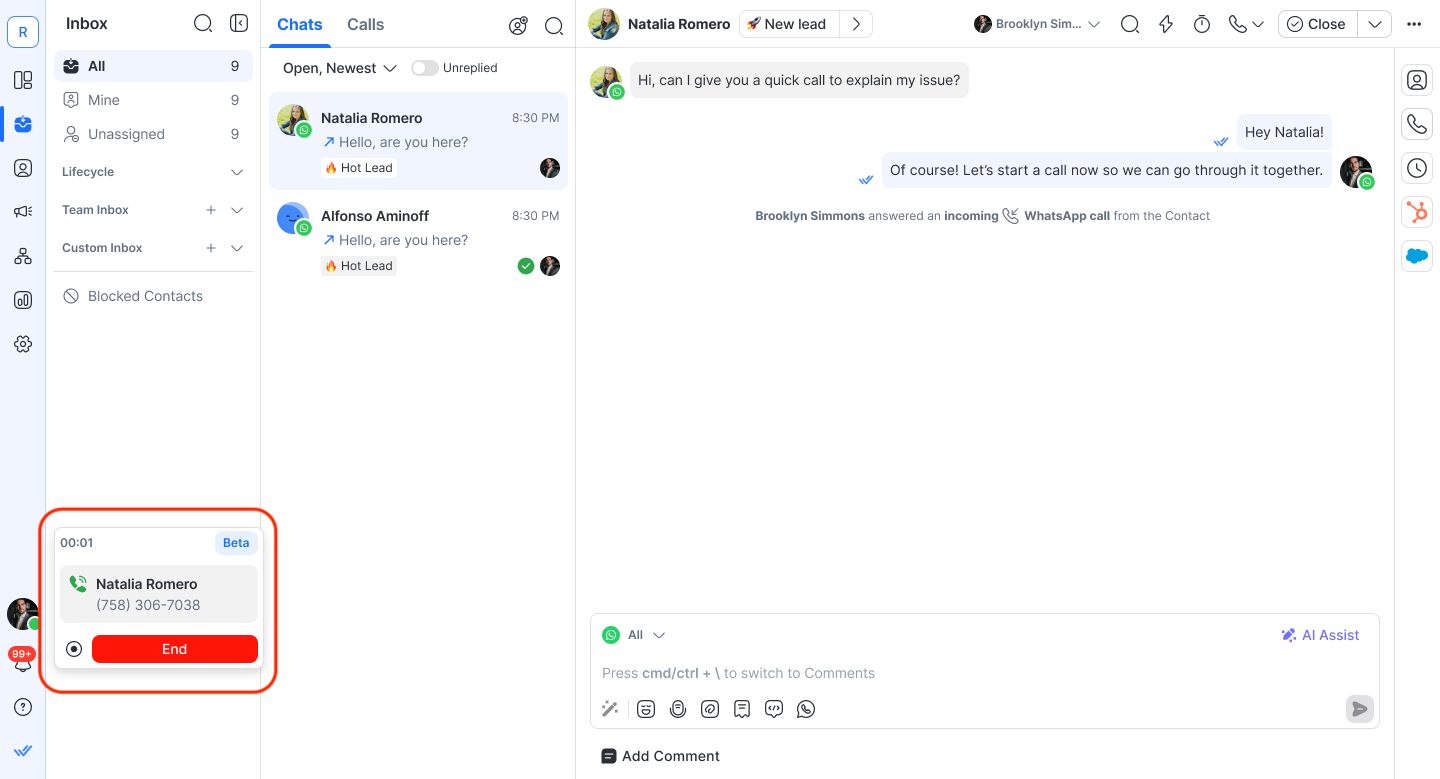
Key details of ongoing conversations:
A call timer appears on the left, tracking call duration.
A Record button is available on the card, allowing agents to record the call if needed.
To end the call, click the End button.
Contact assignment on calls
When handling calls, Contact assignment is automatically managed:
If an agent answers an incoming call from an unassigned Contact, the contact is automatically assigned to the agent.
If an agent initiates an outgoing call to an unassigned Contact, the Contact is also automatically assigned to the agent.
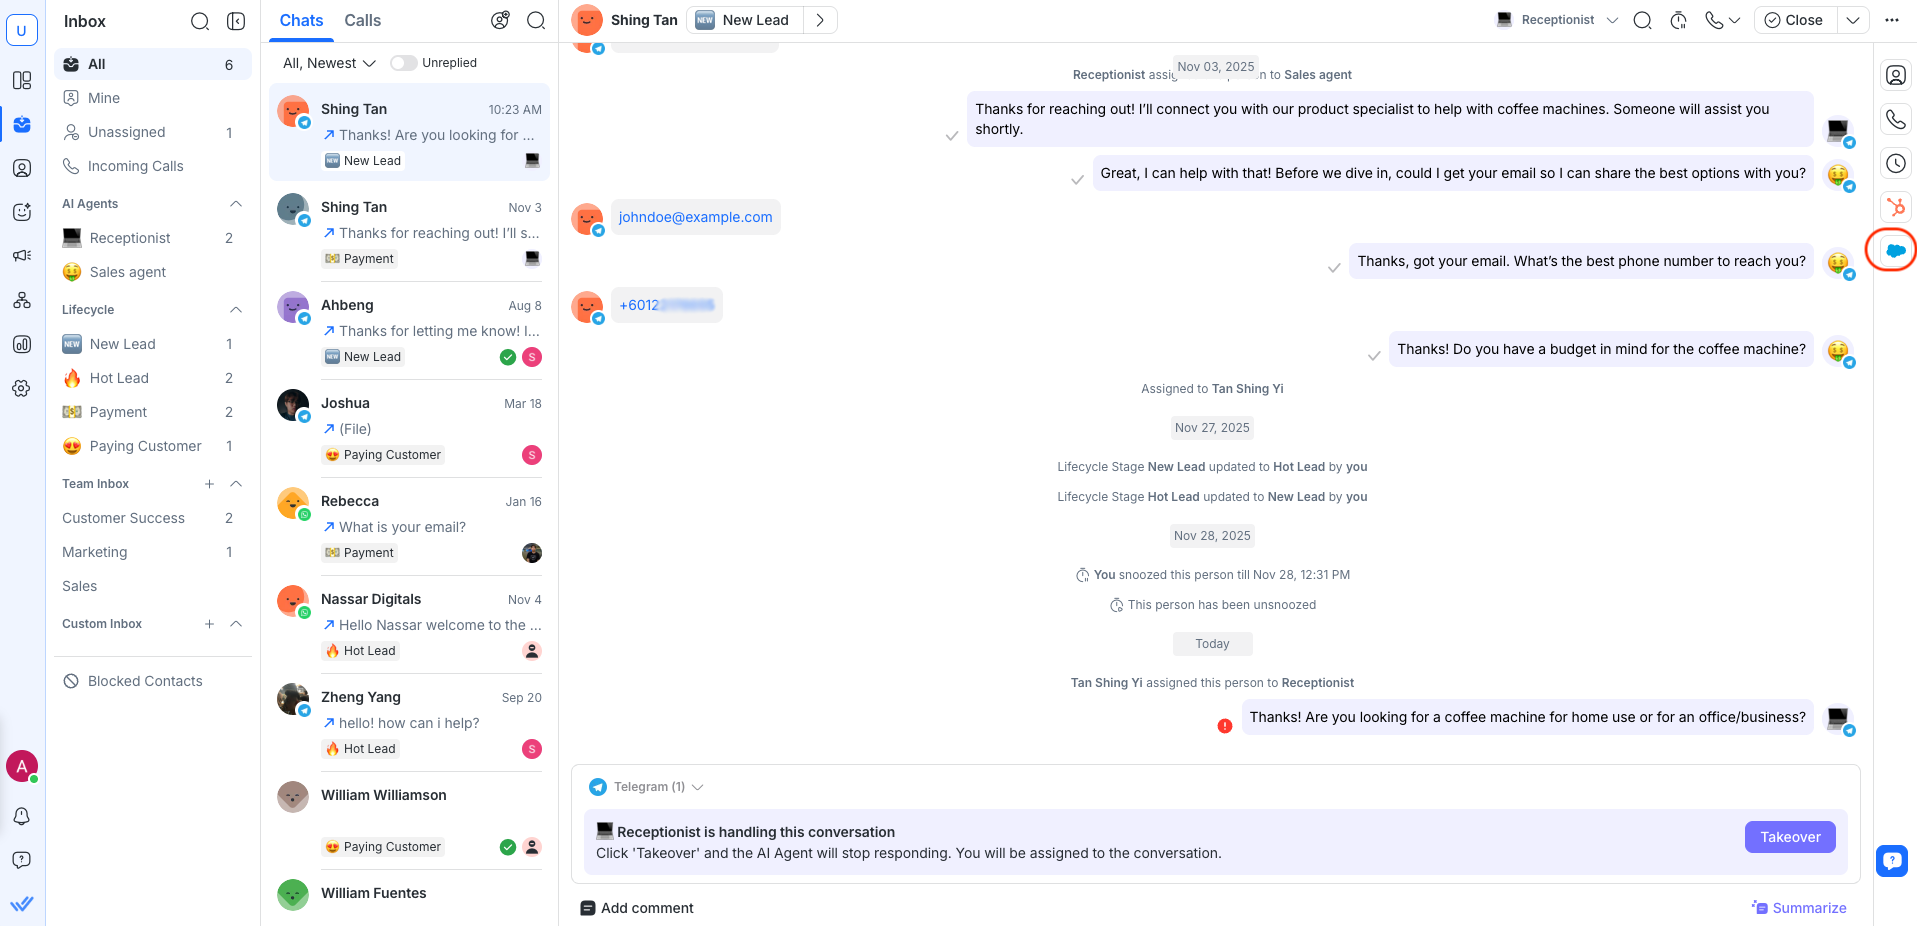
Conversation list
The conversation list is where you can see all conversations with your Contacts. The conversations that appear in the list depends on the Inbox you’ve selected.
Standard and Team Inboxes refresh in real-time when the Inbox is selected or a new message is received.
Custom Inboxes have to be manually refreshed by clicking the refresh button on the “Last updated X time ago” banner at the top of the list.
Chats and Calls view
You can switch between Chats and Calls using the tabs above the Conversation List.
Chats view shows your ongoing conversations.
Calls view displays call logs from your connected Channels.
Use these tabs to quickly toggle between messaging and calling without leaving the Inbox.
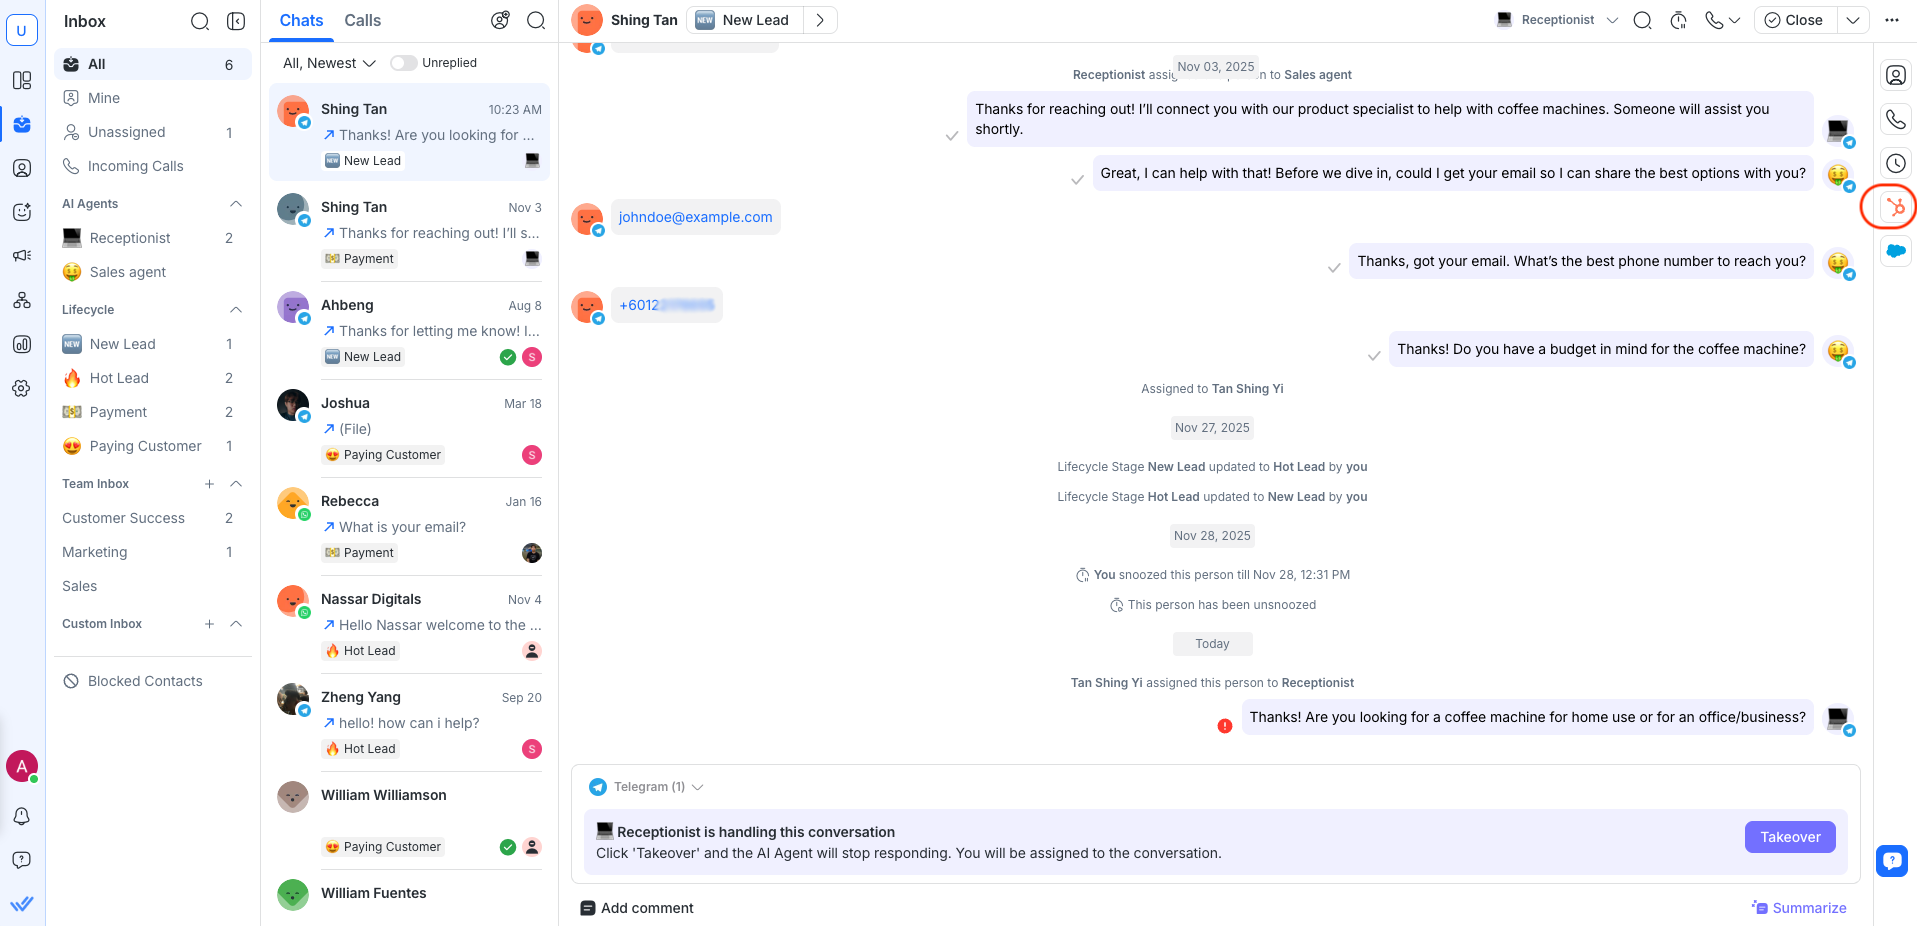
Vertical sidebar
The vertical sidebar is the rightmost column of the Inbox module.
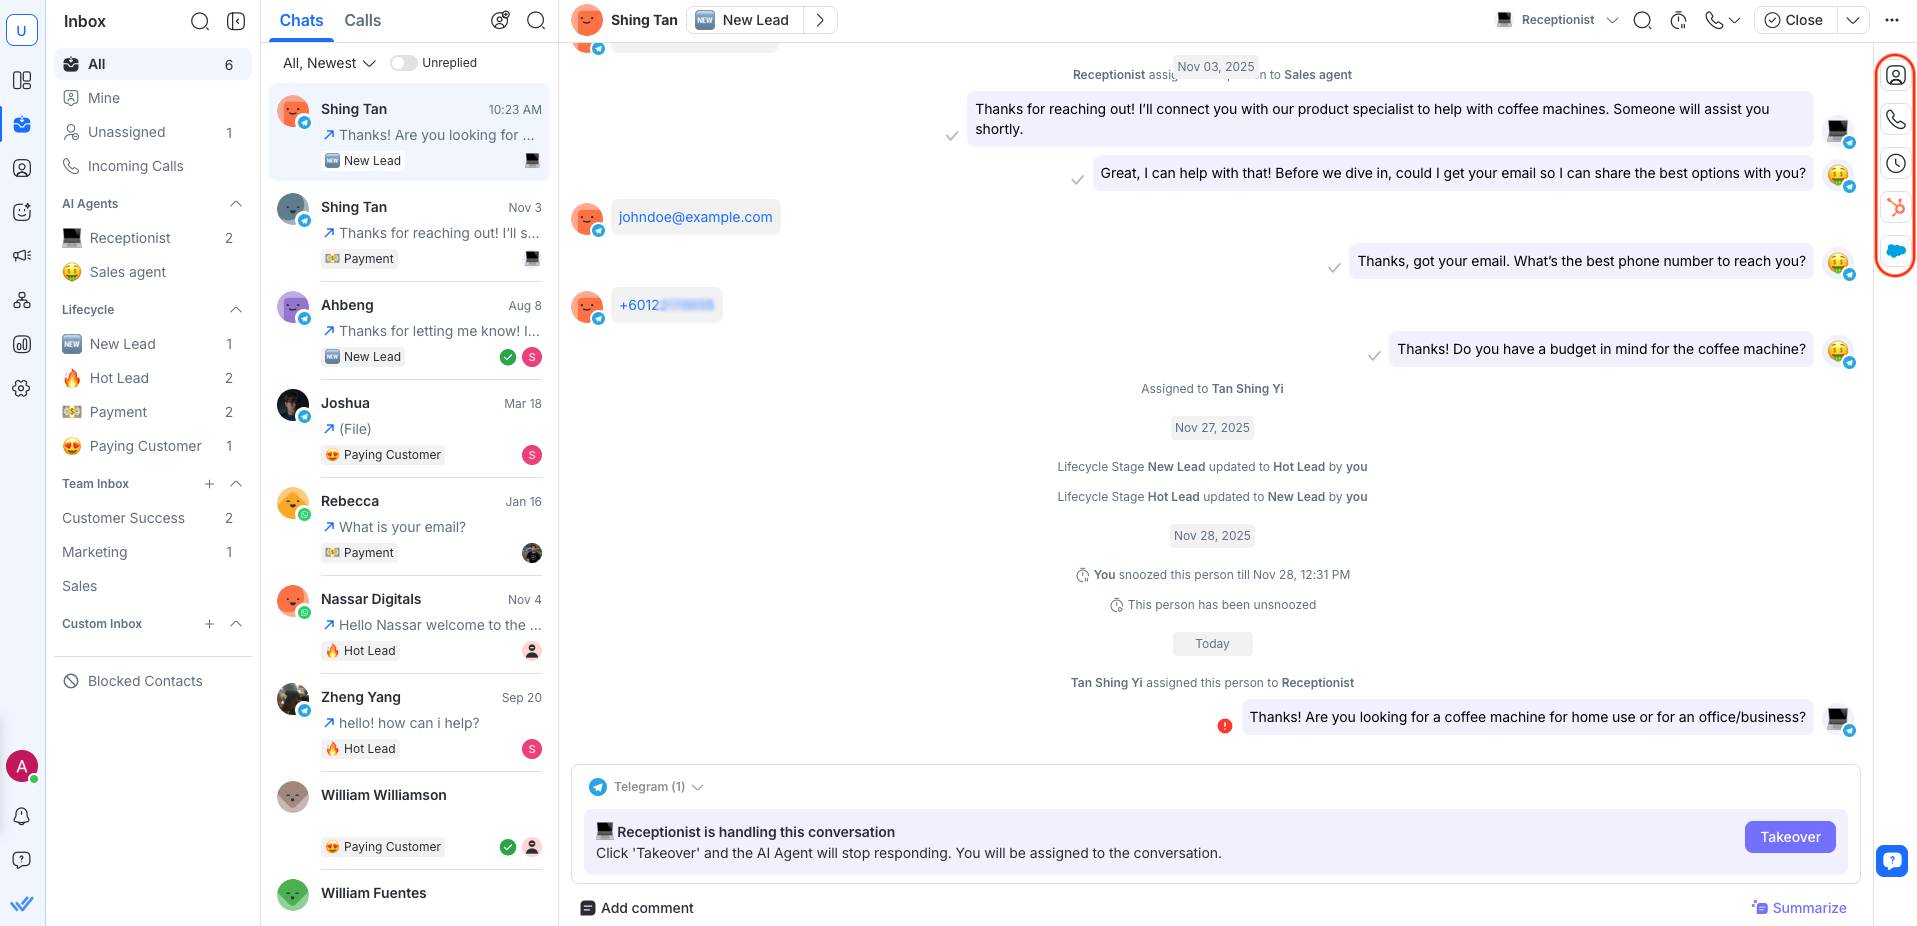
These are the tabs in the vertical sidebar:
Contact details
In the Contact details tab, you can access key information about the selected Contact such as their phone number, email, country and language.
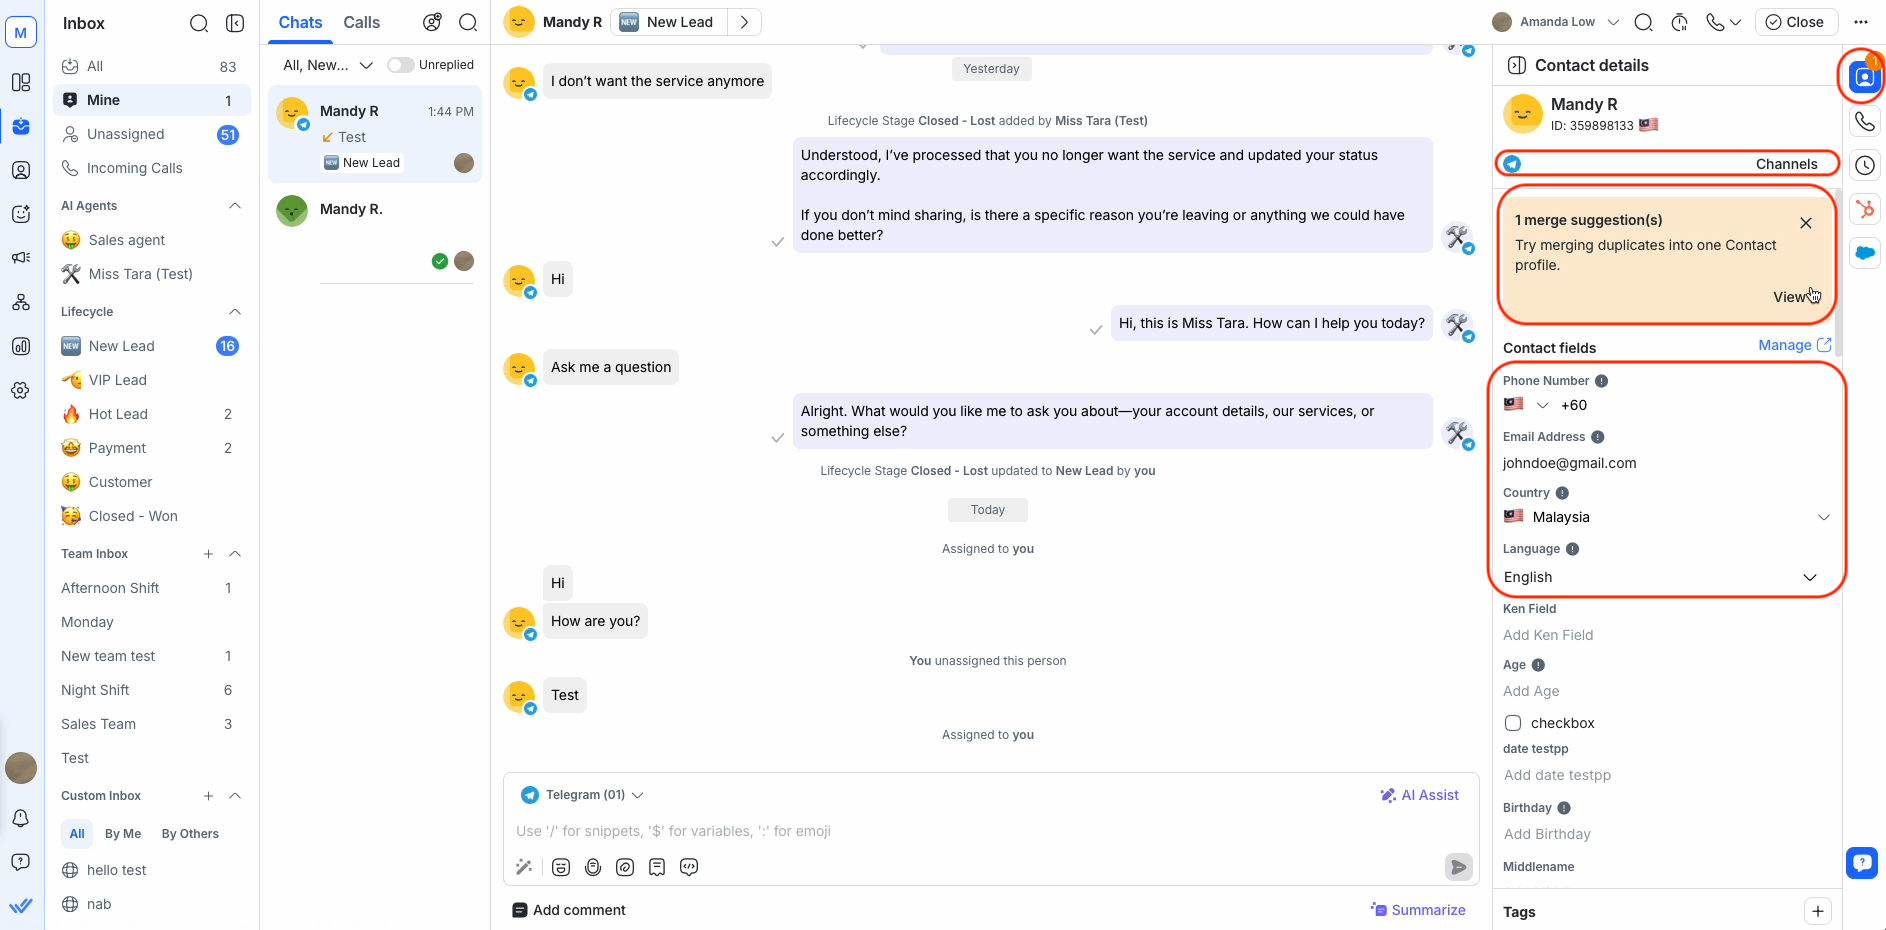
Contact details can be updated when necessary. You can also view any merge suggestions if duplicate Contact information is found, along with the list of Channels connected to the Workspace.
Learn more about Contact details.
Call activities
In Call activities, you can access all call-related activities for a Contact to easily view missed calls, ongoing calls, declined requests and more.
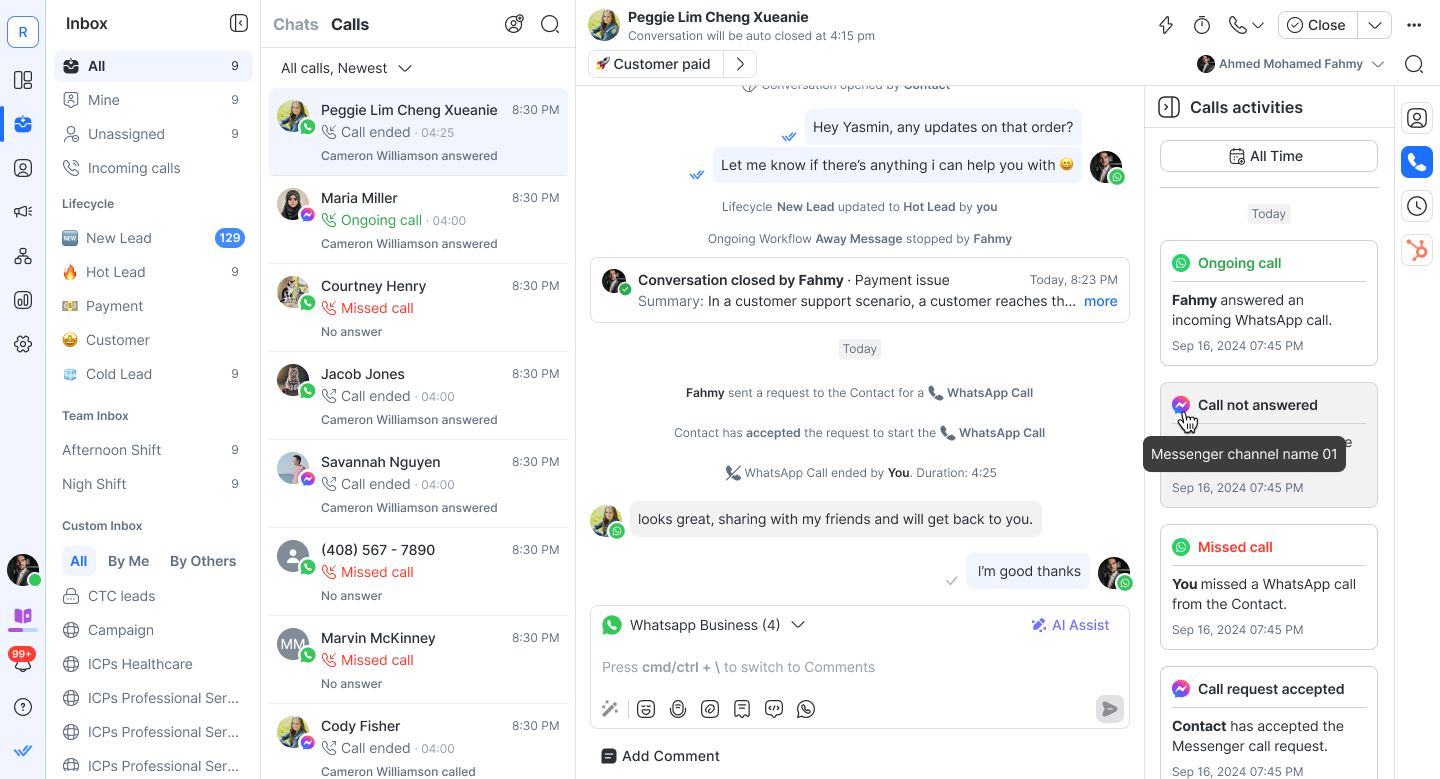
Learn more about managing calls in Inbox.
Activities
In the Activities tab, you can see all internal comments and conversation events related to the selected Contact.
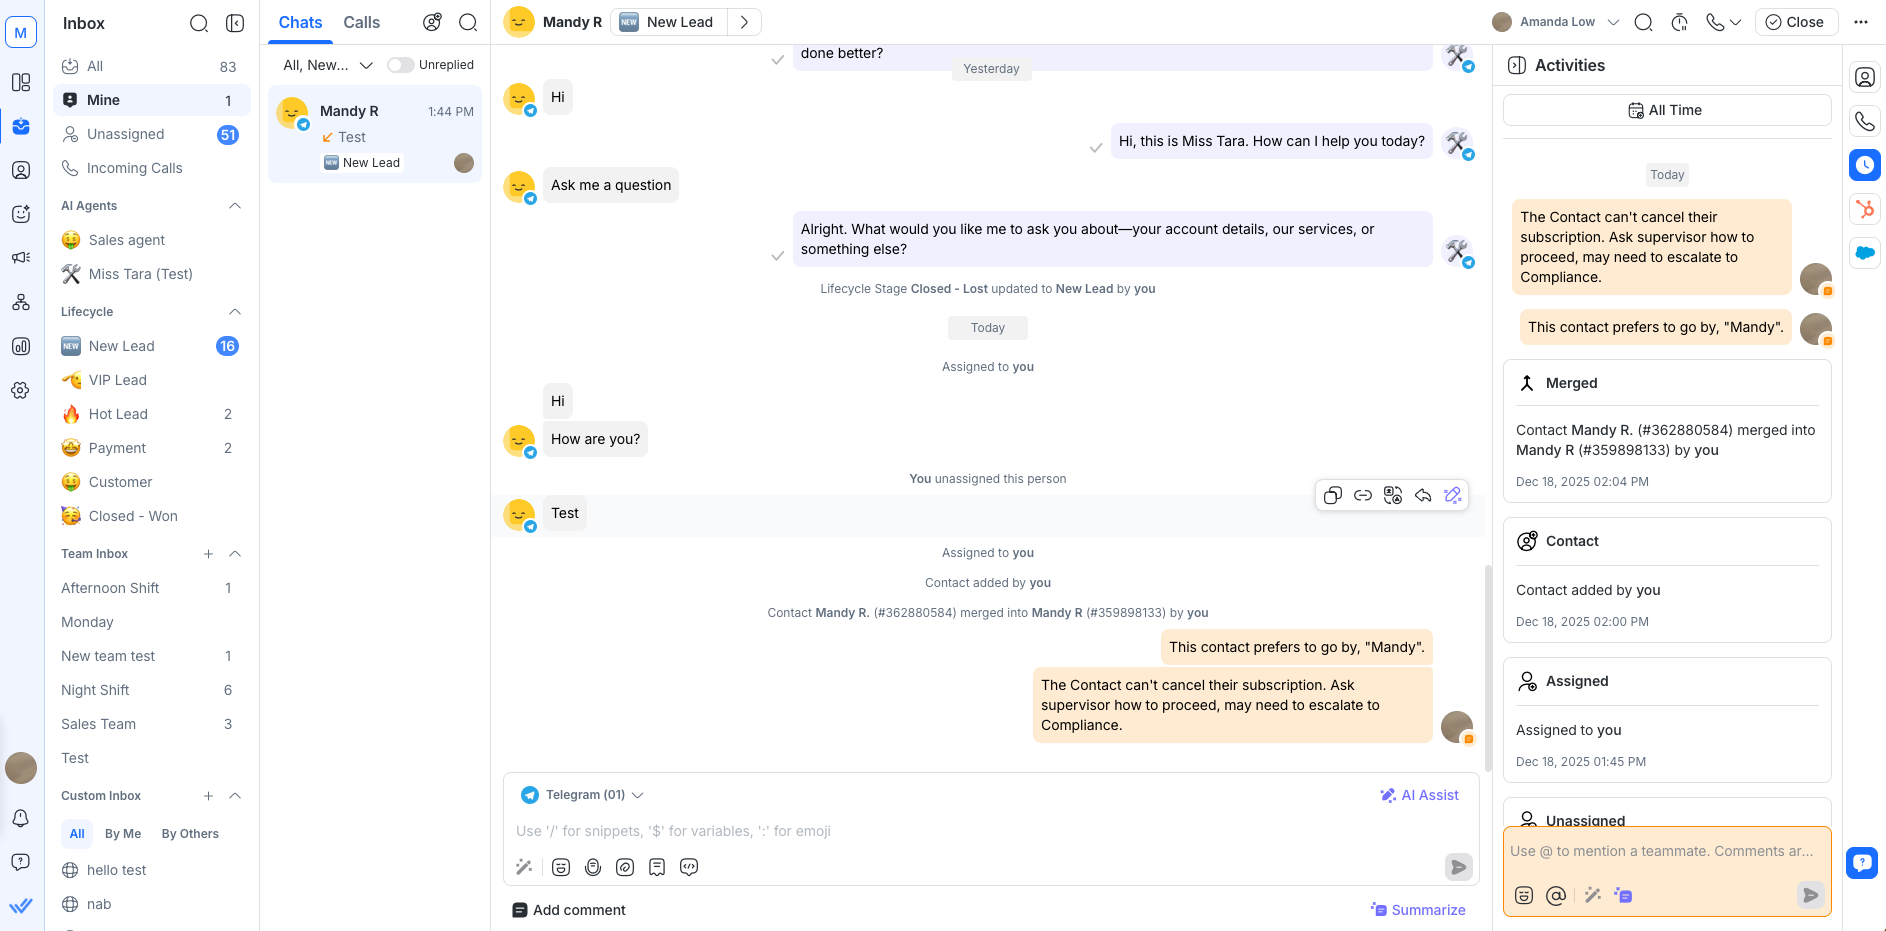
These also appear alongside incoming and outgoing messages in the conversation window, in chronological order.
All internal comments and conversation events are visible only to you and your team—not to the Contact.
Learn more about Activities.
Attachments
The Attachments tab lets you view all files shared in a conversation in one place, without scrolling through message history.
These include attachments sent or received via:
Inbox conversations
Broadcasts
Workflows
API messages
Internal comments
This makes it easier to quickly find images, documents, or invoices while responding to Contacts.
What you can do in the Attachments tab
View attachments shared in the selected conversation
Search attachments by name
Preview supported image files directly in Inbox
Jump to the original message where an attachment was shared
Each attachment shows key details such as file name, type, size, sender, and source channel.
The Attachments tab only shows files sent or received after the Attachments tab feature is enabled. Files shared before this feature was released will not appear.
HubSpot
The HubSpot tab gives you quick access to CRM information from your connected HubSpot integration.
From this tab, you can view, manage, and edit supported fields, streamlining Contact management without leaving the Inbox.
Learn how to set up and use the HubSpot integration.
Salesforce
The Salesforce tab gives you quick access to CRM information from your connected Salesforce integration.
From this tab, you can view, manage, and edit supported fields, streamlining Contact management without leaving the Inbox.
Learn how to set up and use the Salesforce integration.
Next steps
You’ve learned how to navigate the Inbox module and understand its key features. You’re ready for the next step of learning which is managing conversations in the Inbox.


