إذا قمت بالتسجيل وتسجيل الدخول بالفعل، فالأمر الأول الذي يجب عليك فعله هو إكمال عملية الإعداد في مساحه عملك.
تم تصميم عملية الإعداد خصيصًا للمستخدمين الجدد لمساعدتك في إعداد respond.io بشكل صحيح والبدء في إدارة محادثات العملاء فورًا.
من خلال إكمال عملية الإعداد، ستقوم بـ:
قم بتوصيل قناة حتى تبدأ محادثات العملاء بالتدفق إلى Inbox
قم بإعداد دورة الحياة لتنظيم جهات الاتصال بناءً على عملية المبيعات الخاصة بك
قم بإعداد وكيل الذكاء الاصطناعي لأتمتة المحادثات وتقليل عبء العمل اليدوي
ادعُ زملاء الفريق إلى مساحه عملك للتعاون وتوزيع عبء العمل
بمجرد إتمام هذه الخطوات، تكون مساحه عملك معدّة بالكامل لاستقبال وإدارة وأتمتة المحادثات.
ما هي عملية الإعداد؟
إذا كنت مستخدمًا جديدًا على منصة respond.io، فإن أول إجراء يجب عليك اتخاذه هو إكمال عملية الإعداد.
عملية الإعداد هي قائمة مرجعية منظمة خطوة بخطوة تهدف إلى إرشاد المستخدمين الجدد خلال الإعداد الأساسي لمساحه العمل.
يضمن إكمال قائمة التحقق هذه أن مساحه عملك مُكوَّنة بشكل صحيح بحيث يمكنك:
بدء استقبال وإدارة محادثات العملاء
تتبع العملاء المحتملين والعملاء باستخدام دورة الحياة
أتمتة المحادثات باستخدام وكلاء الذكاء الاصطناعي
التعاون مع زملائك

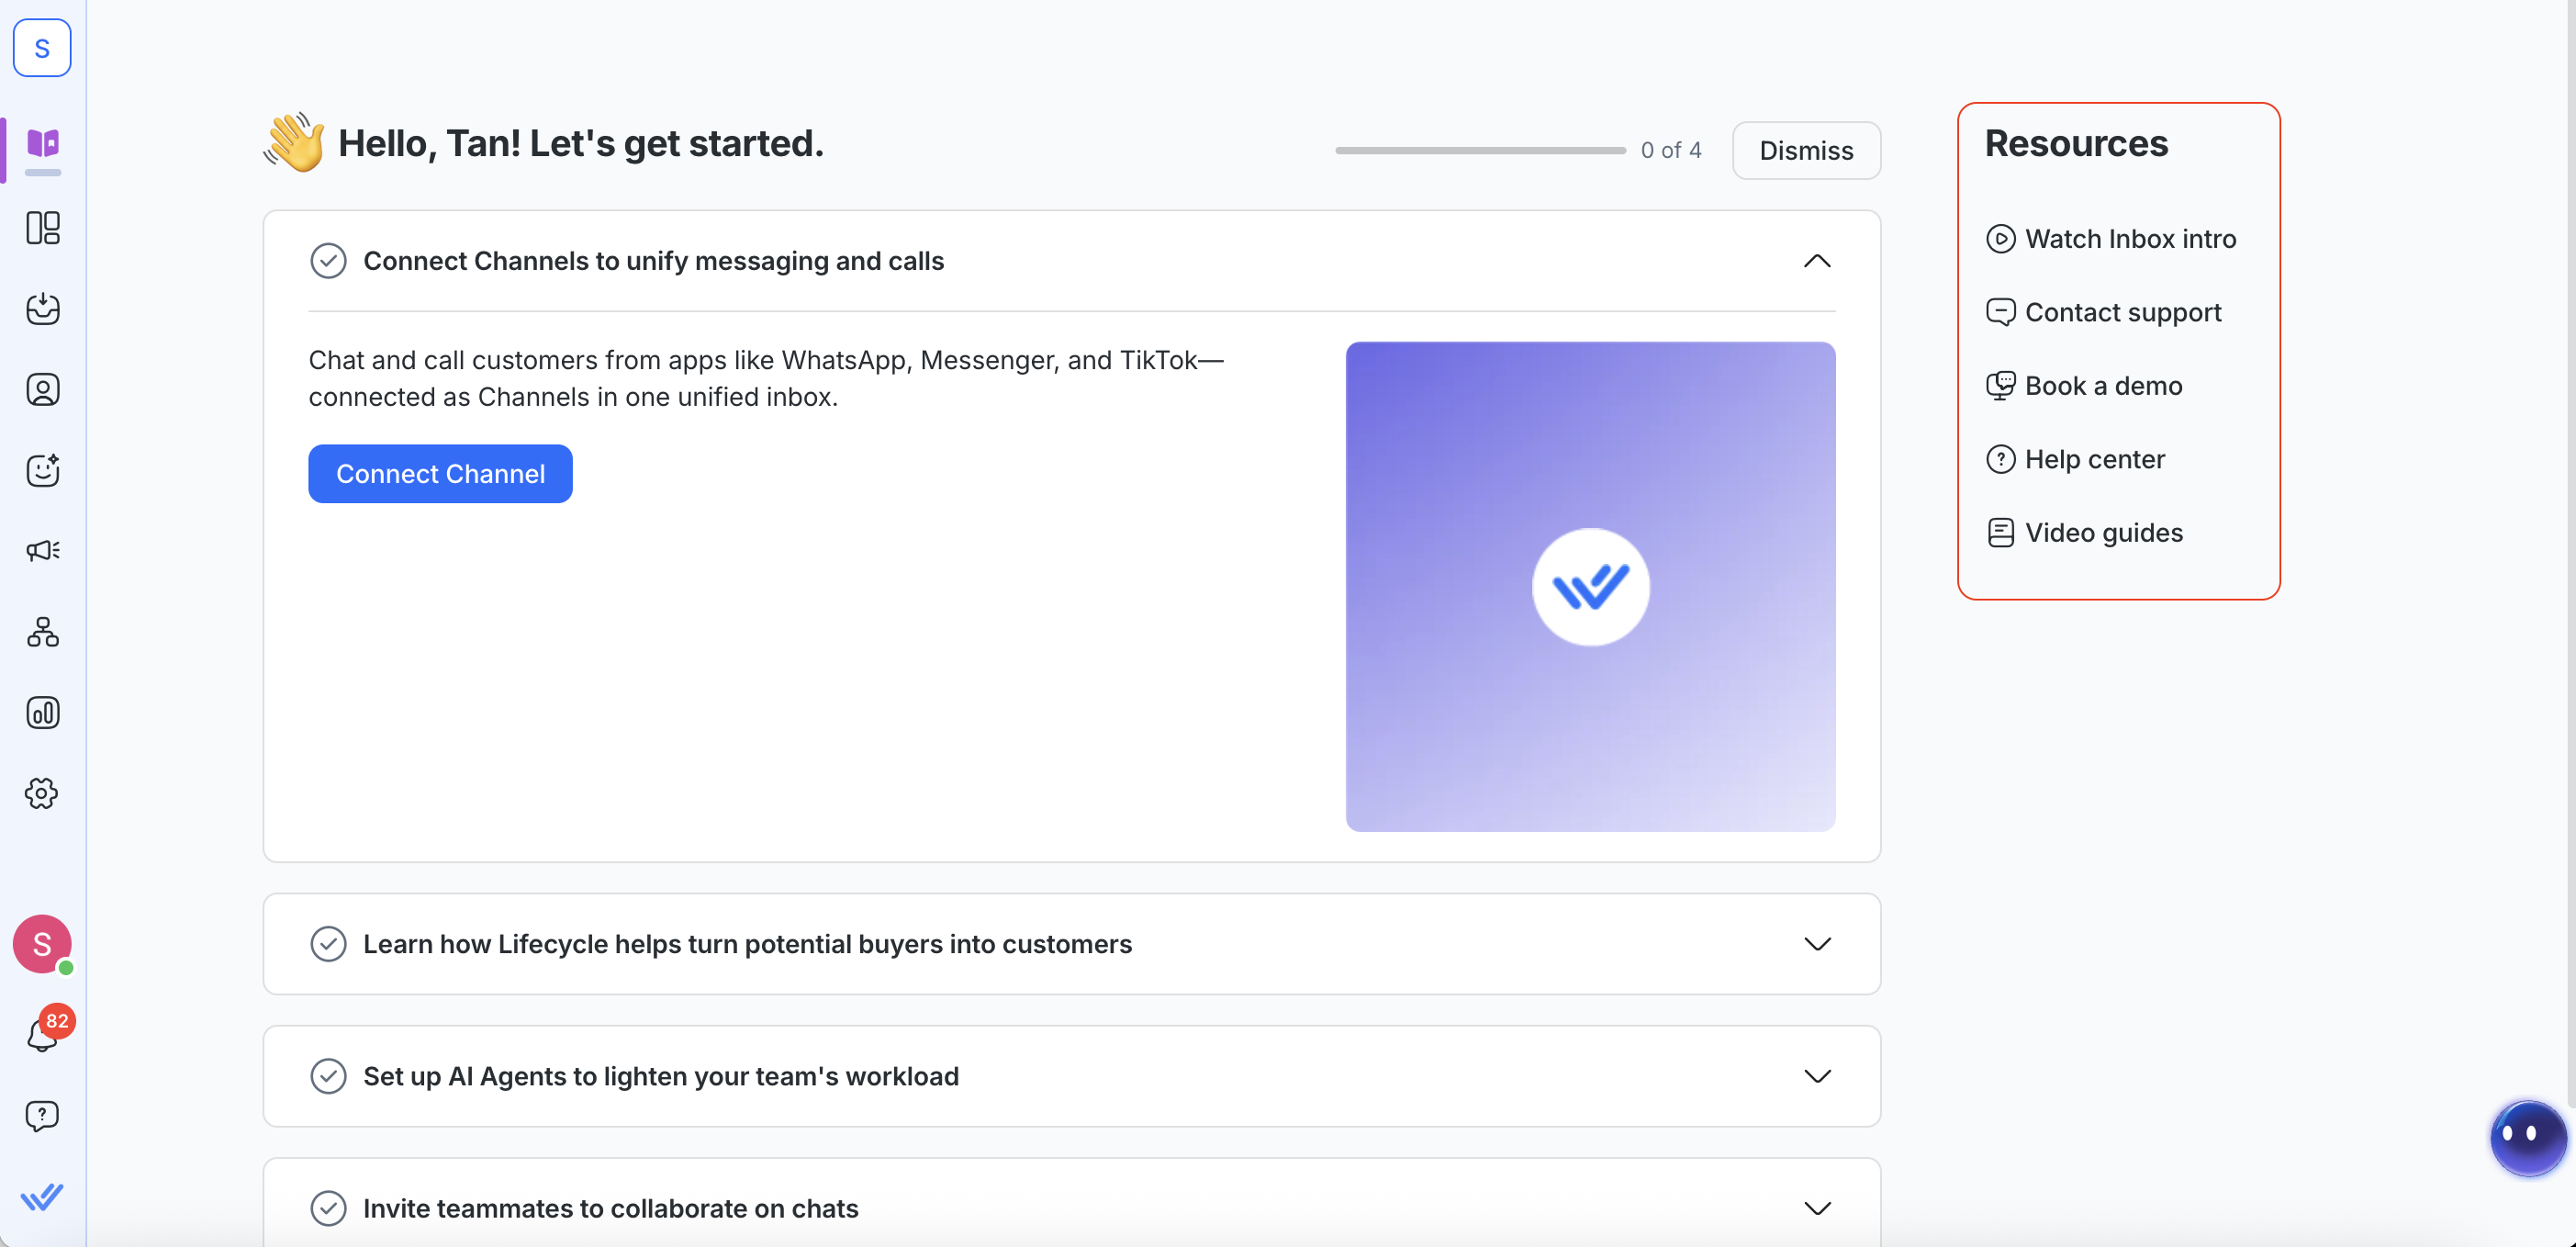
الخطوة 1: توصيل القنوات لتوحيد الرسائل والمكالمات
لبدء الاستخدام، قم بتوصيل قناة مراسلة واحدة على الأقل بمساحه عملك. هذا يعني أن عملاءك يمكنهم التواصل من أي منصة يختارونها ويمكن لفريقك التعامل مع كل شيء في مكان واحد.
بمجرد أن تقوم بتوصيل قناة:
تظهر رسائل العملاء في Inbox
يمكن لفريقك الرد من مساحه عمل موحّدة
تُركّز المحادثات من منصات مختلفة في مكان واحد
يمكنك أيضًا إدارة المكالمات (حيثما كان ذلك مدعومًا)
عاين قائمة قنوات الدعم لدينا وتعرّف على كيفية إعدادها هنا.

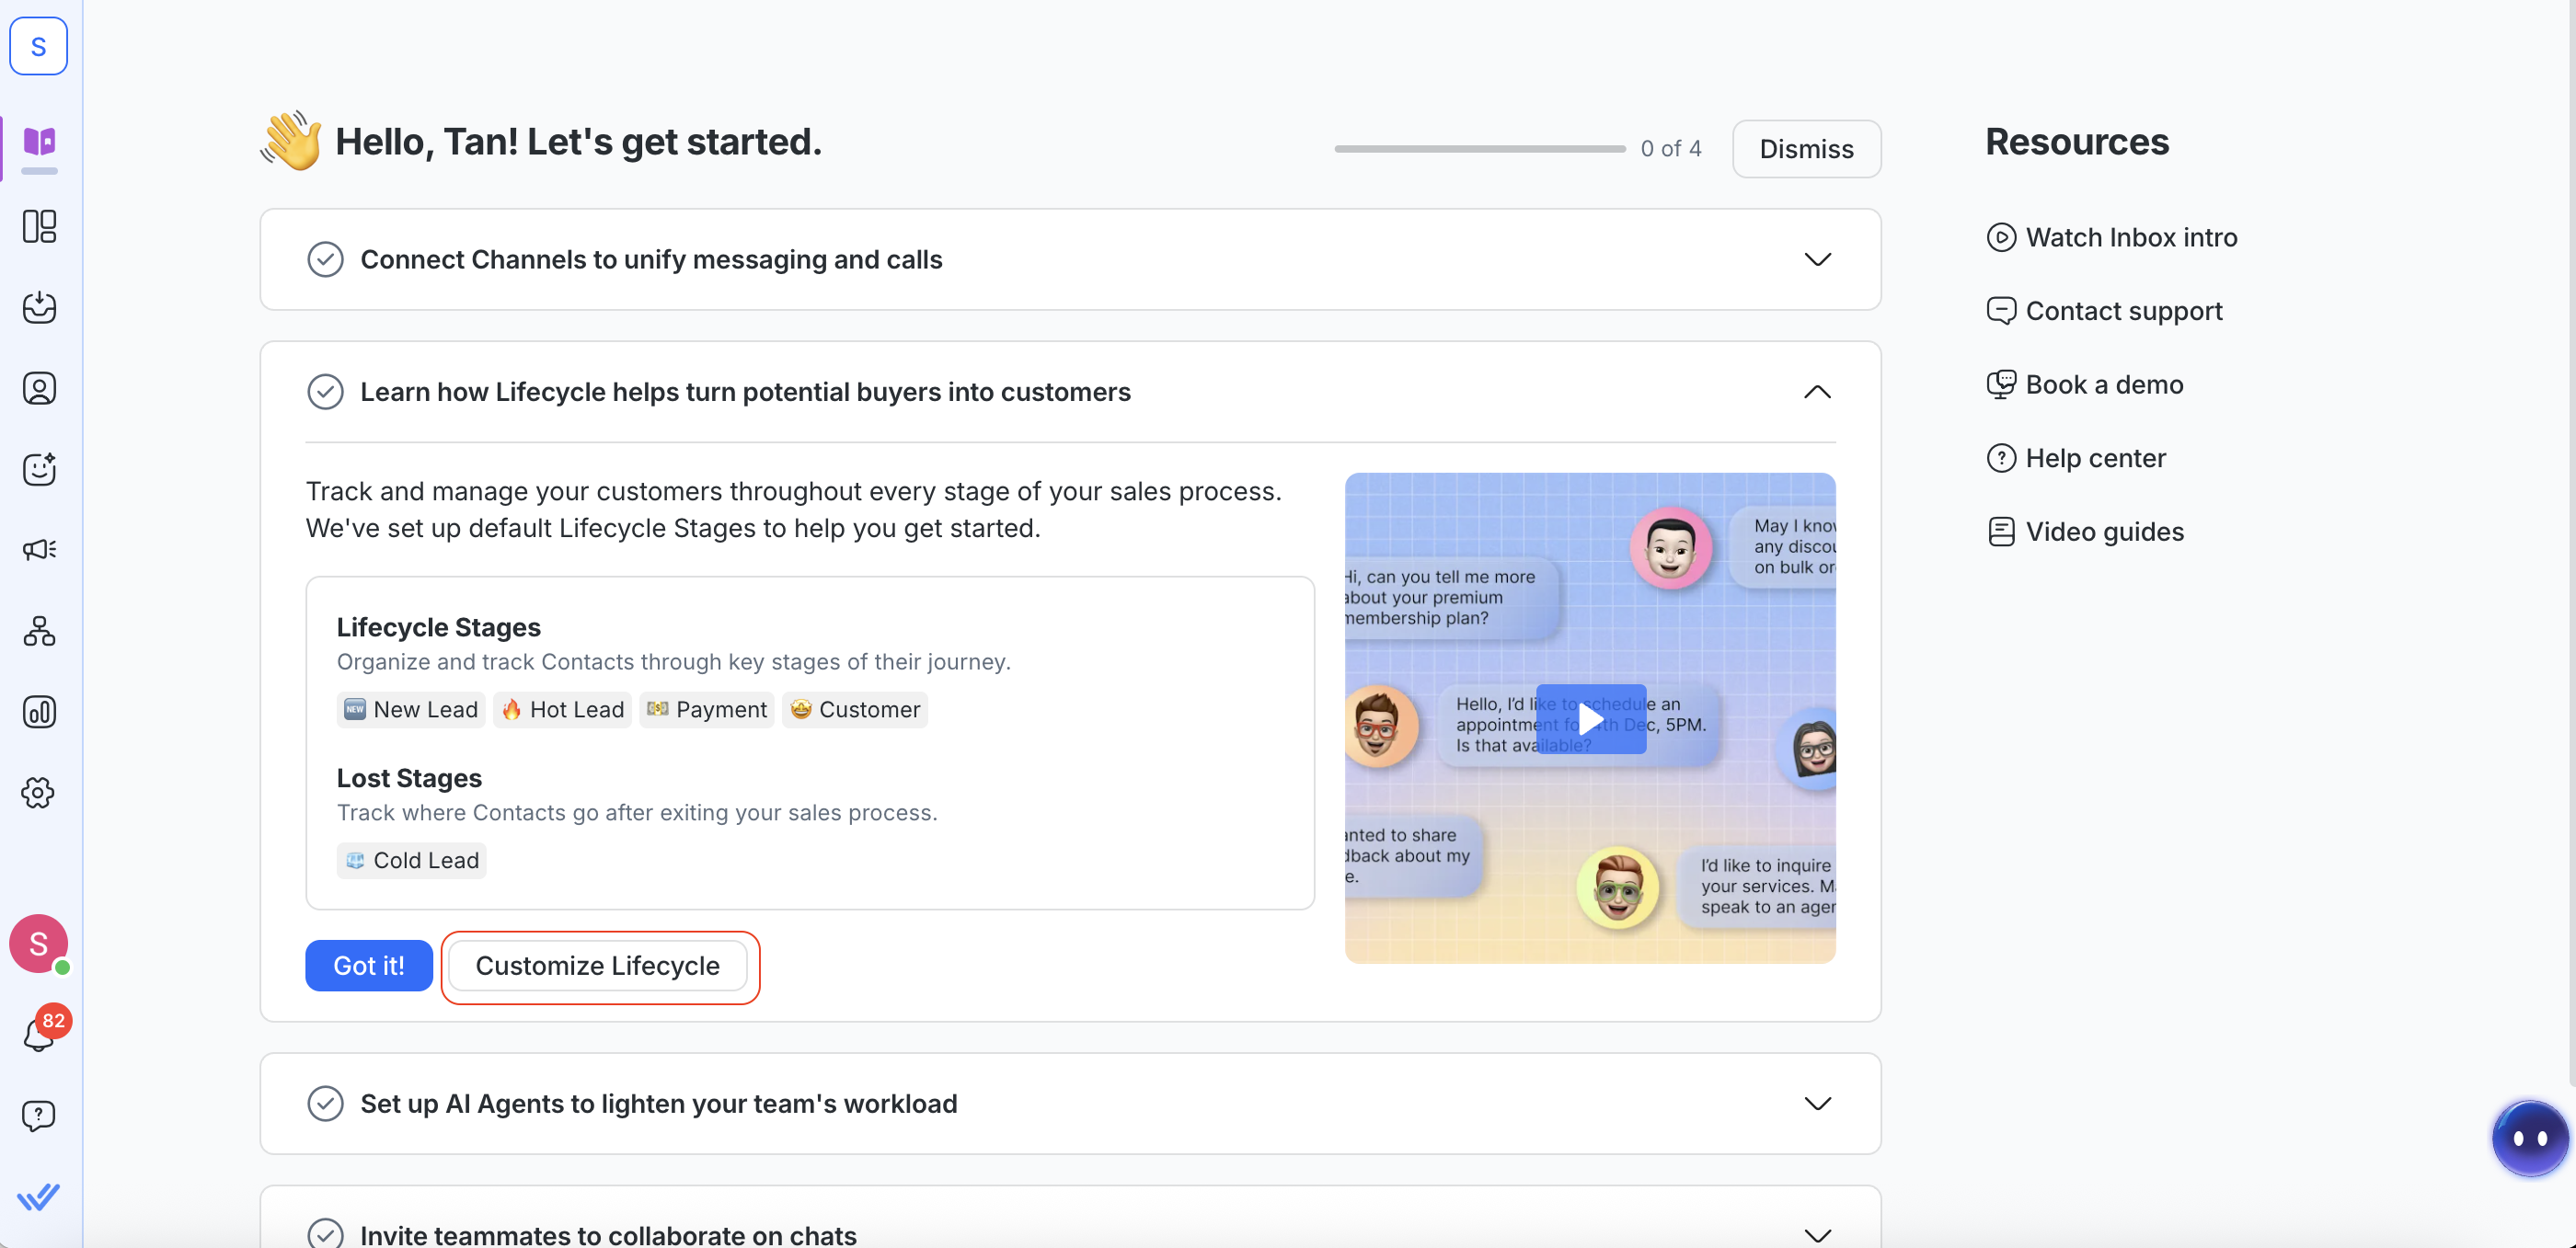
الخطوة 2: تعرّف كيف تساعد دورة الحياة في تحويل المشترين المحتملين إلى عملاء
بمجرد توصيل قناتك وبدء وصول المحادثات، قد يكون من المفيد تتبع وتنظيم جهات الاتصال بناءً على موقعها في عملية المبيعات لديك.
تساعدك دورة الحياة أنت وفريقك على:
تتبع العملاء المحتملين الجدد منذ رسالتهم الأولى
تحديد جهات الاتصال ذات النية العالية
مراقبة تقدم التحويل عبر المراحل
عرض أداء خط الأنابيب في وحدة التقارير
تنظيم جهات الاتصال بناءً على جاهزيتهم للمبيعات
تتضمن كل مساحه عمل مراحل دورة الحياة الافتراضية. يتيح لك ذلك البدء فورًا في تتبع جهات الاتصال دون إعداد إضافي.
إذا كانت عملية المبيعات لديك مختلفة، يمكنك تخصيص دورة الحياة بإضافة أو إزالة مراحل. انقر تخصيص دورة الحياة لمحاذاة دورة الحياة مع قمع المبيعات الخاص بك.
معرفة المزيد عن دورة الحياة.
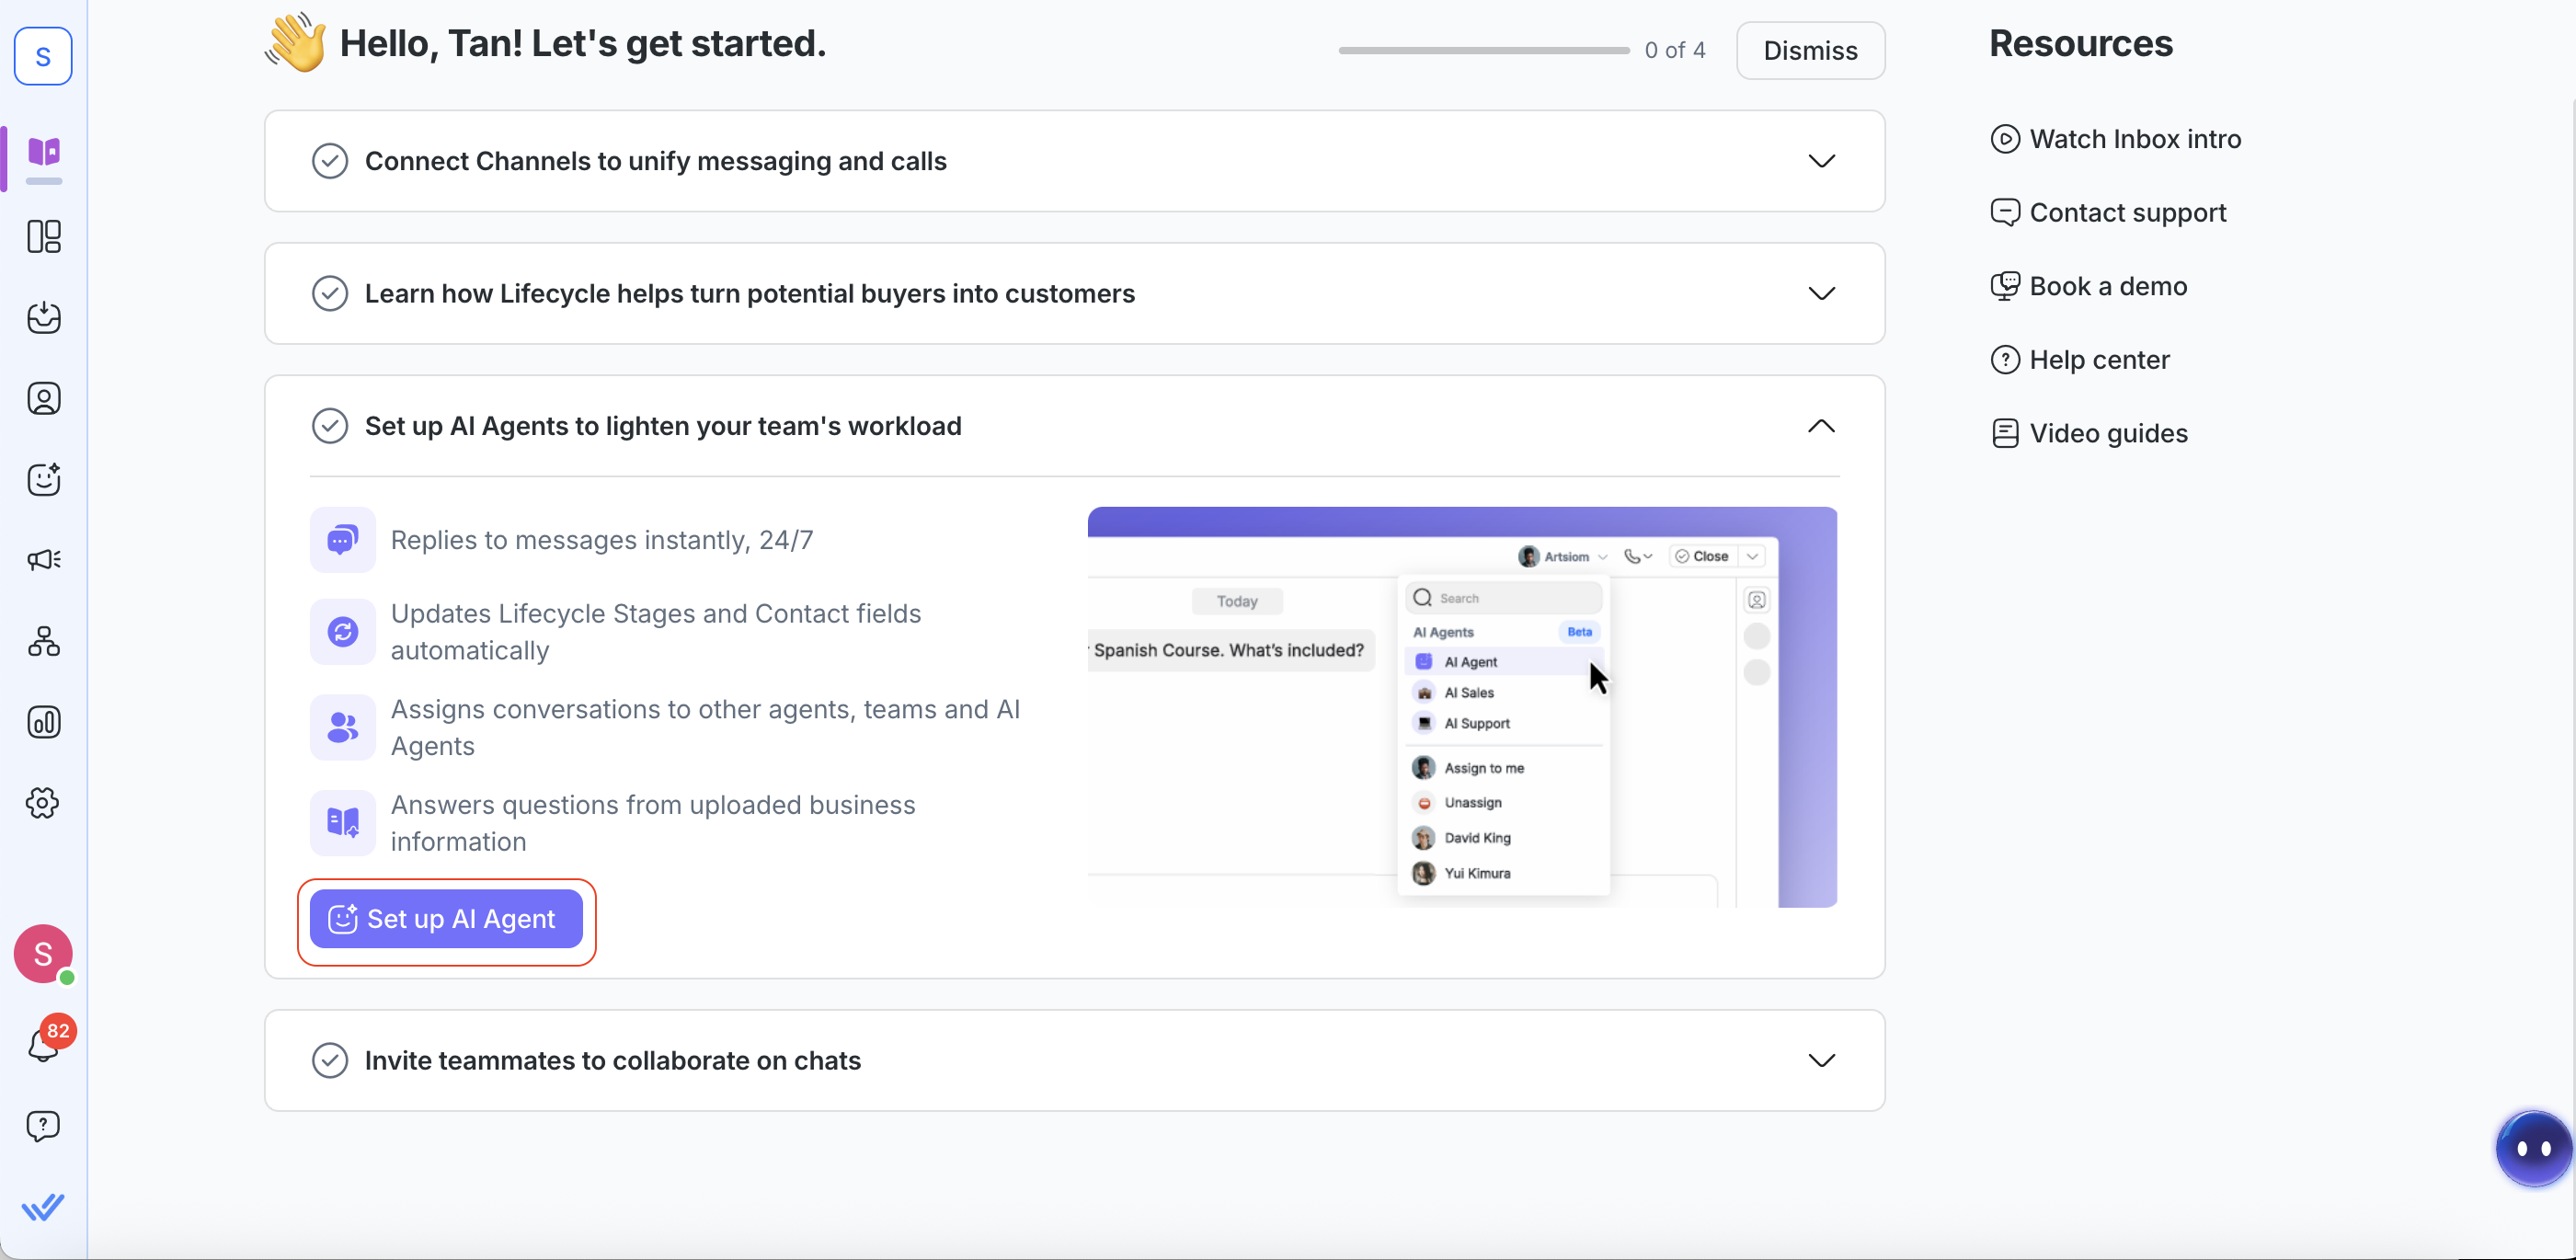
الخطوة 3: إعداد وكلاء الذكاء الاصطناعي لتخفيف عبء عمل فريقك
الآن بعد أن قمت بتوصيل قناة وإعداد مراحل دورة الحياة التي تتوافق مع قمع المبيعات لديك، فأنت جاهز لتطبيق أتمتة تُدير المحادثات تلقائيًا.
أفضل شكل من الأتمتة لذلك هو وكلاء الذكاء الاصطناعي. من الرد على العملاء على مدار الساعة إلى تعيين المحادثات لوكلاء أو فرق أخرى، يمكن لوكلاء الذكاء الاصطناعي مساعدة فريقك في تقليل عبء العمل اليدوي وتحسين أوقات الاستجابة.
انقر إعداد وكيل الذكاء الاصطناعي لإنشاء أول وكيل ذكاء اصطناعي لك.
معرفة المزيد عن:
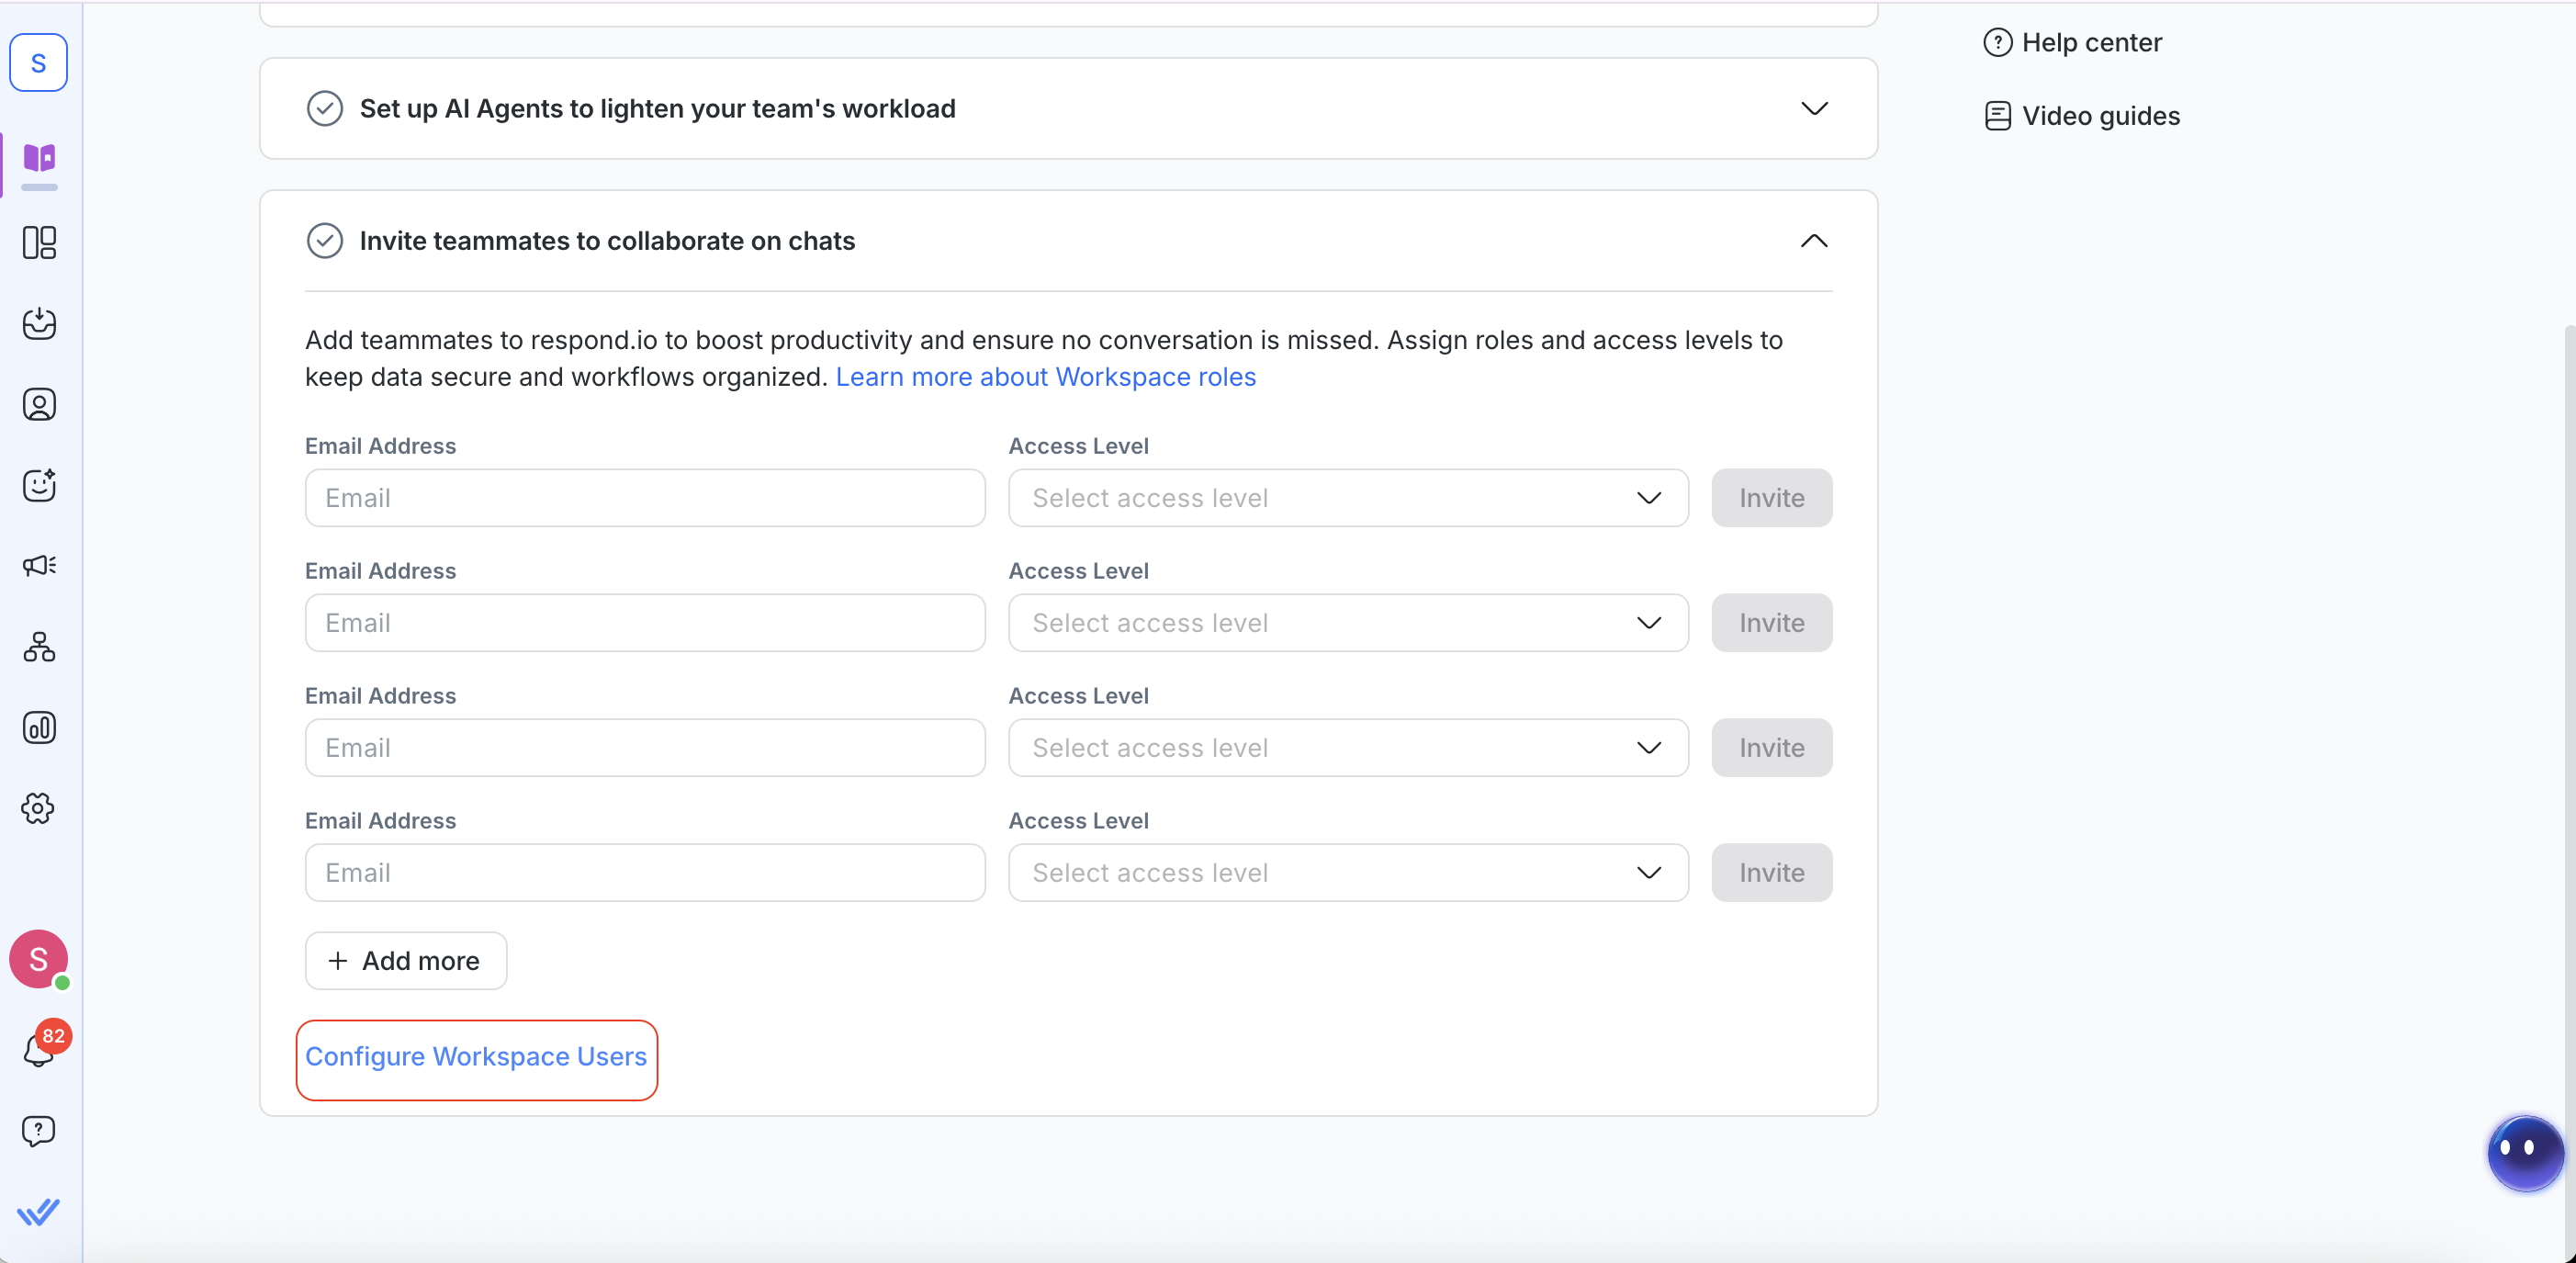
الخطوة 4: دعوة زملاء الفريق للتعاون على المحادثات
أنت الآن جاهز لدعوة باقي فريقك! يتيح هذا لك ولفريقك مشاركة الوصول إلى Inbox، وتعيين المحادثات، وإدارة توزيع عبء العمل.
إليك كيفية إضافة مستخدم جديد:
أدخل عنوان البريد الإلكتروني للزميل
اختر مستوى وصولهم (المالك، المدير أو الوكيل)
انقر دعوة
سيُرسل إليهم بريد إلكتروني يحتوي على دعوة. يجب عليهم النقر على الرابط في البريد الإلكتروني لقبول الدعوة والحصول على الوصول إلى مساحه عملك.
إذا أردت إلغاء الوصول أو تعديل مستوى وصولهم، فانقر على تكوين مستخدمي مساحه العمل في عملية الإعداد.
معرفة المزيد عن إضافة مستخدمين جدد.
الموارد في عملية الإعداد
في الجانب الأيمن من عملية الإعداد، ستجد قائمة بالموارد. توفّر هذه القائمة اختصارات للتعلم والدعم.
تتضمن قائمة الموارد ما يلي:
فيديو يشرح كيفية استخدام وحدة Inbox
روابط مباشرة للتواصل مع فريق الدعم
رابط لحجز عرض توضيحي مع فريق المبيعات
الوصول إلى مركز مساعدة respond.io
مجموعة من مقاطع الفيديو التعليمية الخاصة بـ respond.io
الخطوات التالية
تهانينا على إكمال رحلة الإعداد مع respond.io! أنت جاهز رسميًا لبدء إدارة المحادثات على نطاق واسع.
للمحافظة على زخم التقدم، يمكنك:
إعداد Inbox للدعم متعدد القنوات


