In this article, you’ll discover how to automate Contact assignments based on the preferred load distribution strategy.
Respond.io’s default Contact Assignment behavior is the pick-and-assign system. As your company grows, this manual process can be time-consuming and raise a potential problem in ensuring a fair inbound conversation distribution among your sales or support agents. These issues can be easily avoided by setting up a Workflow with automatic assignment logic based on your business’ needs.
Benefits of Auto-Assignment & Load Distribution
Use contact distribution/load balancing to:
Save agents and managers time compared to manual assignment processes.
Improve response time as customers will be assigned to an agent quickly.
Distribute Contacts among agents fairly to ensure effective resource allocation.
Workflow Setup
To optimize your auto-assignment strategy, here are 2 load distribution logic to consider.
Business preferences | Auto-Assignment Strategy |
|---|---|
- Resolve inquiries as quickly as possible | Low-Cost Load Distribution |
- Provide great service | High-Quality Load Distribution |
For Low-Cost Assignment Strategy, click Assignment: Round Robin + Online Only > Use template
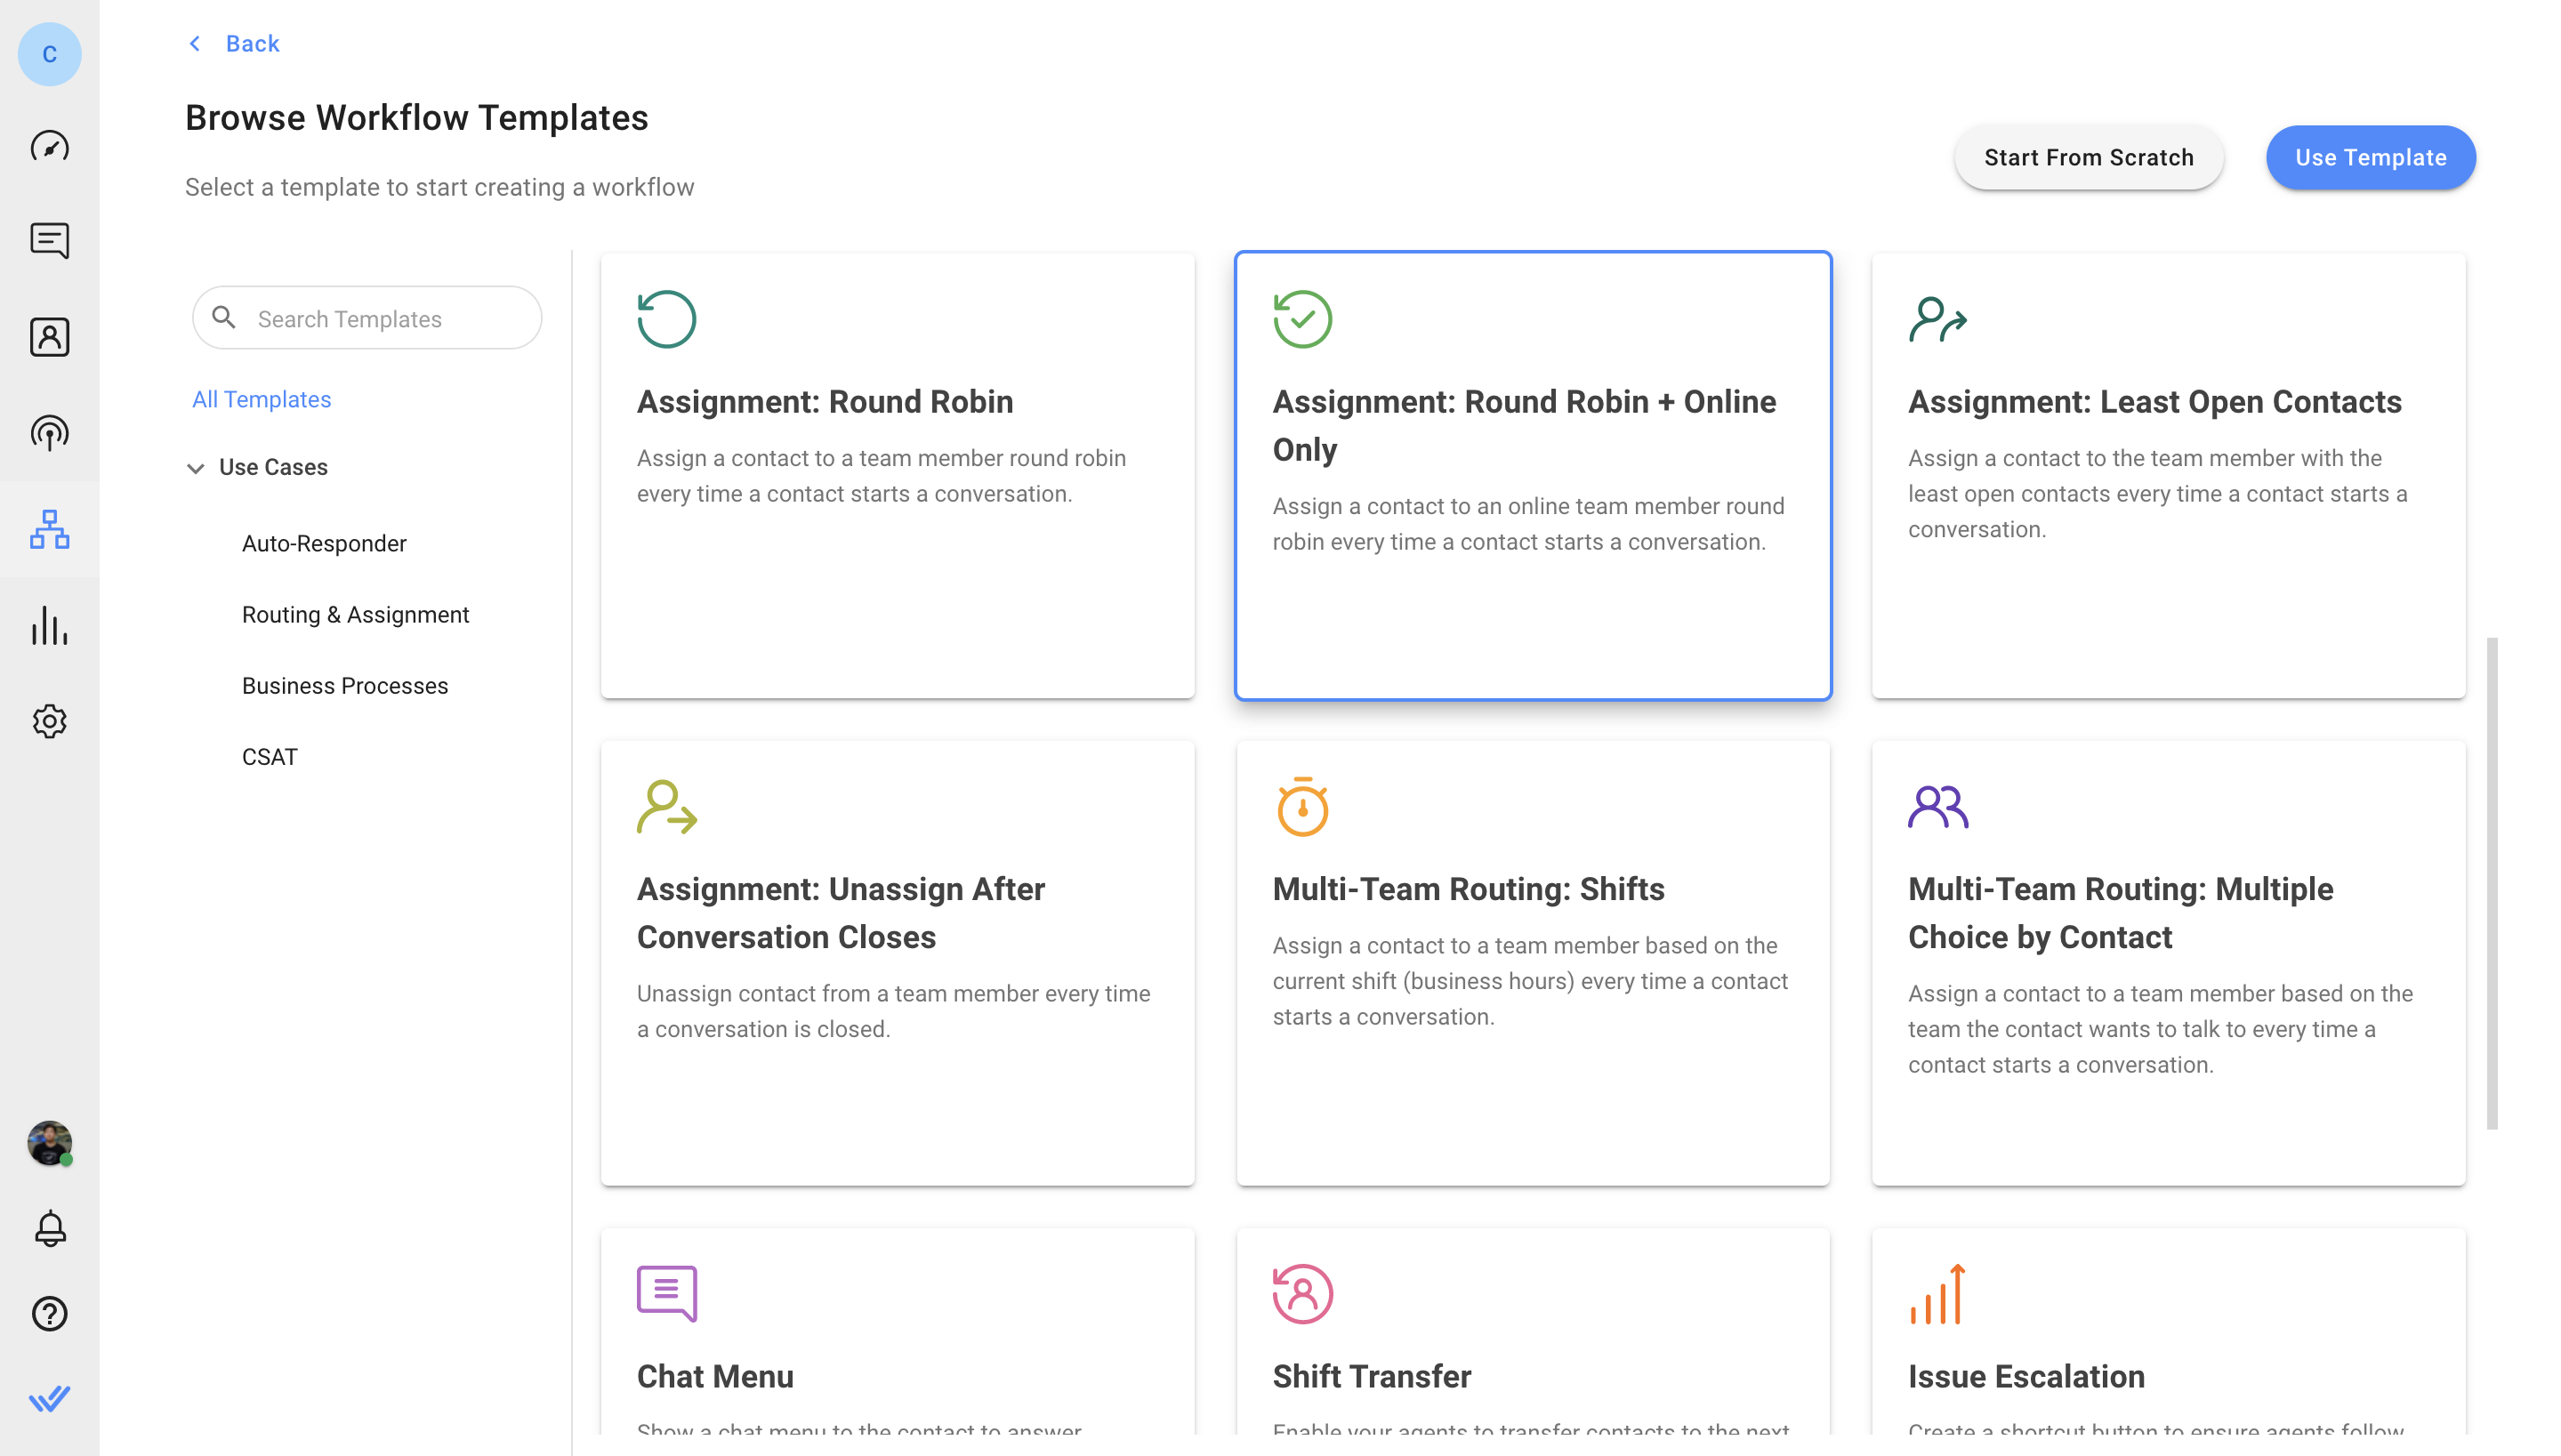
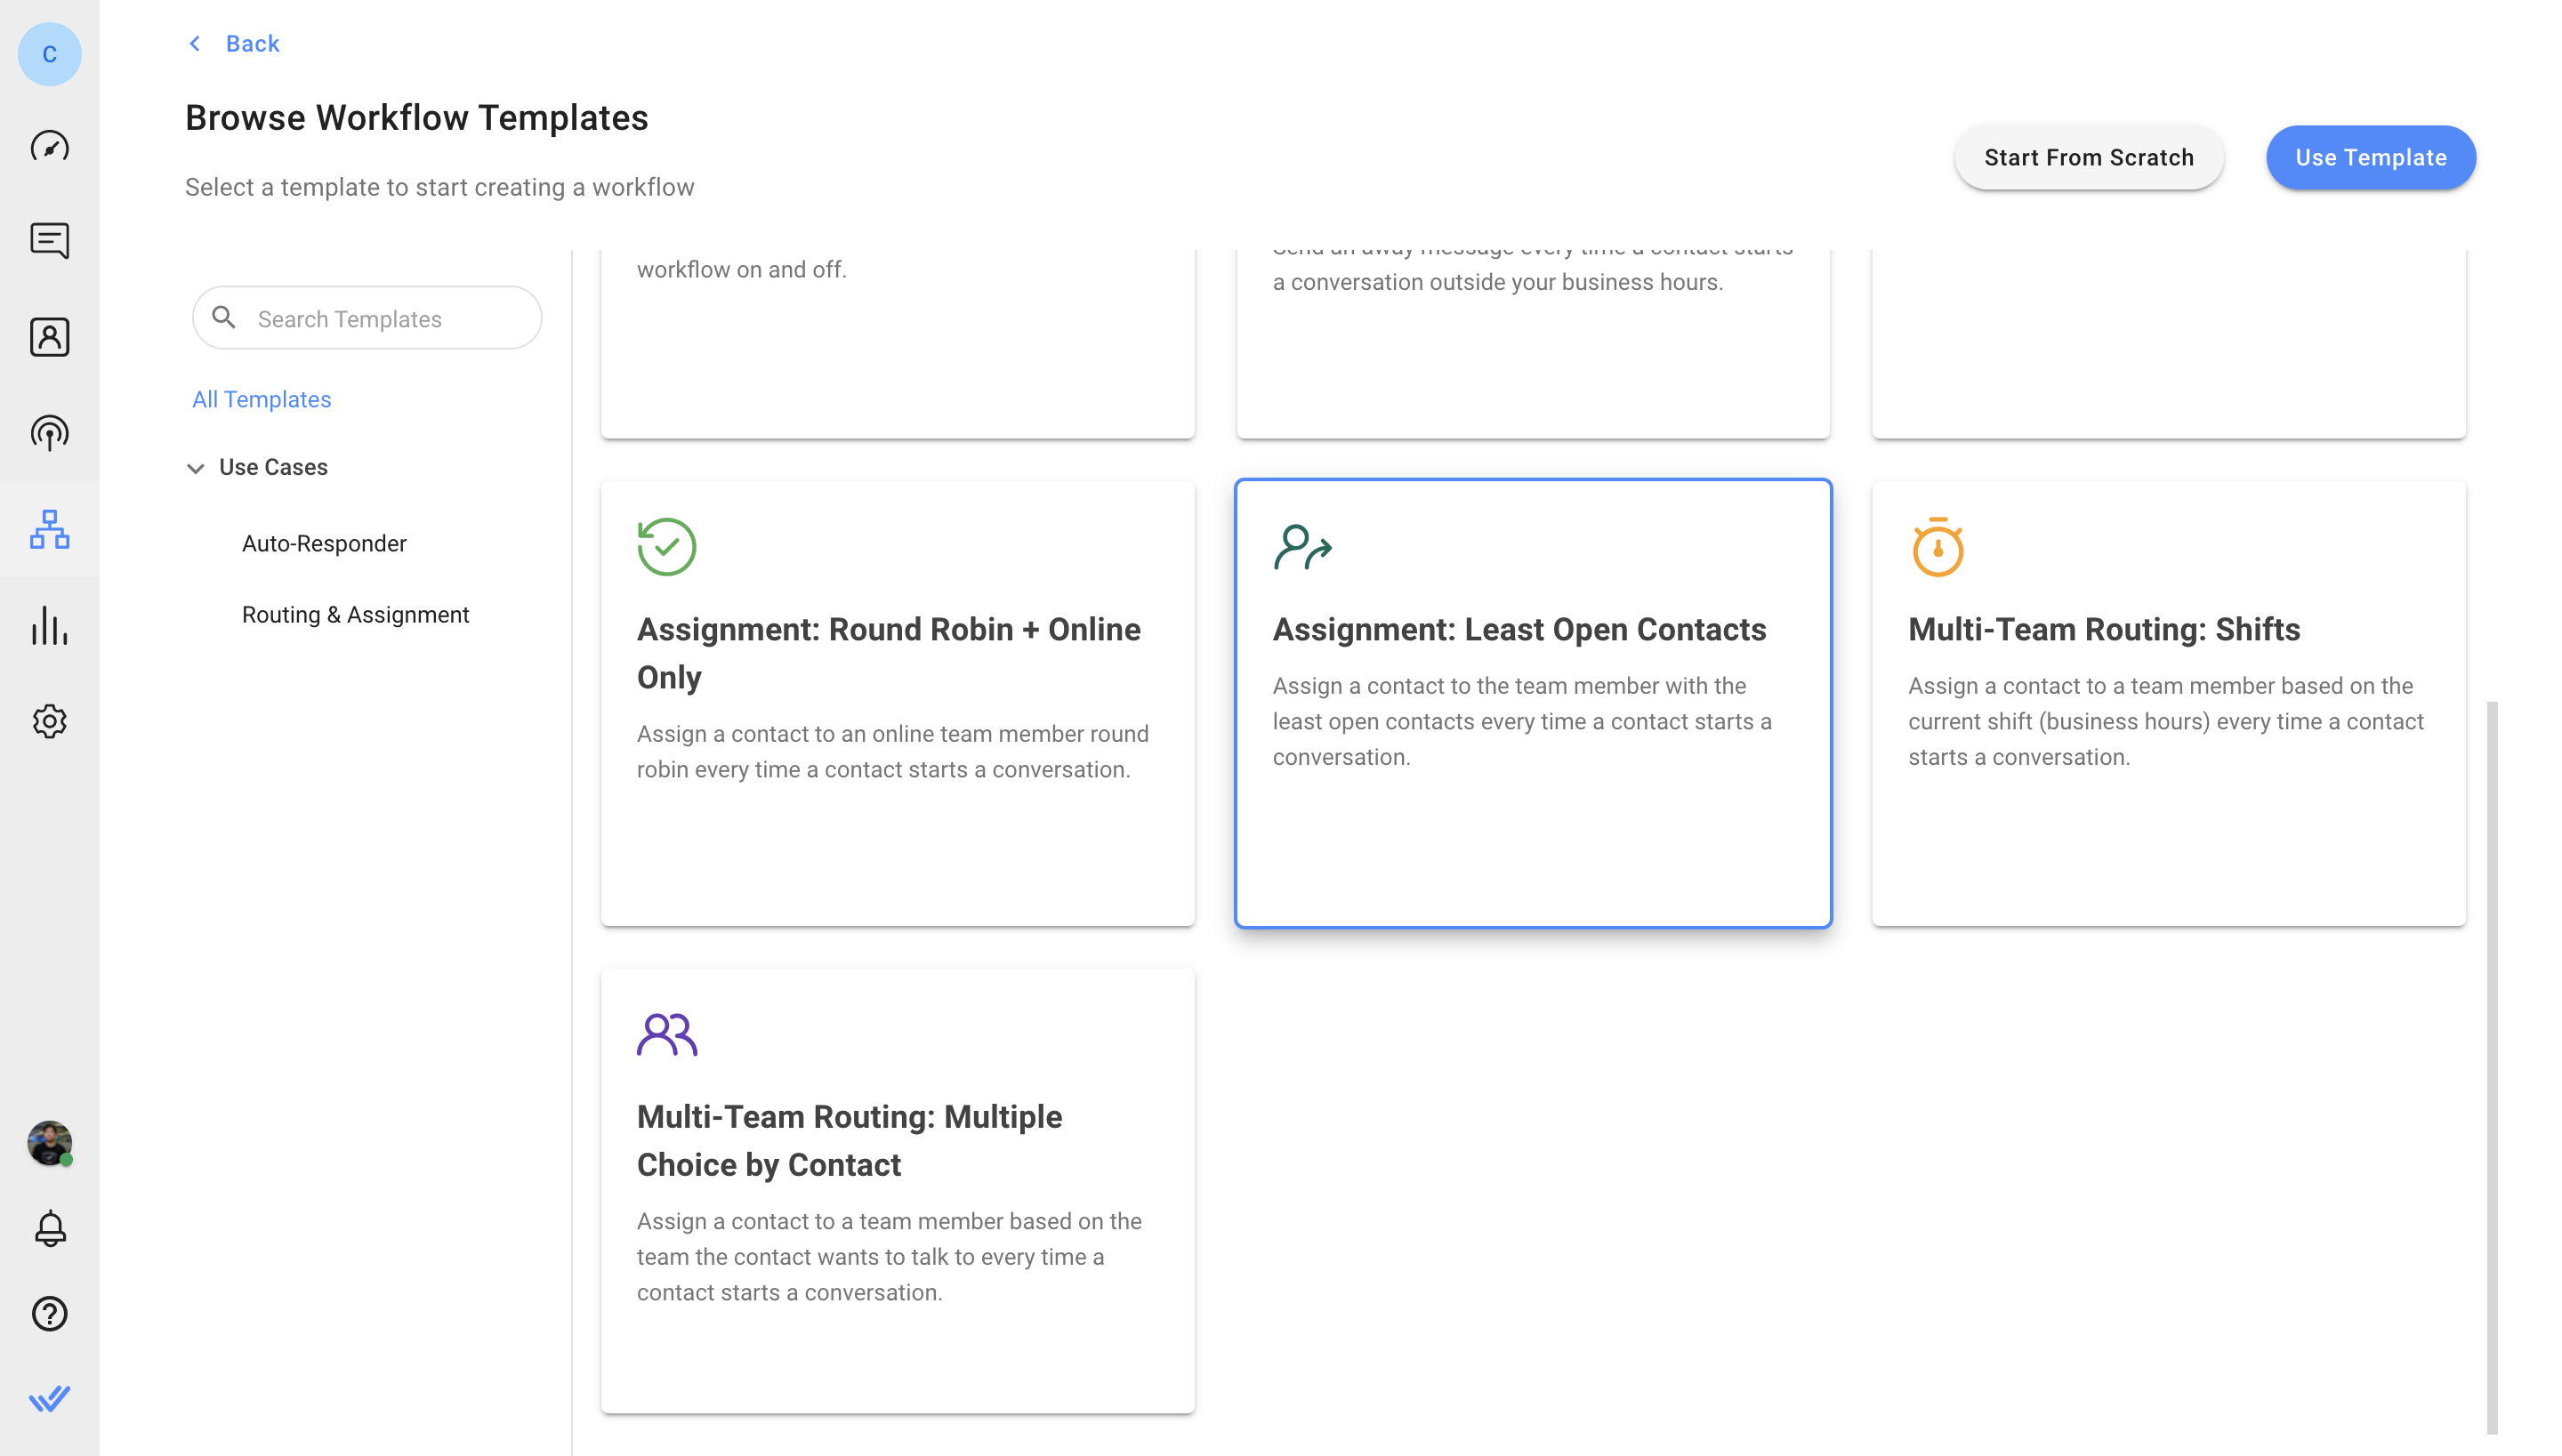
For High Quality Assignment Strategy, click Assignment: Least Open Contacts > Use template
Both Workflows are triggered when a conversation is open by Contact and an auto-reply is sent with a Welcome Message. You can customize the Welcome Message as desired.
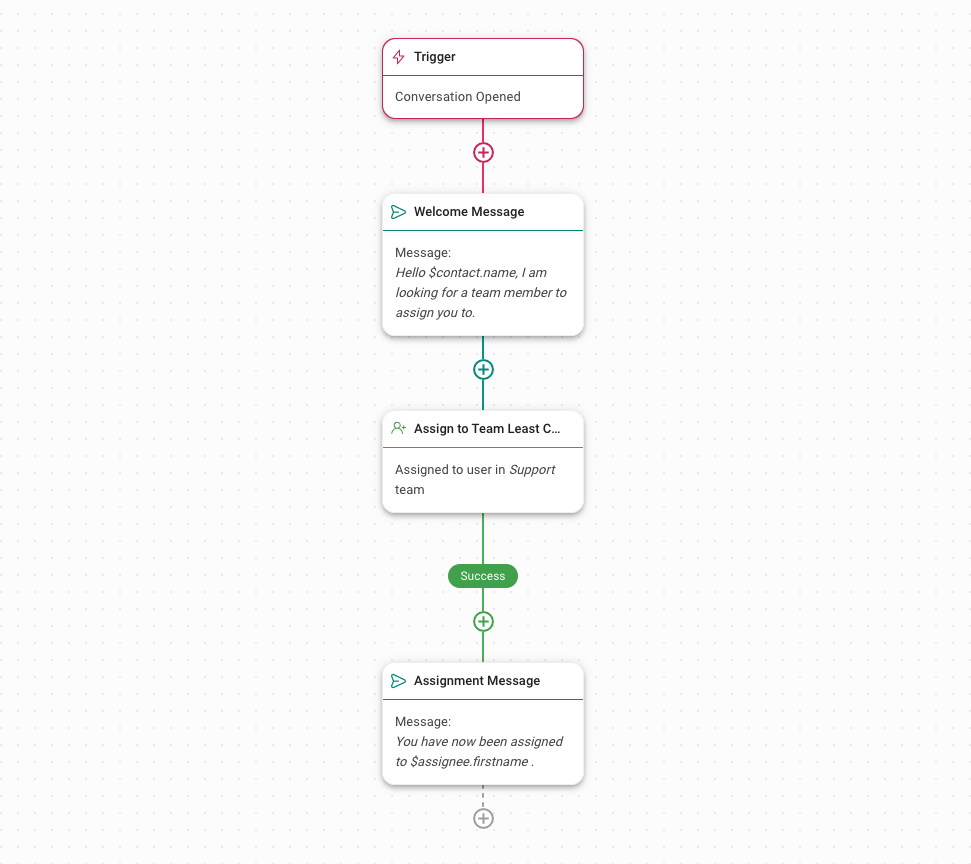
If you have multiple teams, use routing to route contacts to the right team first before applying an auto-assignment strategy.
Then, edit the Assign To Step to set up auto-assignment based on your strategy preferences.
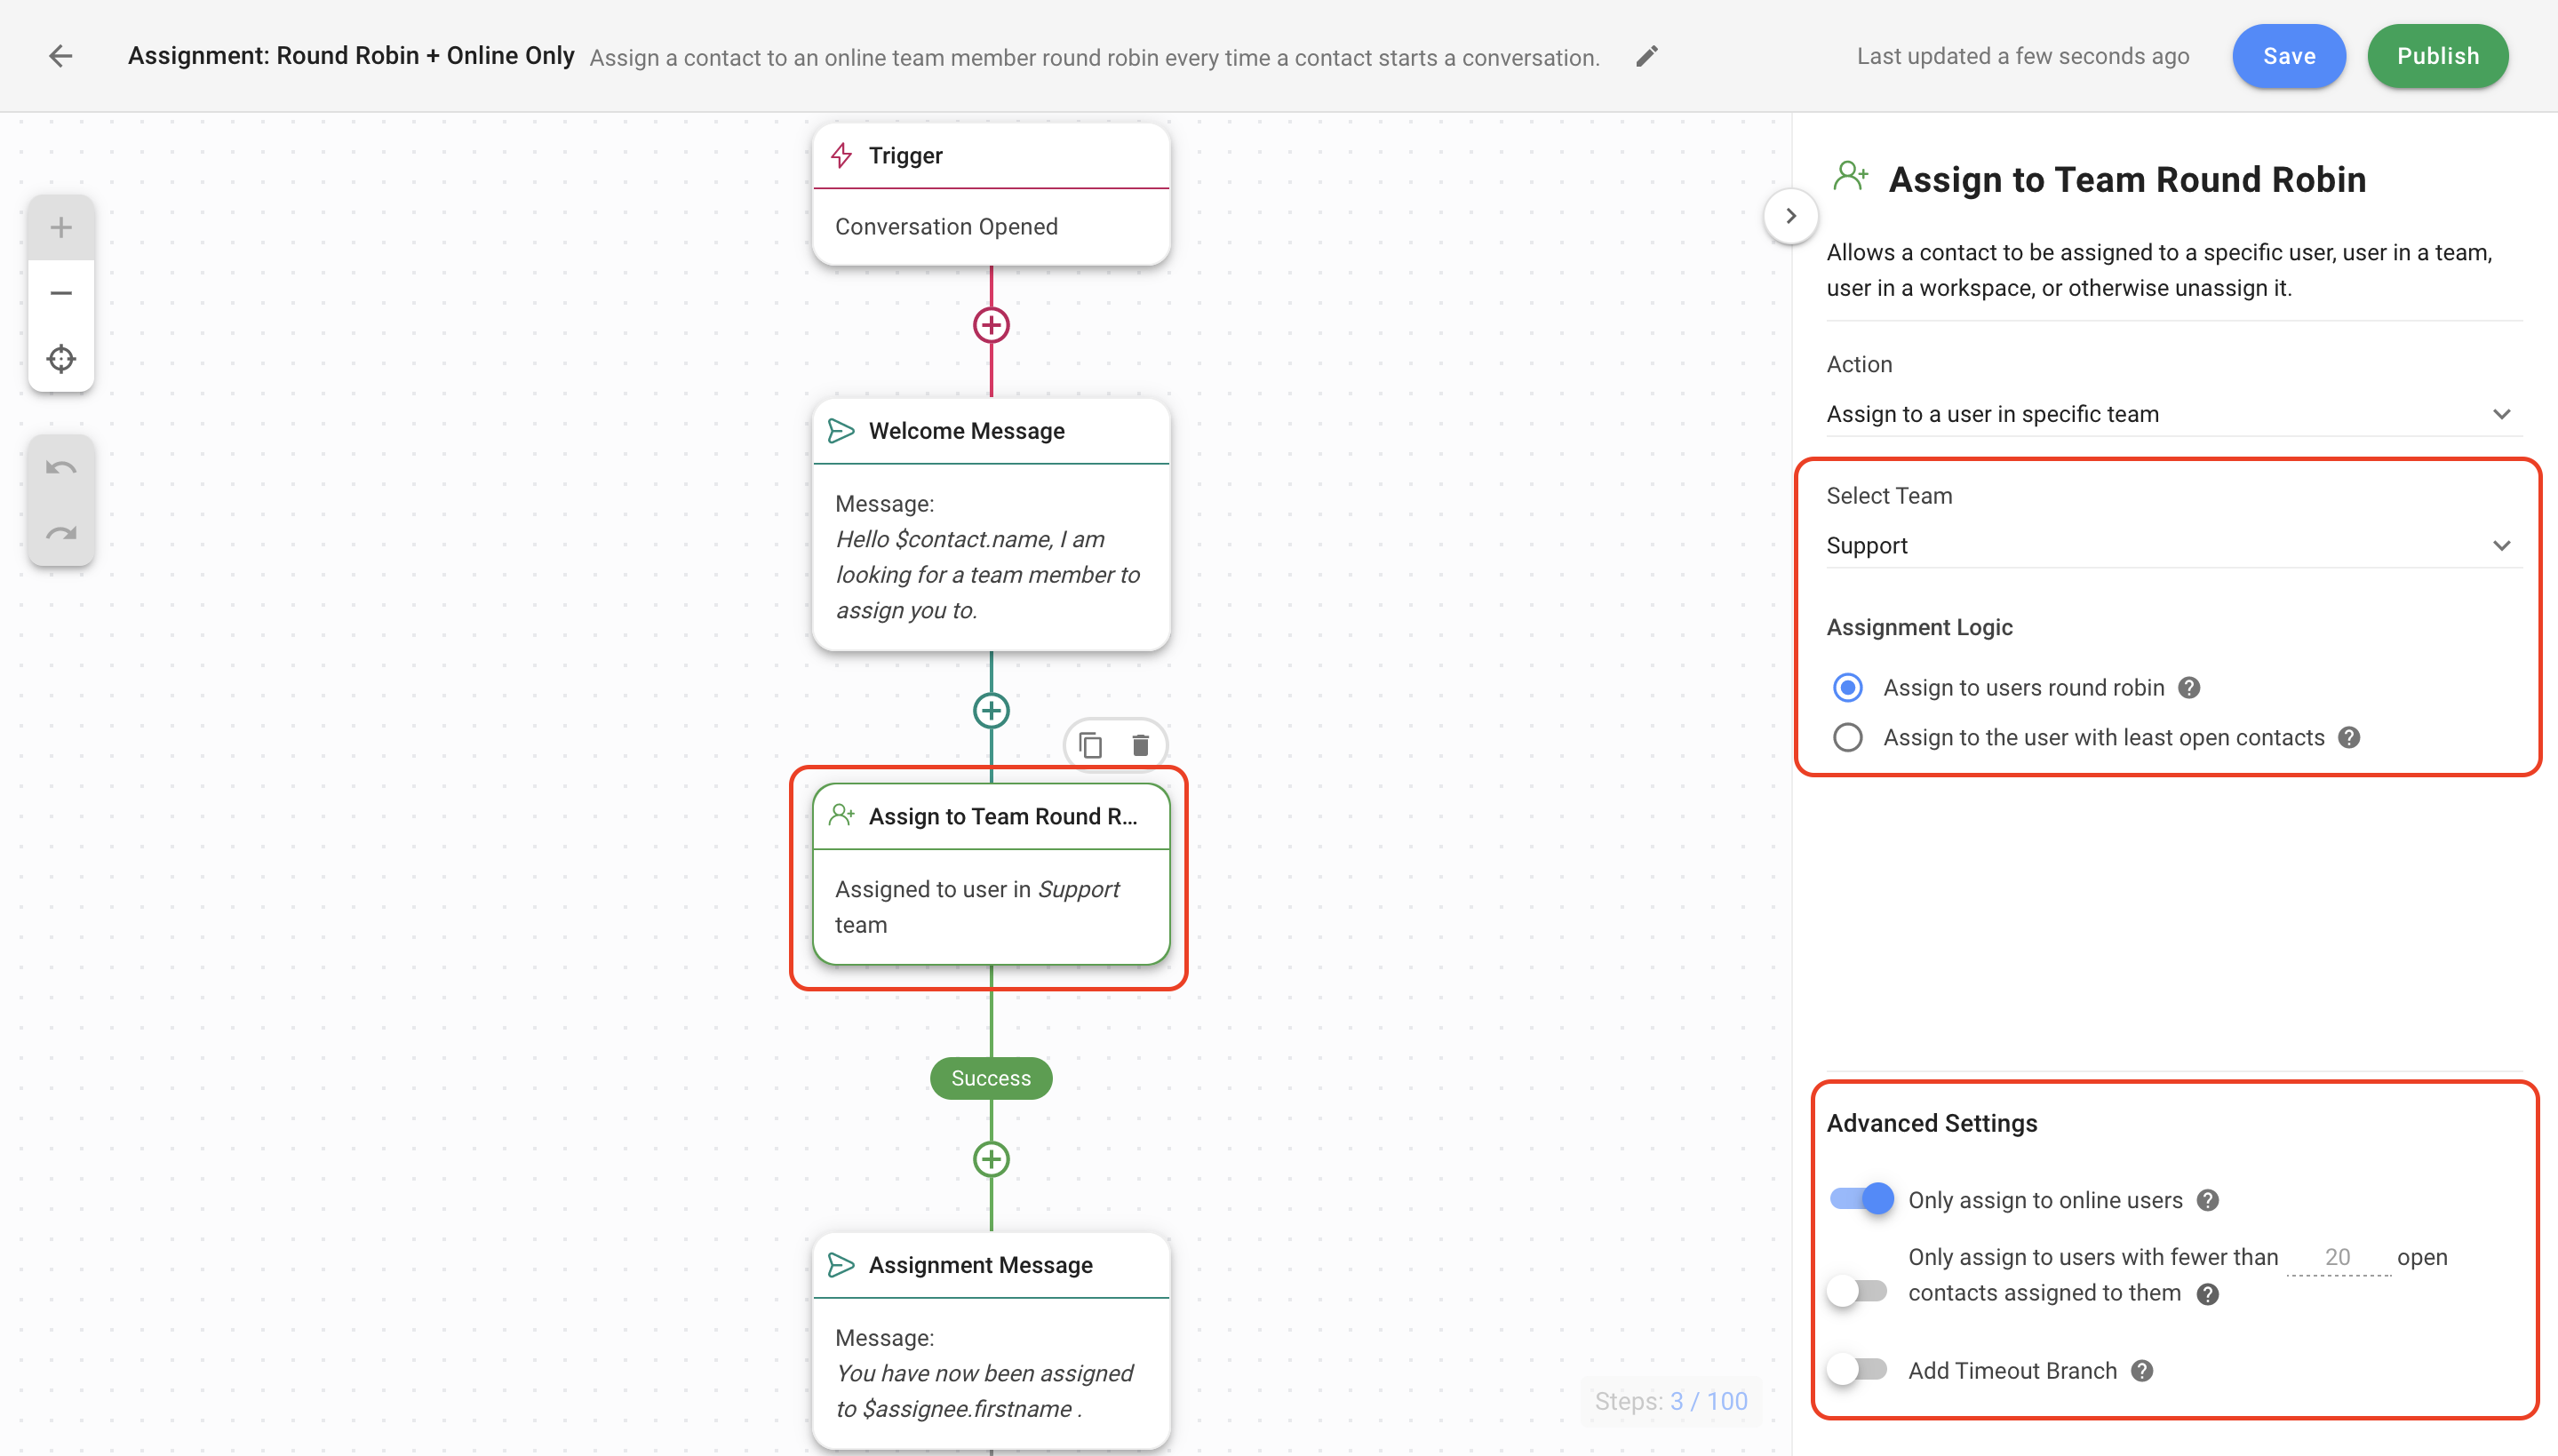
Low-Cost Auto-Assignment Strategy Configuration
Click the Assign To step to configure the assignment logic
Select a team in the Select Team dropdown logic
Assignment Logic should remain as “Assign to users round robin” to distribute Contacts equally among agents.
In Advanced Settings, the “Only assign to online users” toggle should remain turned on.
Finally, click Save and Publish to activate the Workflow.
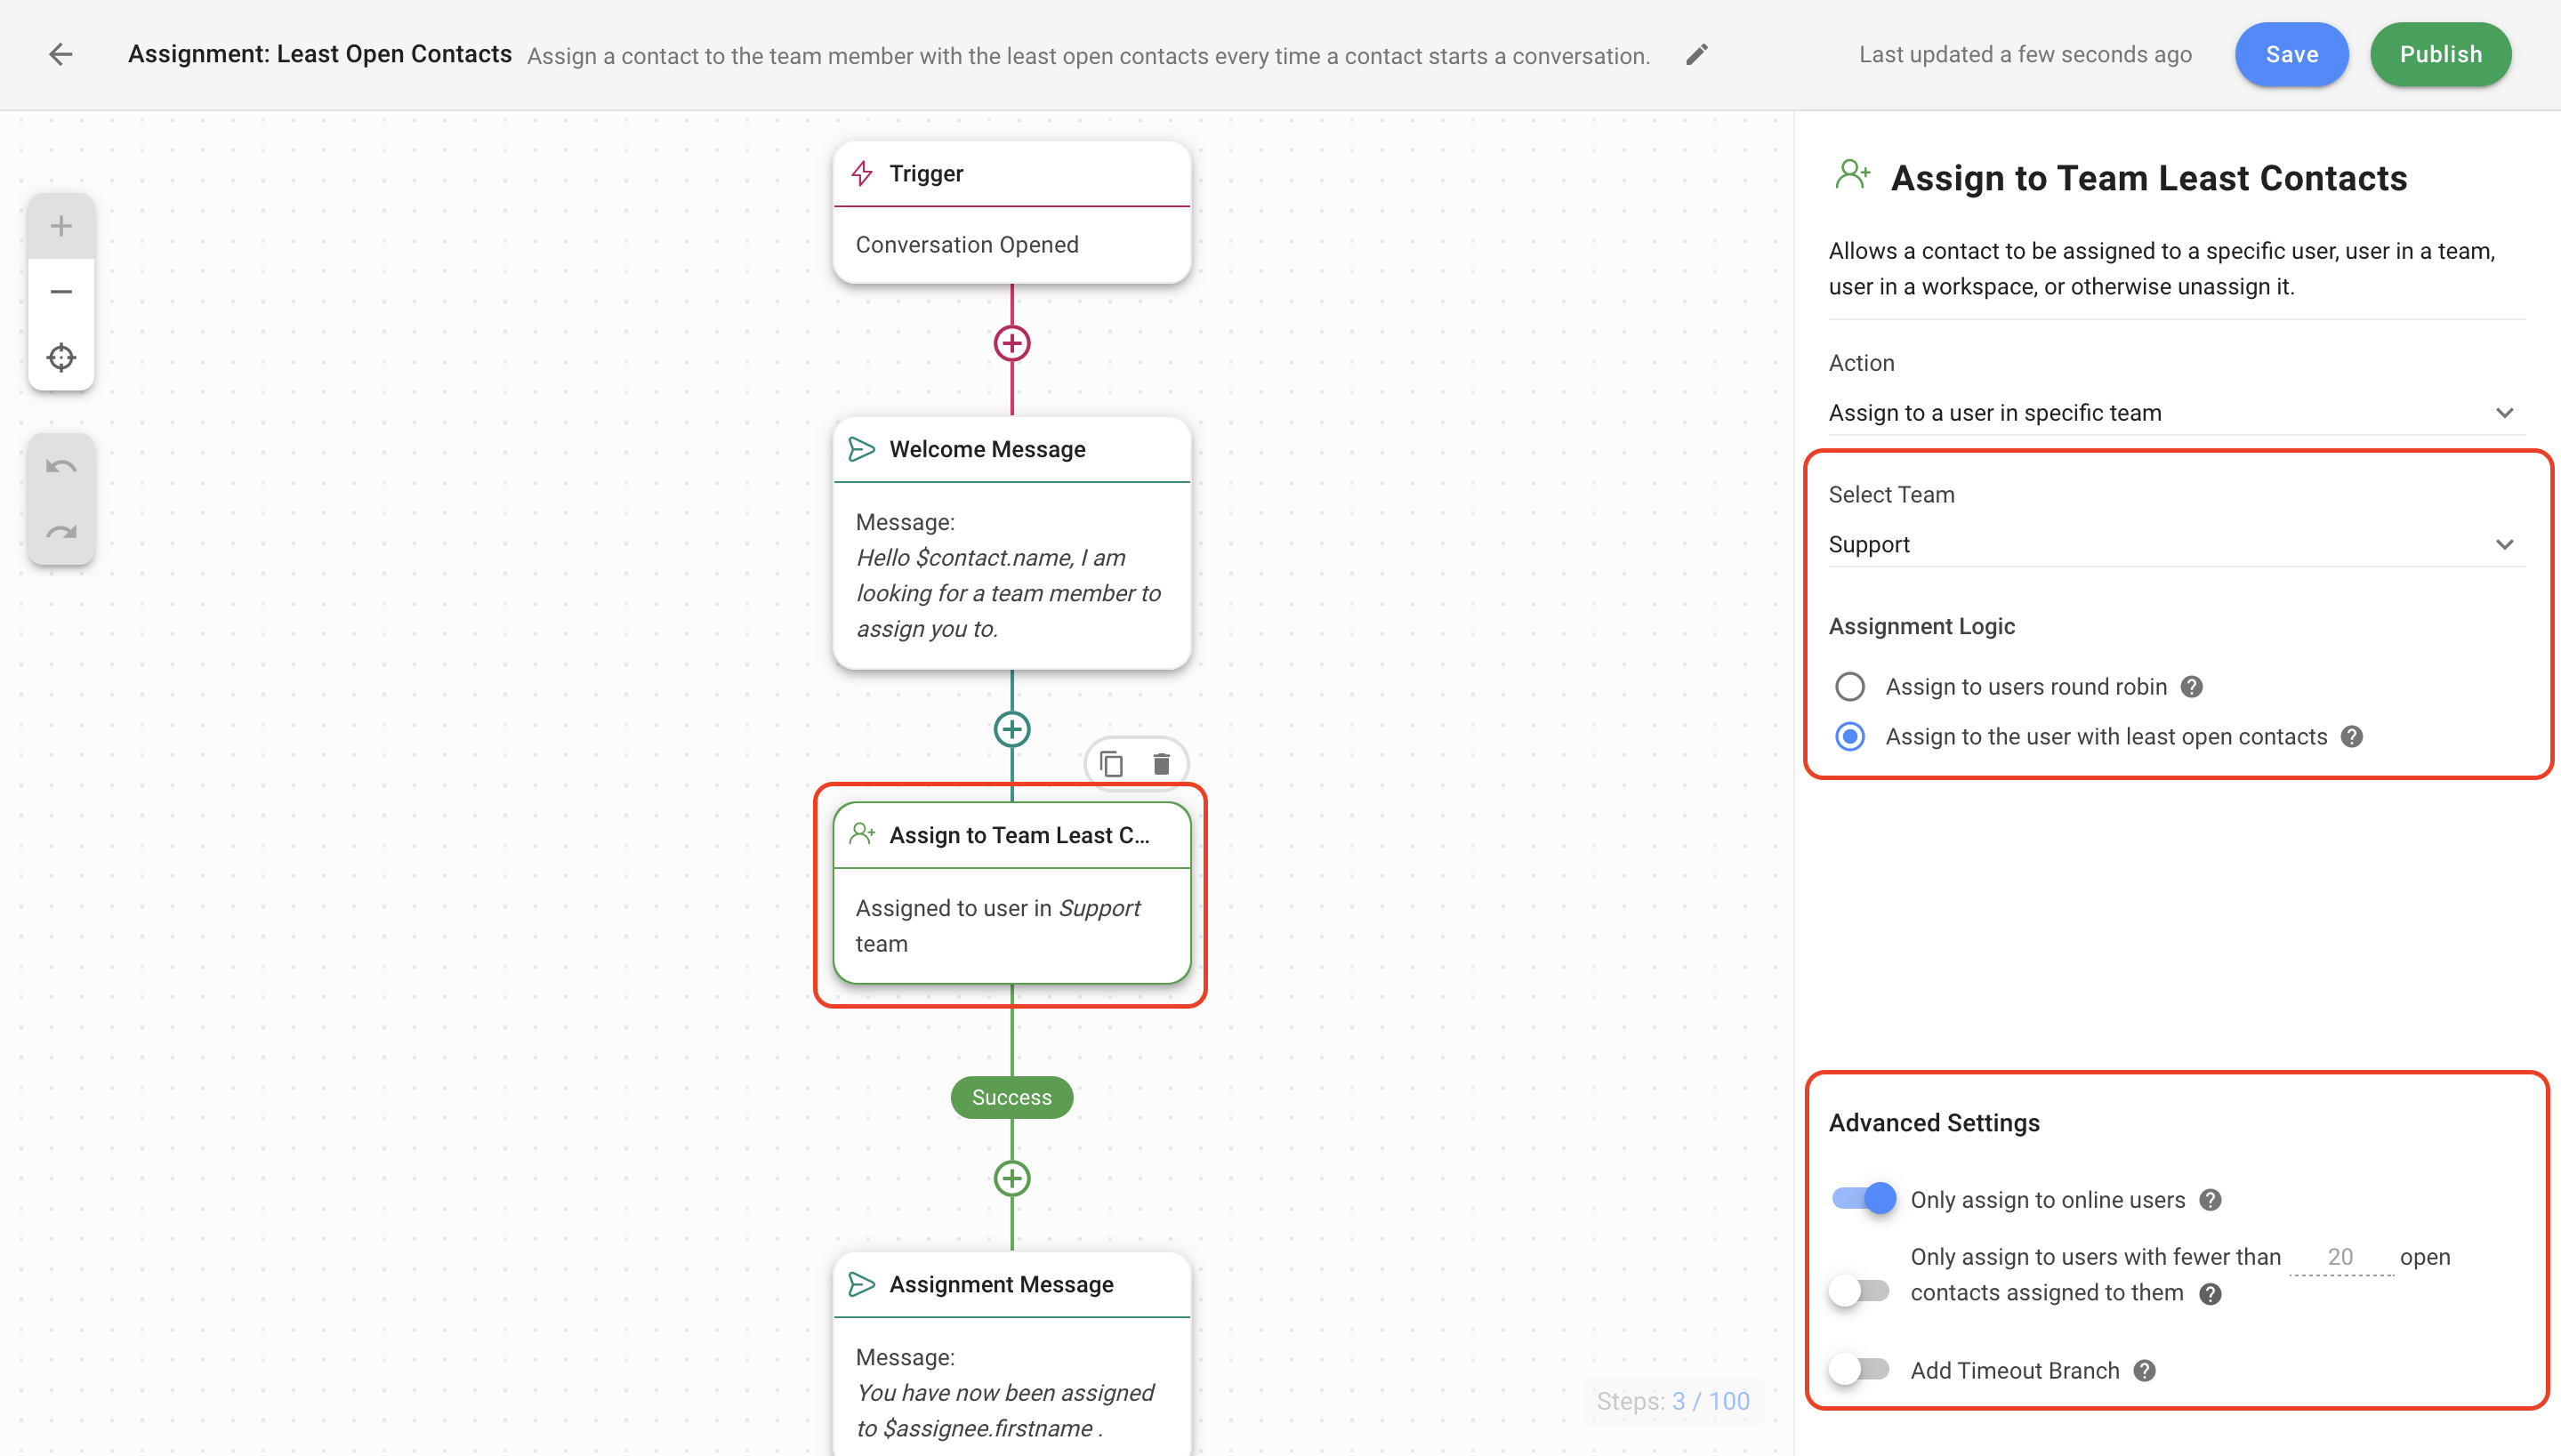
High-Quality Auto-Assignment Strategy Configuration
Click the Assign To step to configure the assignment logic.
Select a team in the Select Team dropdown list.
Assignment Logic should remain as “Assign to the user with least open contacts” to allow agents to provide high quality support.
In Advanced Settings, turn on the “Only assign to online users” toggle.
Finally, click Save and Publish to activate the Workflow.