

Connecting a Viber chatbot to respond.io lets a business send and receive Viber messages from a single Workspace. This guide covers how to apply for a new Viber bot, connect an existing bot, and configure the Channel. A Viber bot account is required to connect a Viber Channel.
Before you begin
A personal Viber account.
A Viber bot account, if you're connecting an existing bot.
As of February 5, 2024, you can no longer create a Viber bot yourself. To apply for a new bot, email the Viber team and follow the steps in How to apply for a new Viber bot below.
Learn more about the current Bot Commercial Model.
How to apply for a new Viber bot
Navigate to Settings > Channels.

Click Add Channel > Viber > Connect > Apply For A Bot.

Email Viber to apply. In your email, state that you're a respond.io customer applying for a new Viber bot.
If you already have a private token, skip steps 3 and 4 and proceed to step 5.

Once Viber approves and processes your application, you'll receive a private token.
Click I Have A Bot Token, paste the private token into the Viber Bot Token field and click Connect.


How to connect an existing Viber bot
Watch the video below for a step-by-step guide on connecting an existing Viber account to respond.io.

Navigate to Settings > Channels.
Click Add Channel > Viber > Connect > Connect an Existing Bot.

Sign in to the Viber Admin Panel.
Select a bot to connect to respond.io. If no bot is available, follow the steps in How to apply for a new Viber bot above.
On the Bot Info page, locate the token and add it to the corresponding field on respond.io.
Click Complete to finish the setup.

After setup, any messages sent to the Viber Business Account arrive in the Workspace.
Once the Channel is connected, scan the QR code to send a test message and confirm everything works.
How to configure the Viber Channel
The Viber Channel can be configured with a unique Channel name used internally to identify the account.
Navigate to Settings > Channels.
Locate the Viber Channel and click Manage.

On the Viber Configuration page, review the following:
Chat Link — a click-to-chat link that directs customers to start or continue a conversation with the Viber account. Share this link to refer customers to a new or existing thread, based on whether the user has previously messaged the Viber account. A QR code for the chat link is also available to share with Contacts.
Channel Name — the internal name used to identify the Channel. Edit it as needed.

Important: Ensure the details are correct for messages to be received successfully in the Viber account.
Click Save Changes to update the Viber Configuration page.


FAQ and troubleshooting
Can I connect to a personal Viber account?
No. A Viber bot account is required to connect a Viber Channel. Starting February 5th, 2024, you can no longer create Viber bots on your own. Email Viber and state that you're a respond.io customer applying for a new Viber bot.
Learn more about the current Bot Commercial Model.
How do I share my Viber link?
When you make a Viber bot, by default it won’t automatically have a live landing page on viber.com and it won’t show up in Viber’s search results right away either.
Create a link to open a private chat with your bot, but this works only for users who have Viber on their devices. To learn how to generate a Viber link, follow this guide.
How do I change my Viber Chatbot profile photo?
On your Viber app, go to Settings > Bots > Select your Viber chatbot.
Tap Edit info > Tap the existing profile photo.
Select the location of the photo > Select the photo > Click Done to upload your new profile photo.
Click Done to save the changes.
How do I edit the About section for my Viber Chatbot?
On your Viber app, go to Settings > Bots > Select your Viber chatbot.
Click Edit info > Edit the details.
Click Done to save the changes.
How do I add pre-filled text to my Viber link and QR codes?
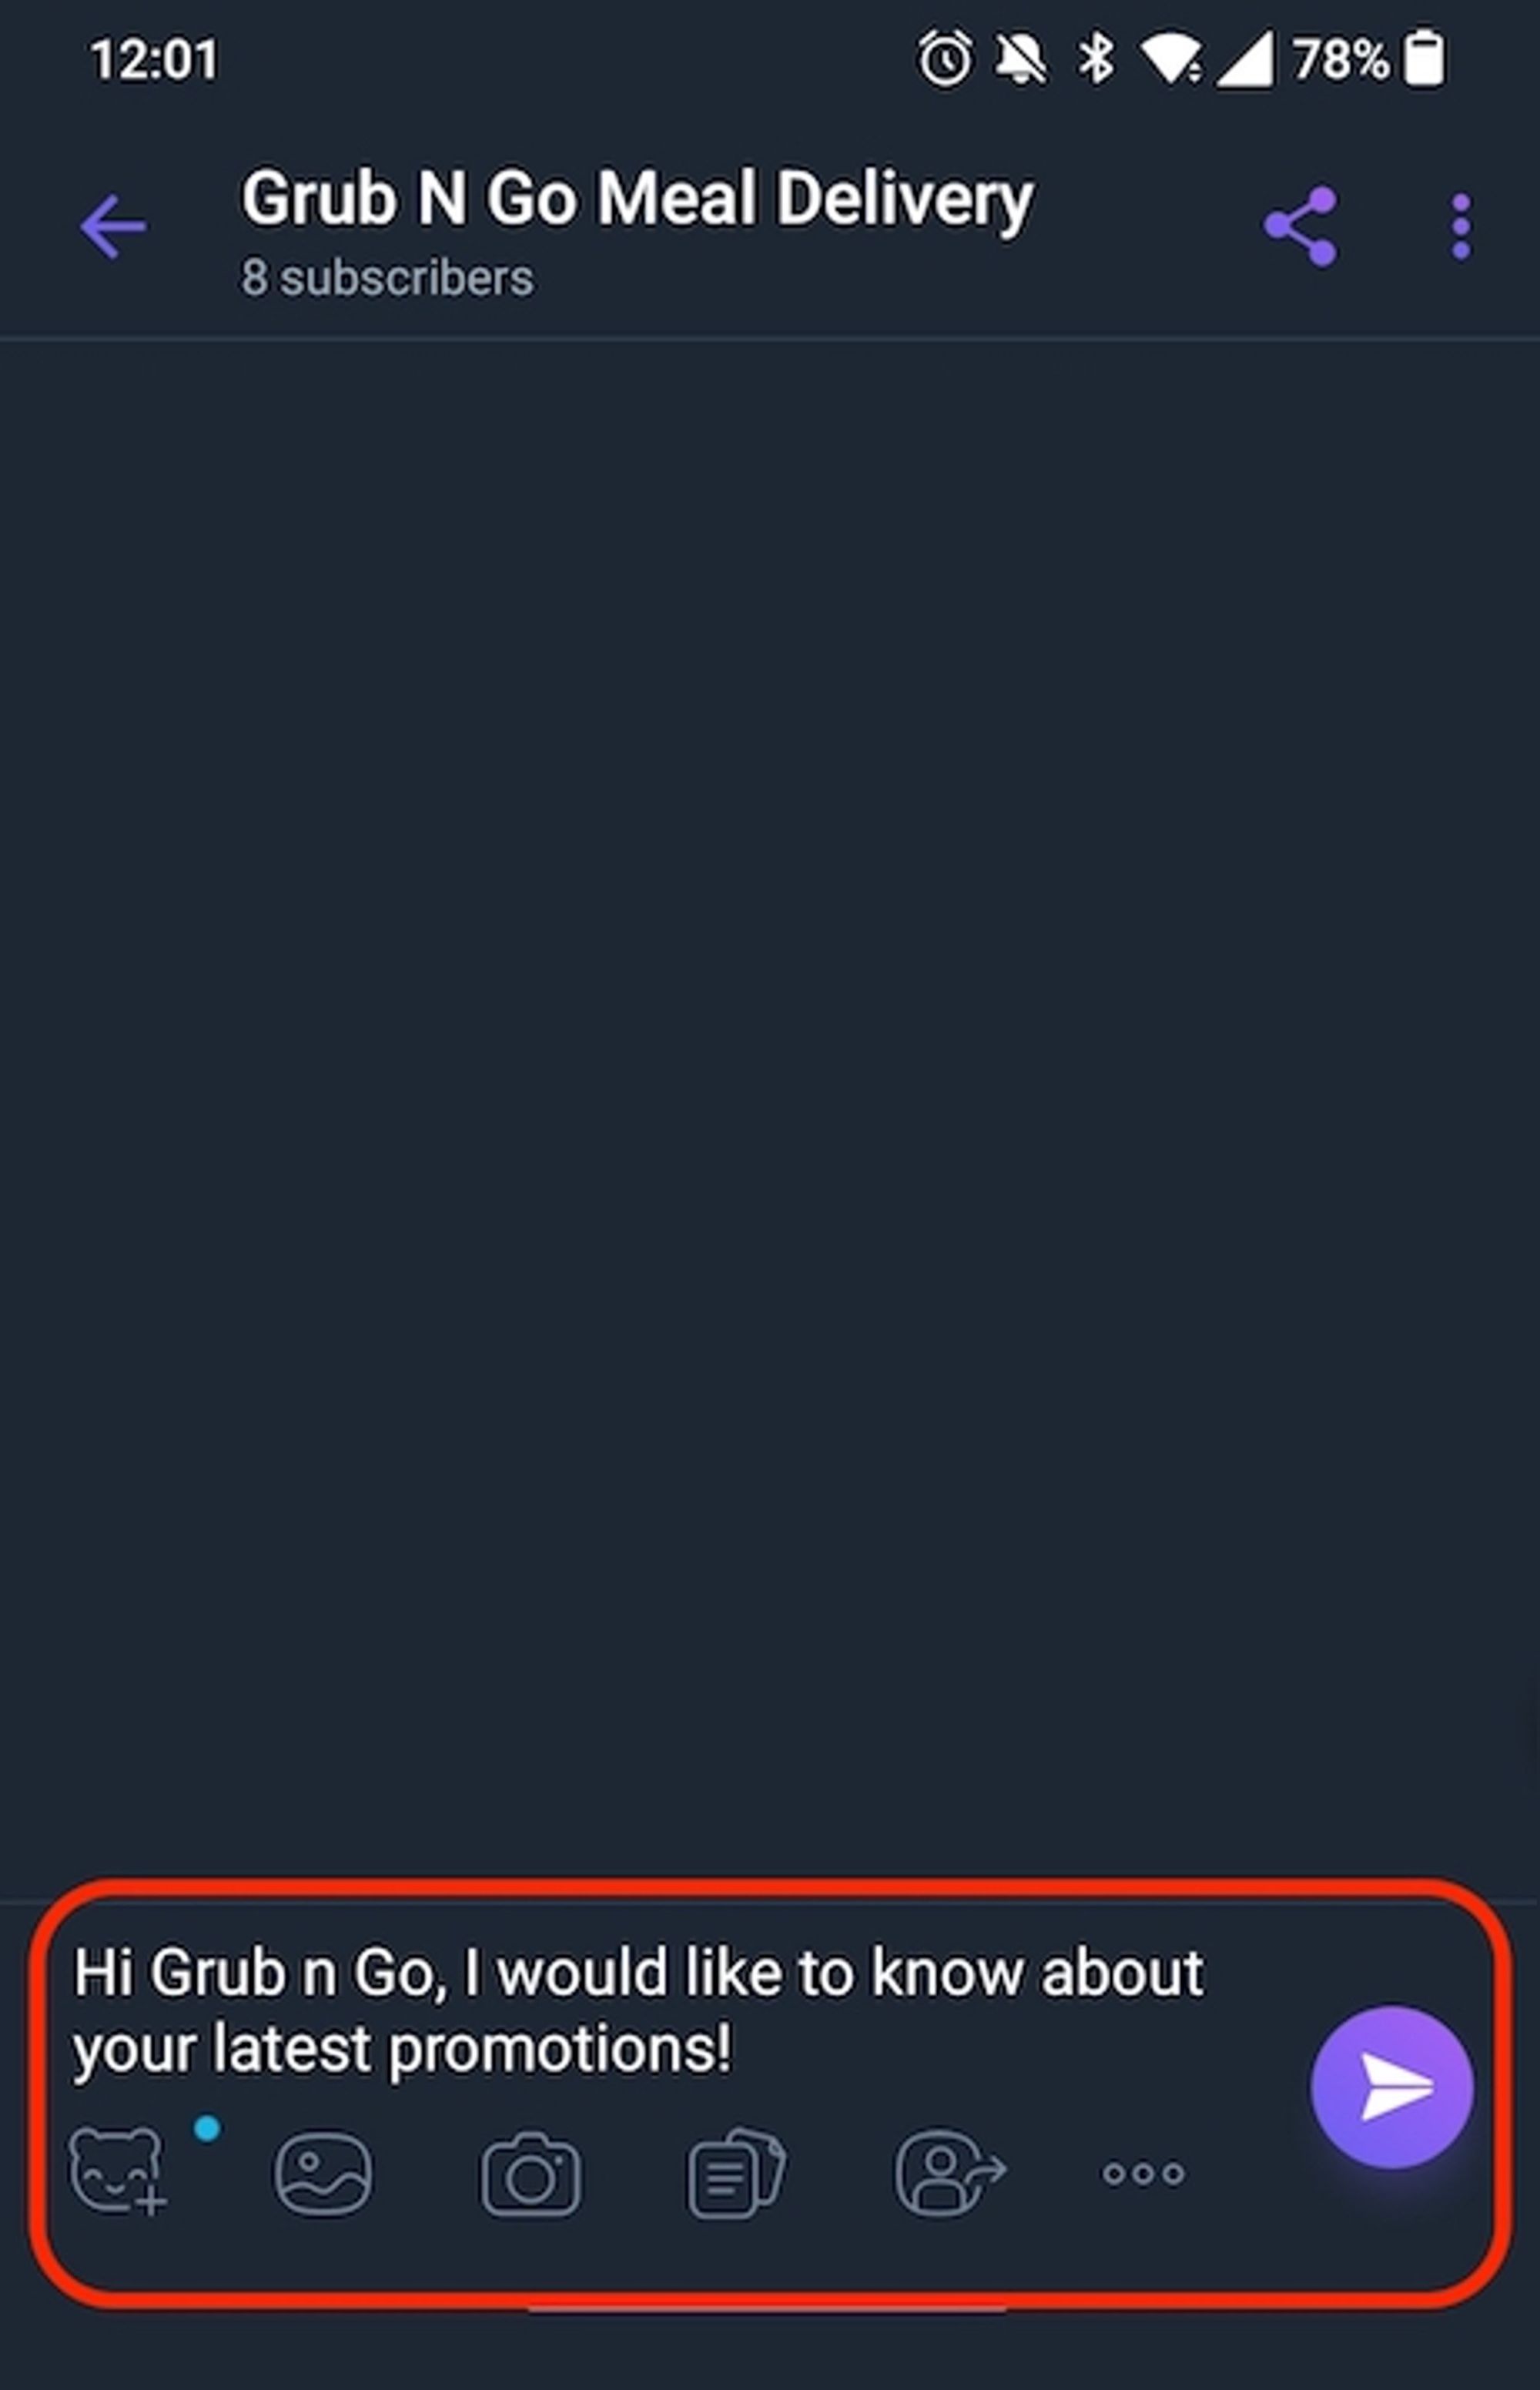
Use respond.io's Pre-Filled Text feature to populate the message box with a default message when Contacts open a chat window with your business.
This saves Contacts' time from needing to think about what to write and just click send, encouraging Contacts to send the first message.
Here's how to add pre-filled text to your Viber link and QR codes.
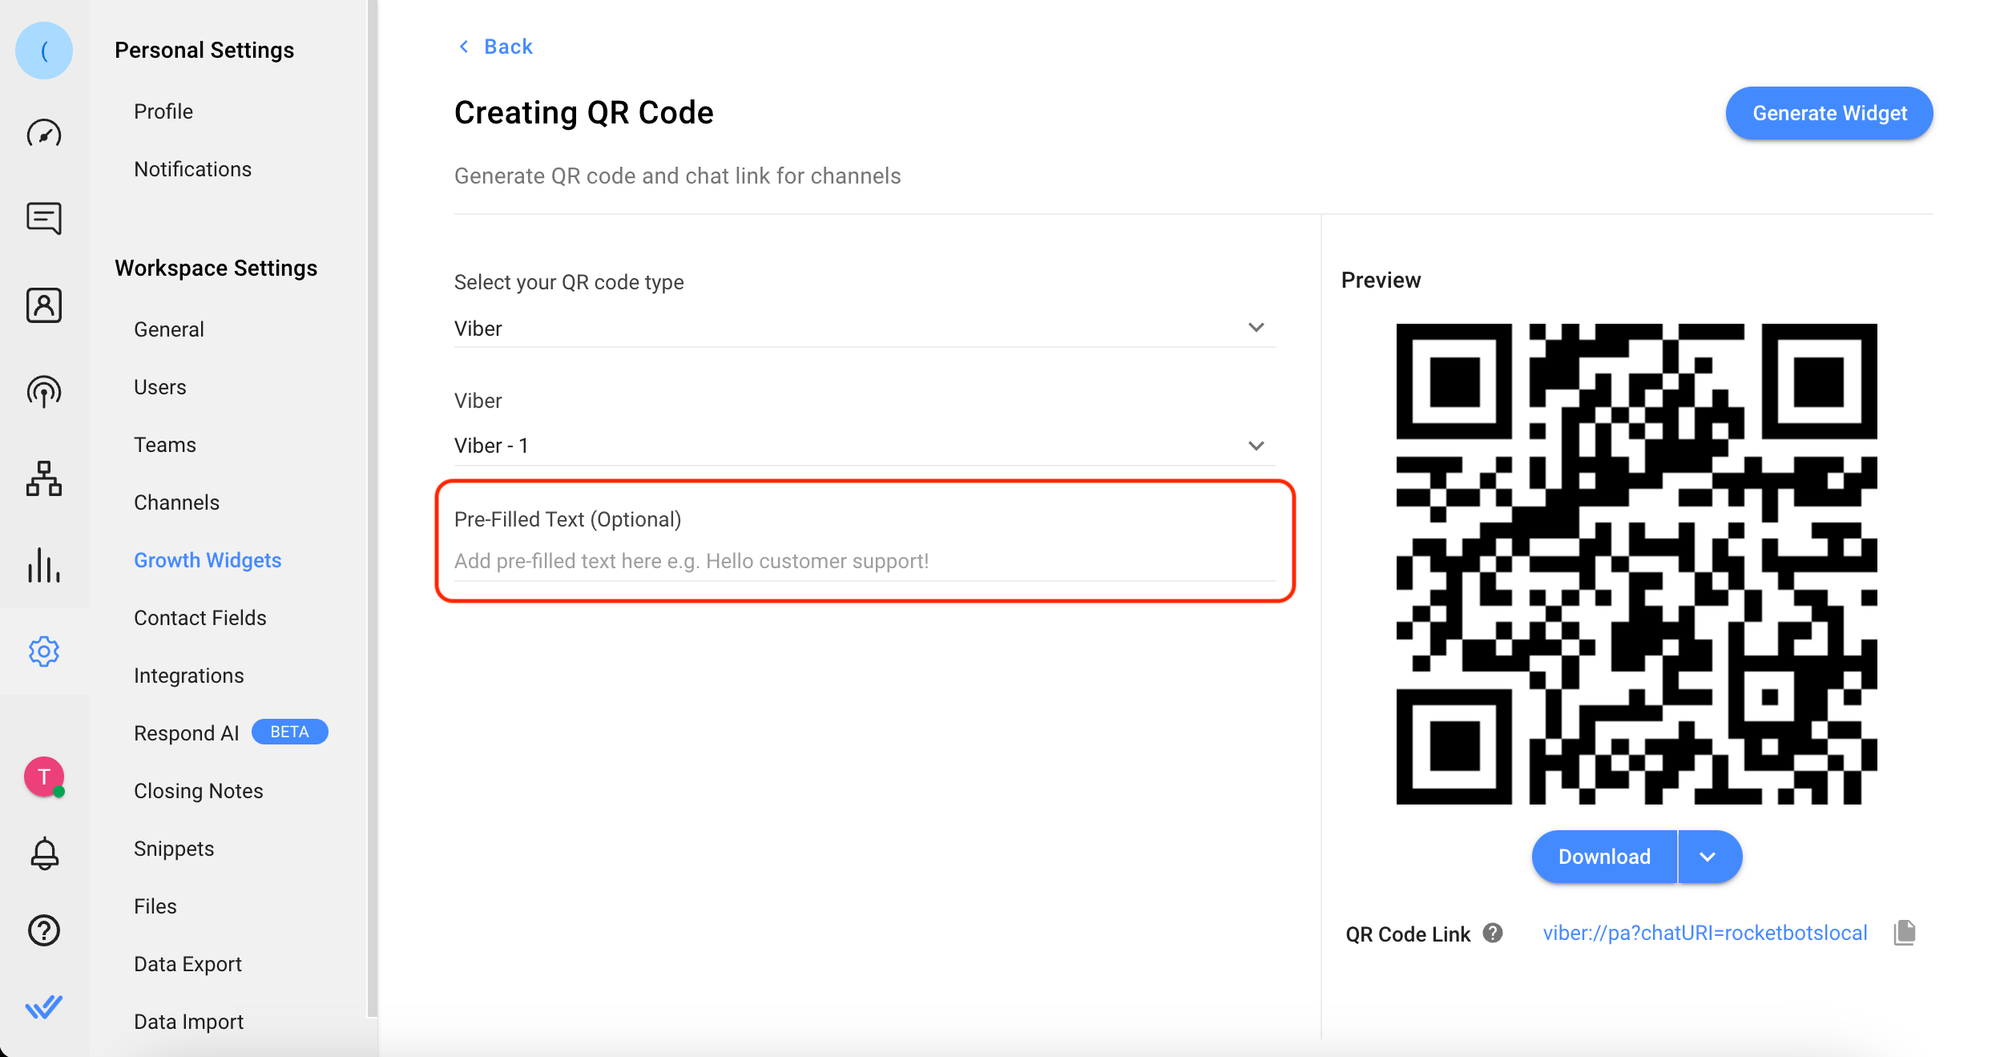
On the respond.io platform, click Settings > Growth Widgets > Add Widget.
Select QR Code option and click Create Widget.
Create the QR Code.
Select “Viber” as the QR code type.
Select the connected Viber Channel that you want to create the QR code for.
Add the pre-filled text that will automatically appear in the message field when the QR code is scanned.

Click Generate Widget button to create your QR code with the pre-filled text.
Click Download and select the size of the QR code you want to save or follow the instructions here to get your Viber chat link.
When Contacts scan your QR code or click on your Viber link, they should automatically have the pre-filled text in the message box.

Why do I receive the error message Failed to send the message as the contact is not subscribed anymore?

Seeing this error means the Contact has already unsubscribed from your business Viber bot.
Opting out stops a Contact from getting messages from a business. Often, Contacts do this due to spam, feeling the business sends too many promotions. Once unsubscribed, the business can't send any messages, like broadcasts or 1-to-1 messages, unless the Contact contacts the business again.
Why can’t I receive inbound messages?
Check if the test message is sent to your personal number tied to Viber or to the Viber Bot’s URI. If you are sending it to your personal number, you will not receive any messages. Try sending a message to the Bot's URI instead.
To locate the Bot's URI:
Log in to the Viber Admin Panel.
Select the bot and navigate to the URI field.


