

HubSpot is only available for Growth plan and above.
The HubSpot integration enables you to connect your HubSpot account with your respond.io workspace. With this integration, you can:
View and edit HubSpot contact properties like email, phone number, lifecycle stage, and more directly in respond.io.
Reduce platform switching by accessing contact data inside the Inbox and Contacts modules.
What you’ll need
Admin access in HubSpot.
Owner or Manager access in respond.io.
Setting Up the Integration
Install the HubSpot Integration
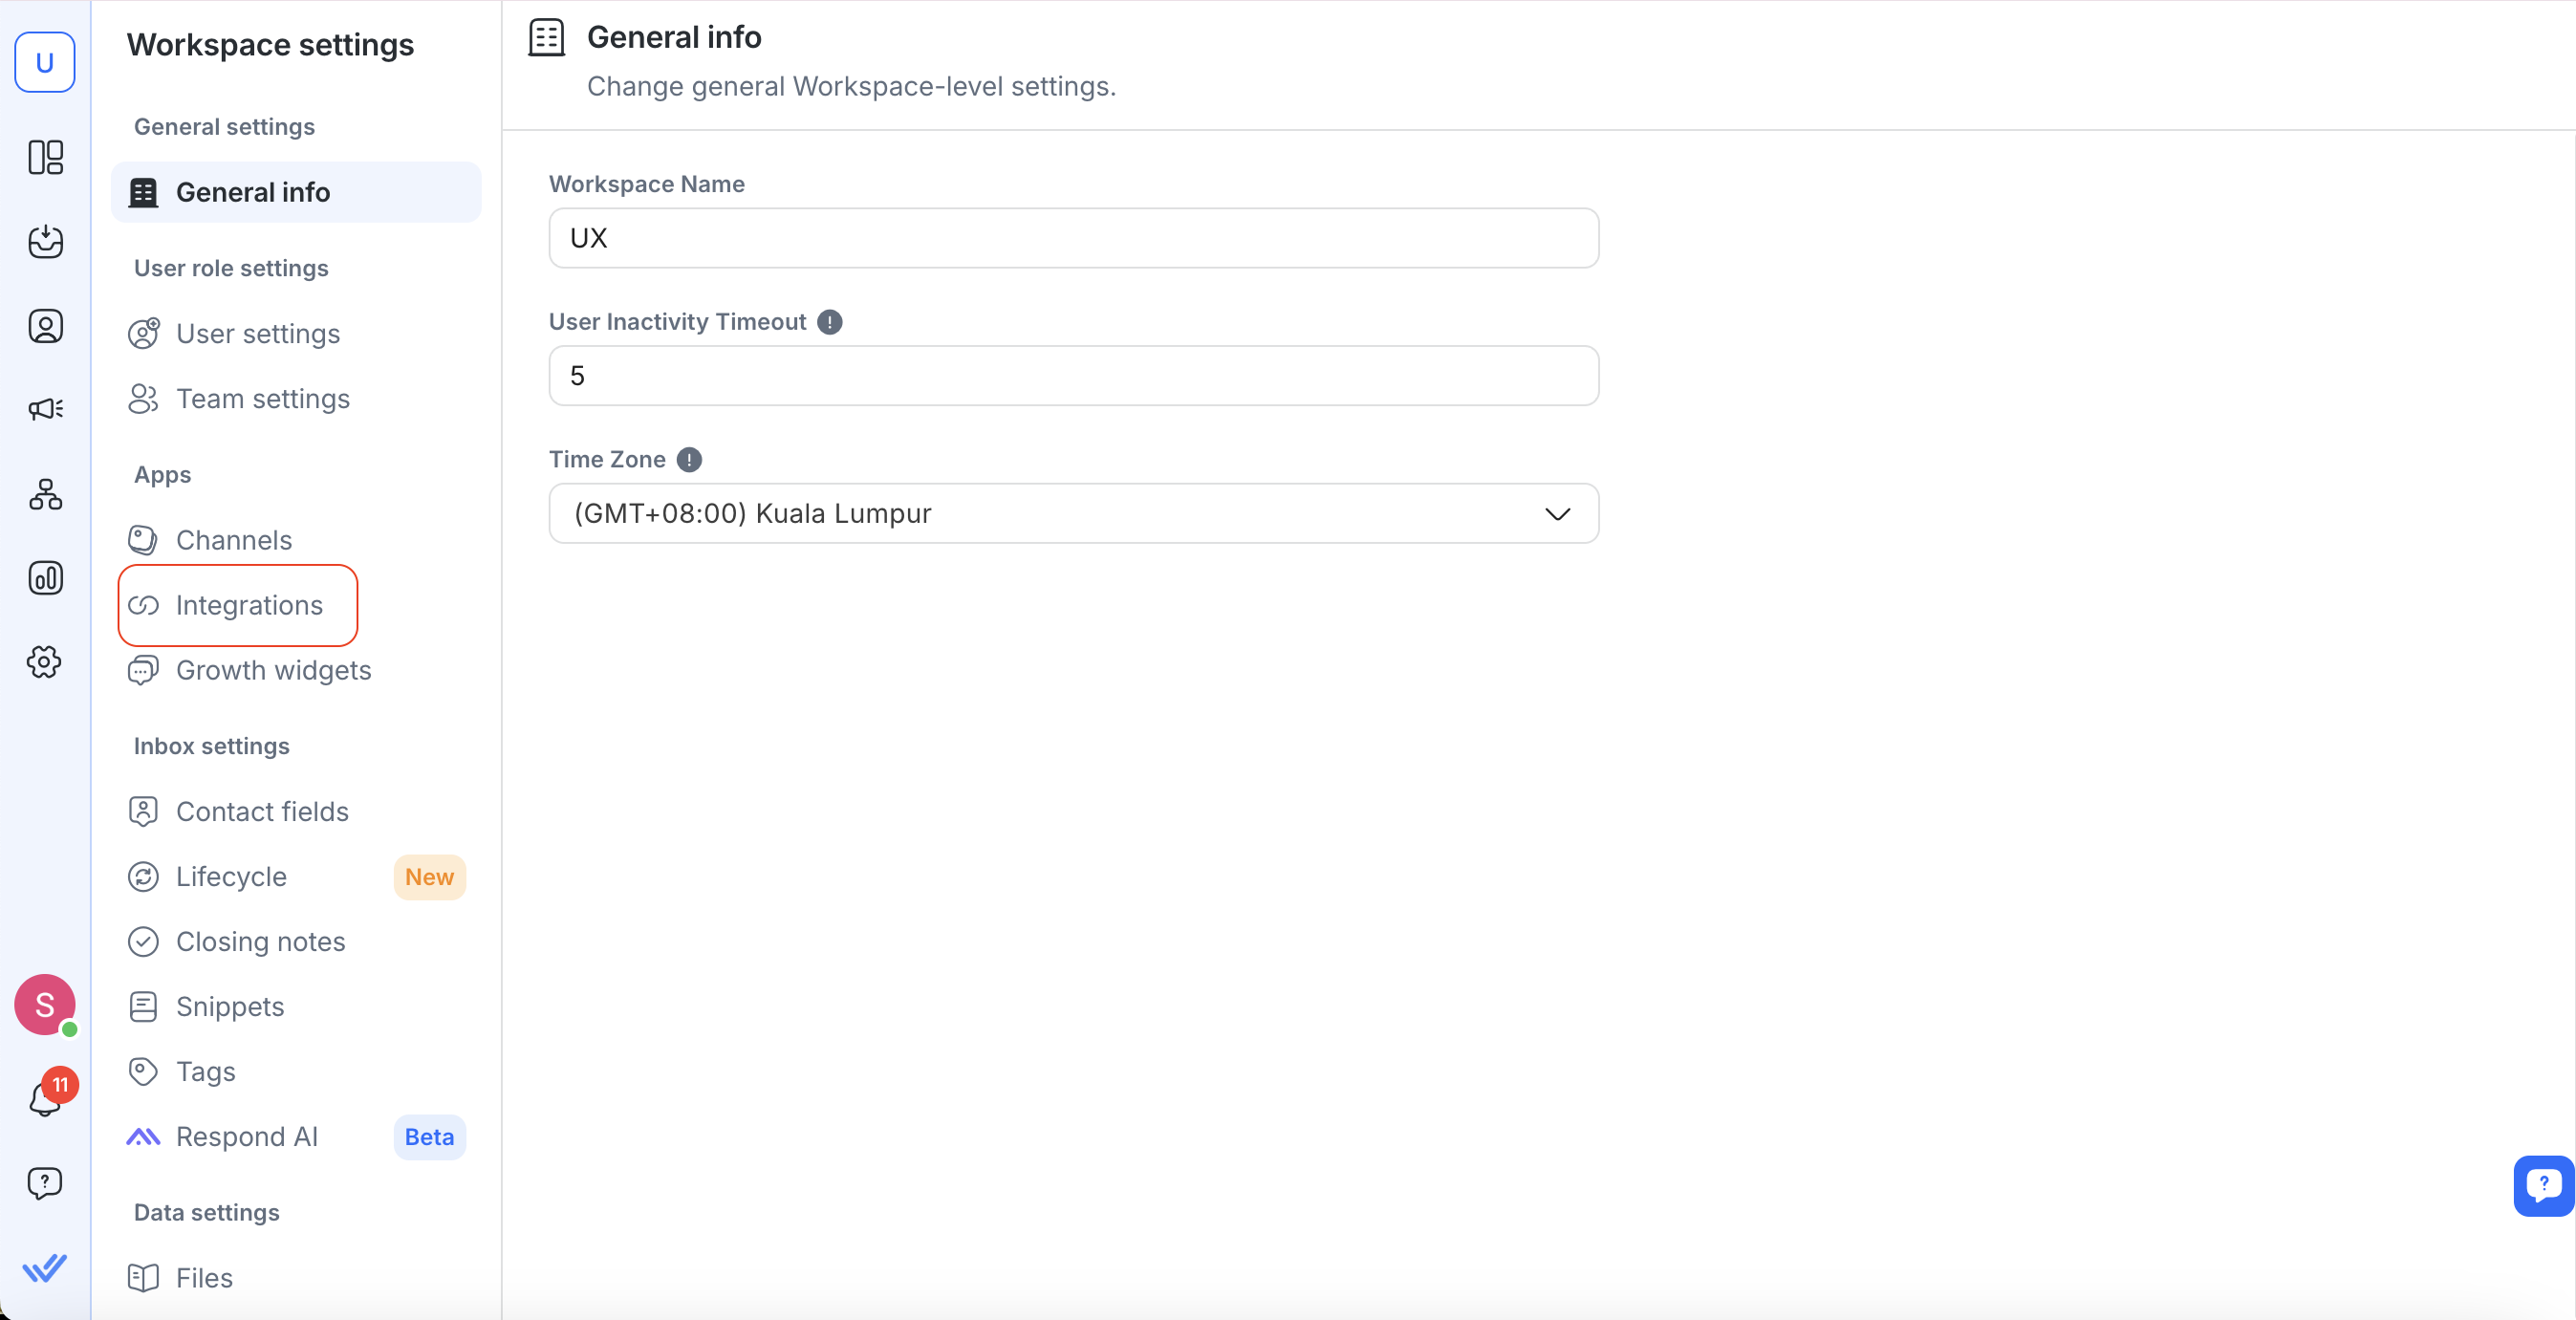
In your Workspace, go to Workspace settings > Integrations
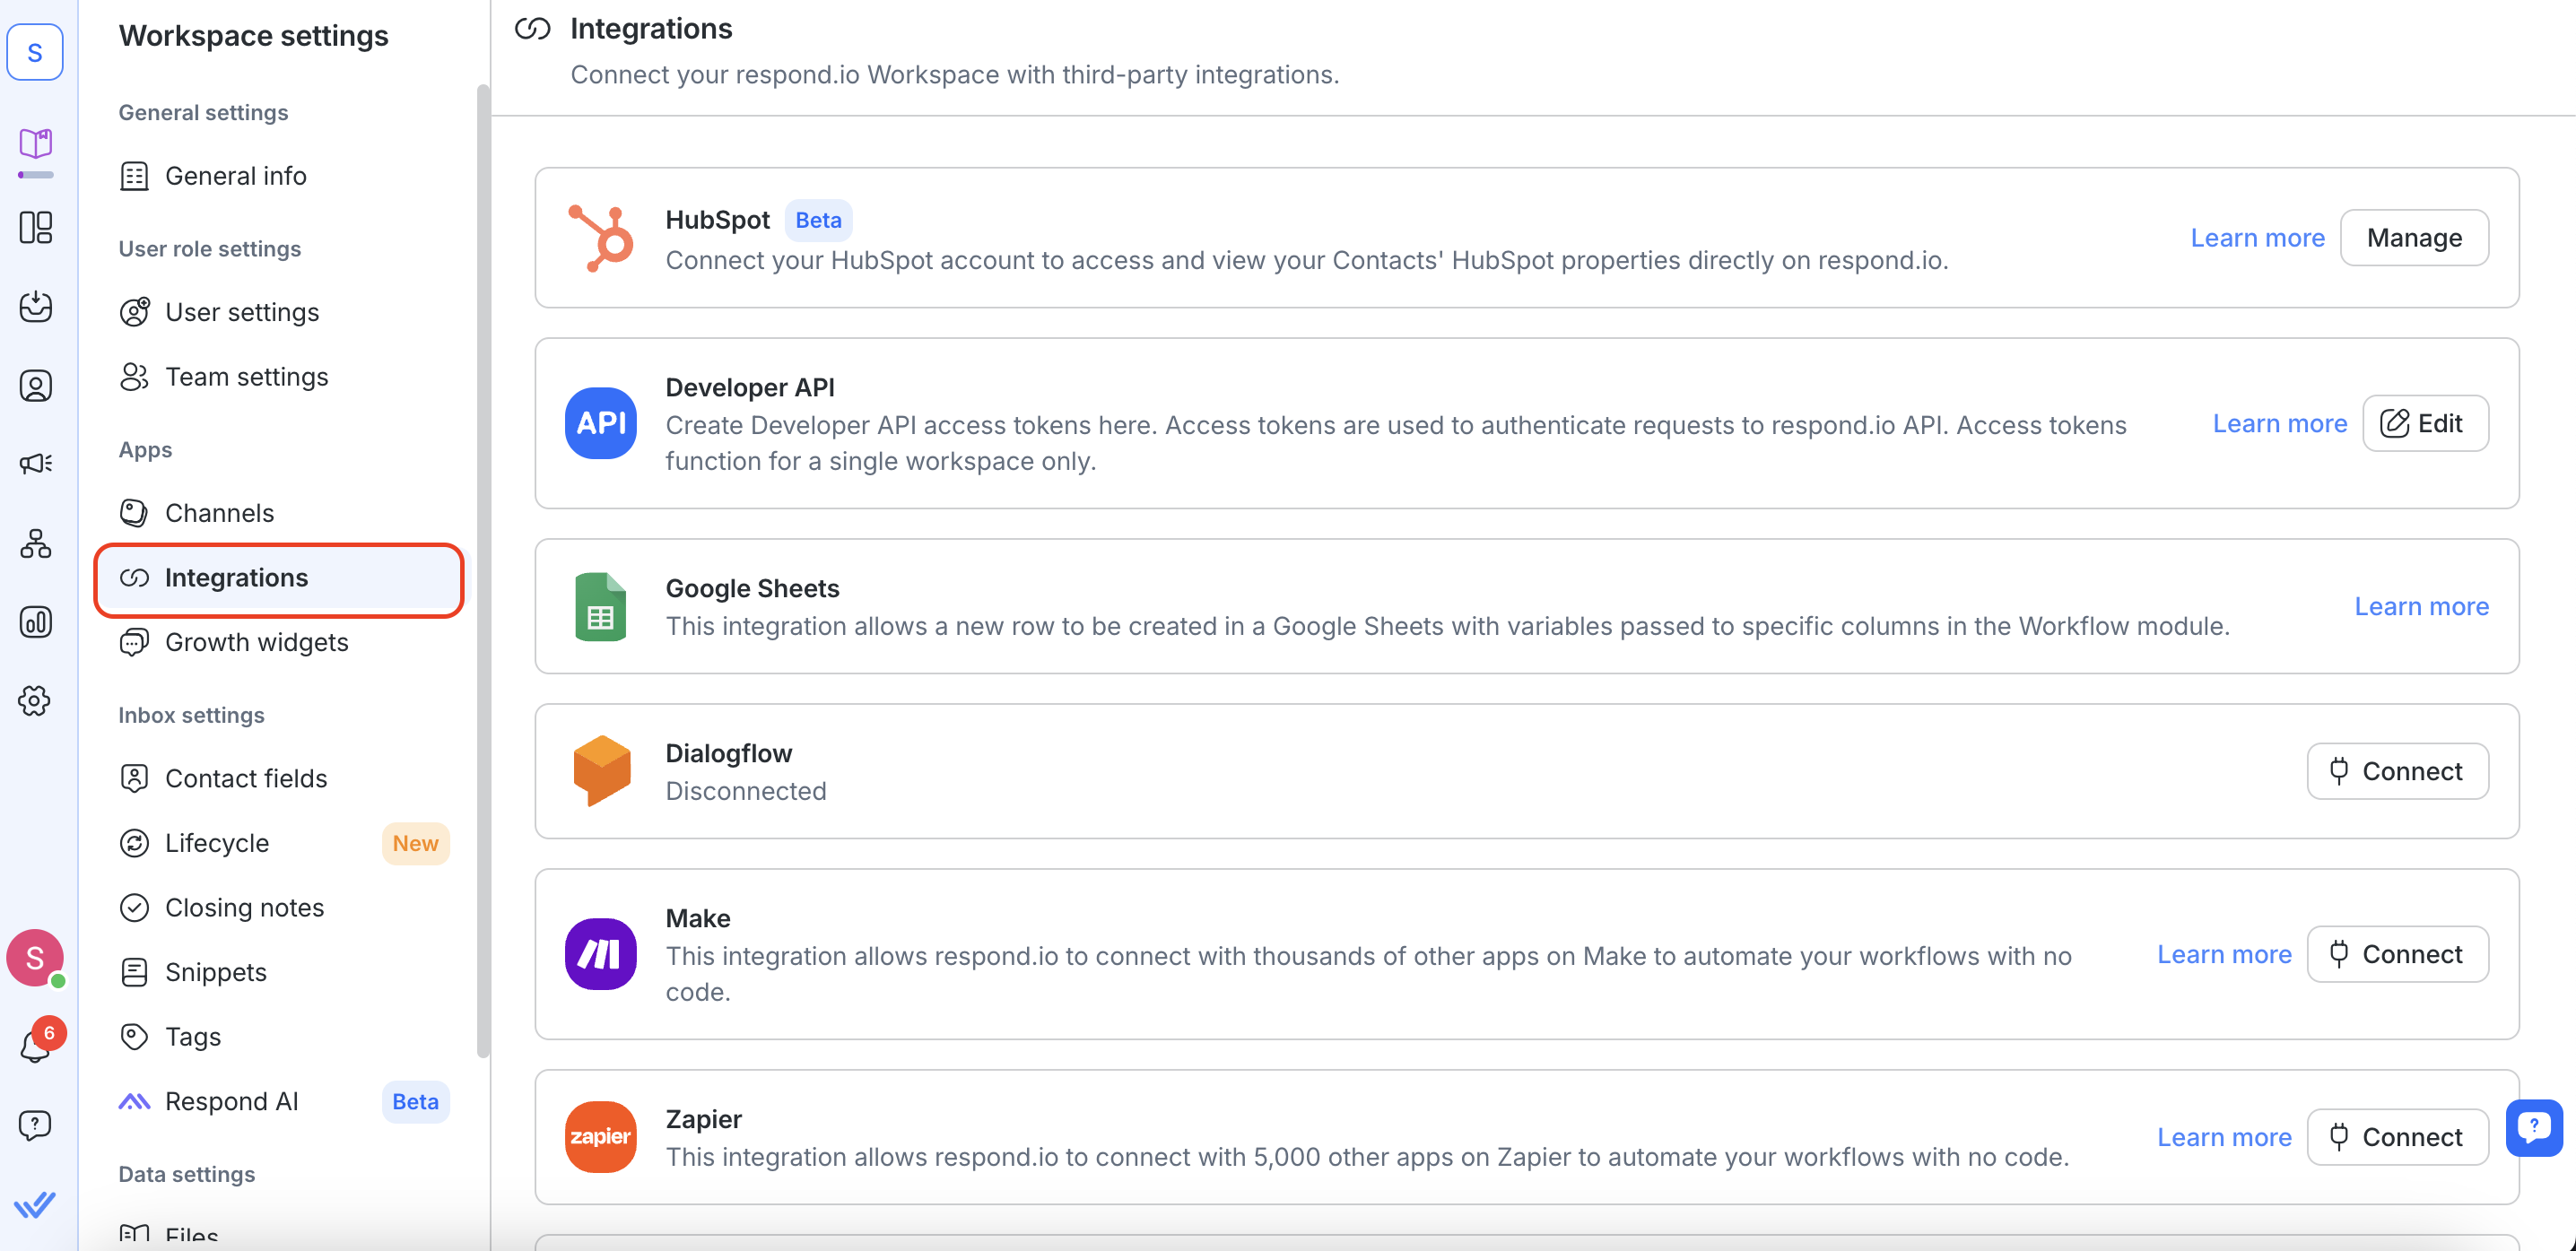
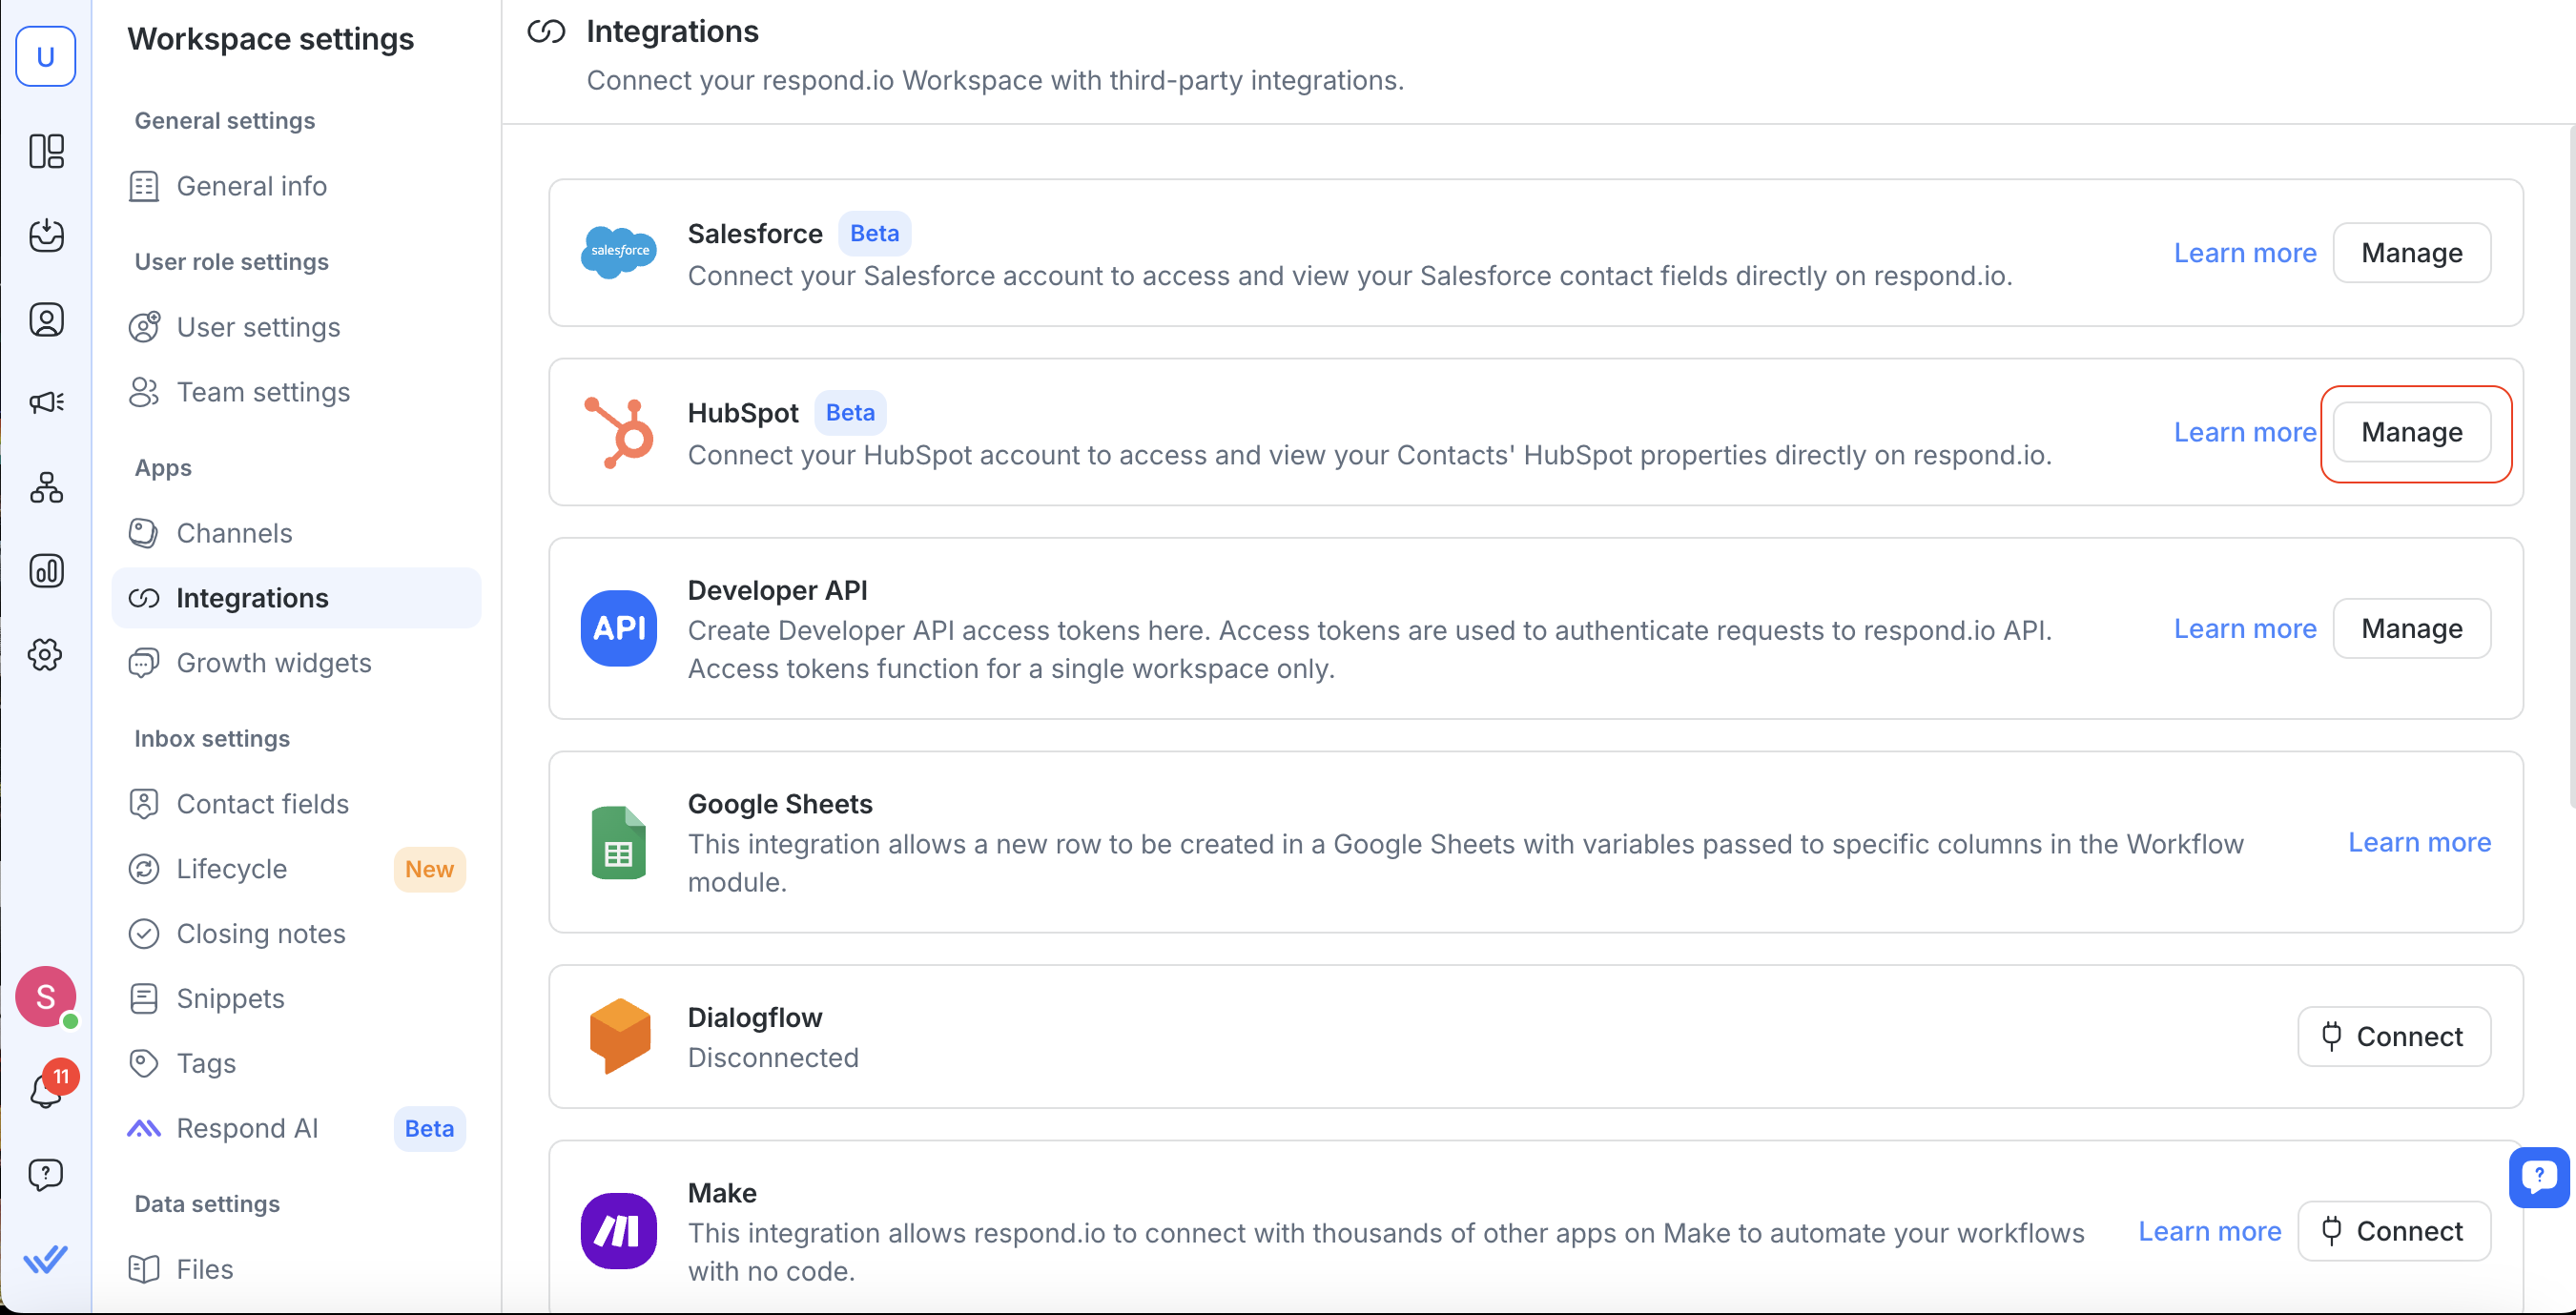
2. Navigate to HubSpot and select Manage.
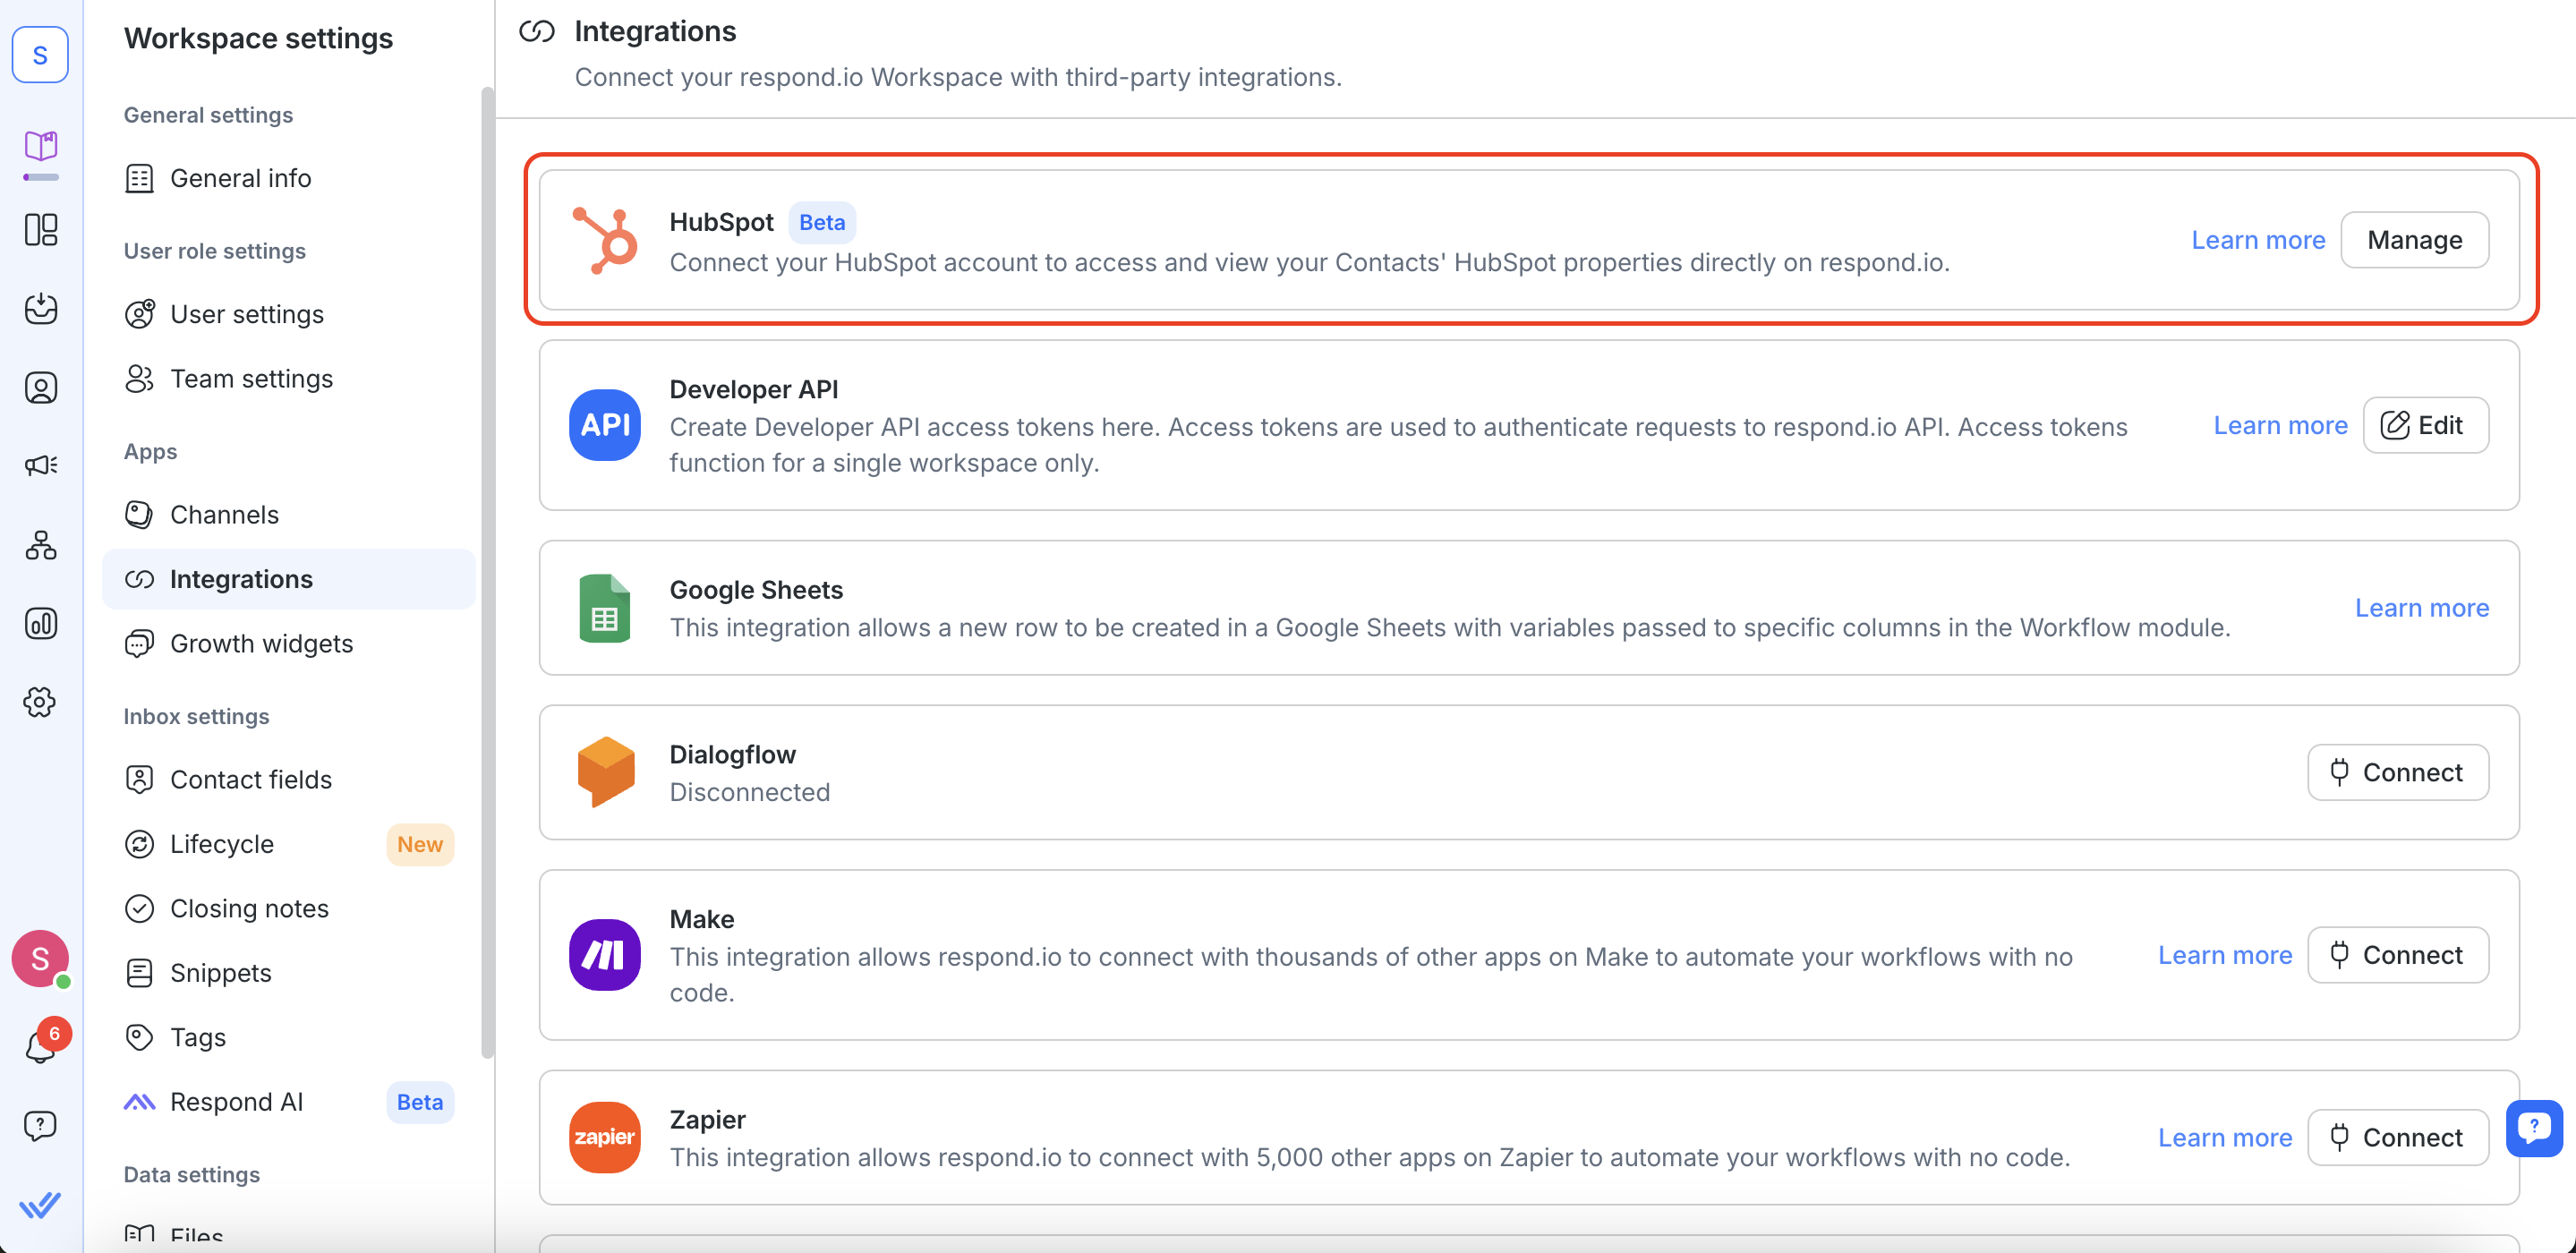
3. Select the Connect HubSpot button.
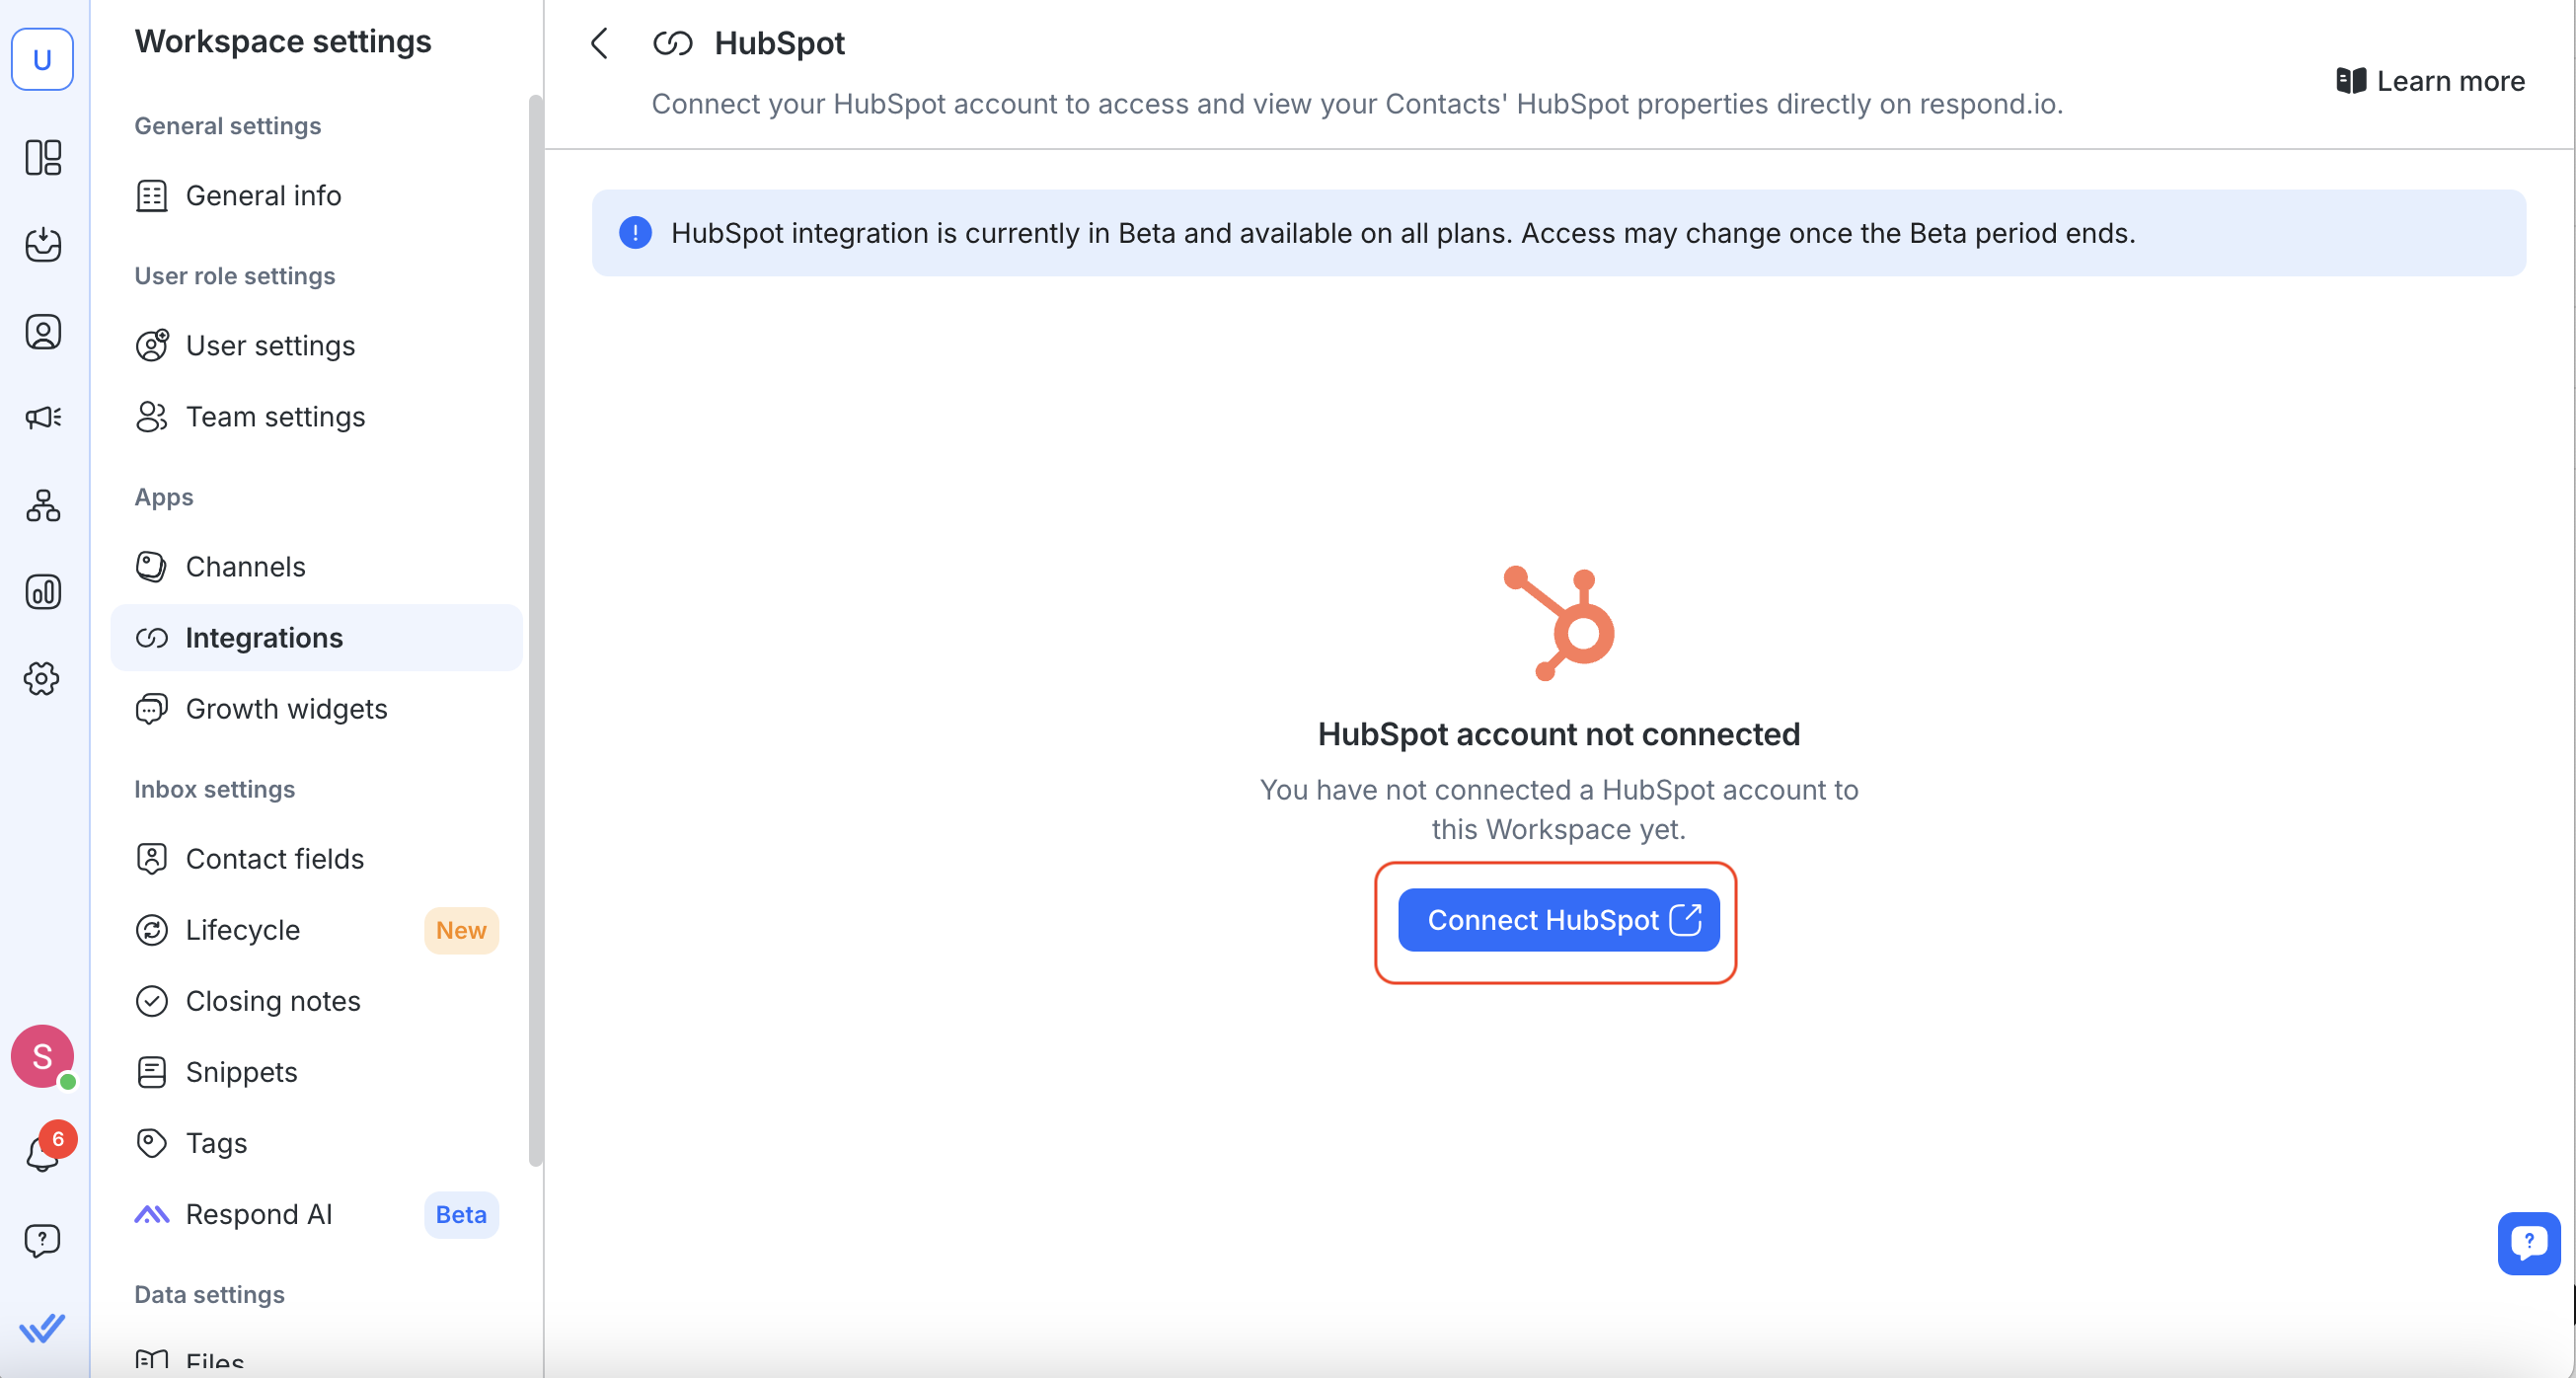
4. A new pop up will be opened for you to sign in with your HubSpot account. Follow along the steps to connect your HubSpot account.
Authorize respond.io to access your HubSpot data.
Note: Each respond.io workspace can only connect to one HubSpot account.
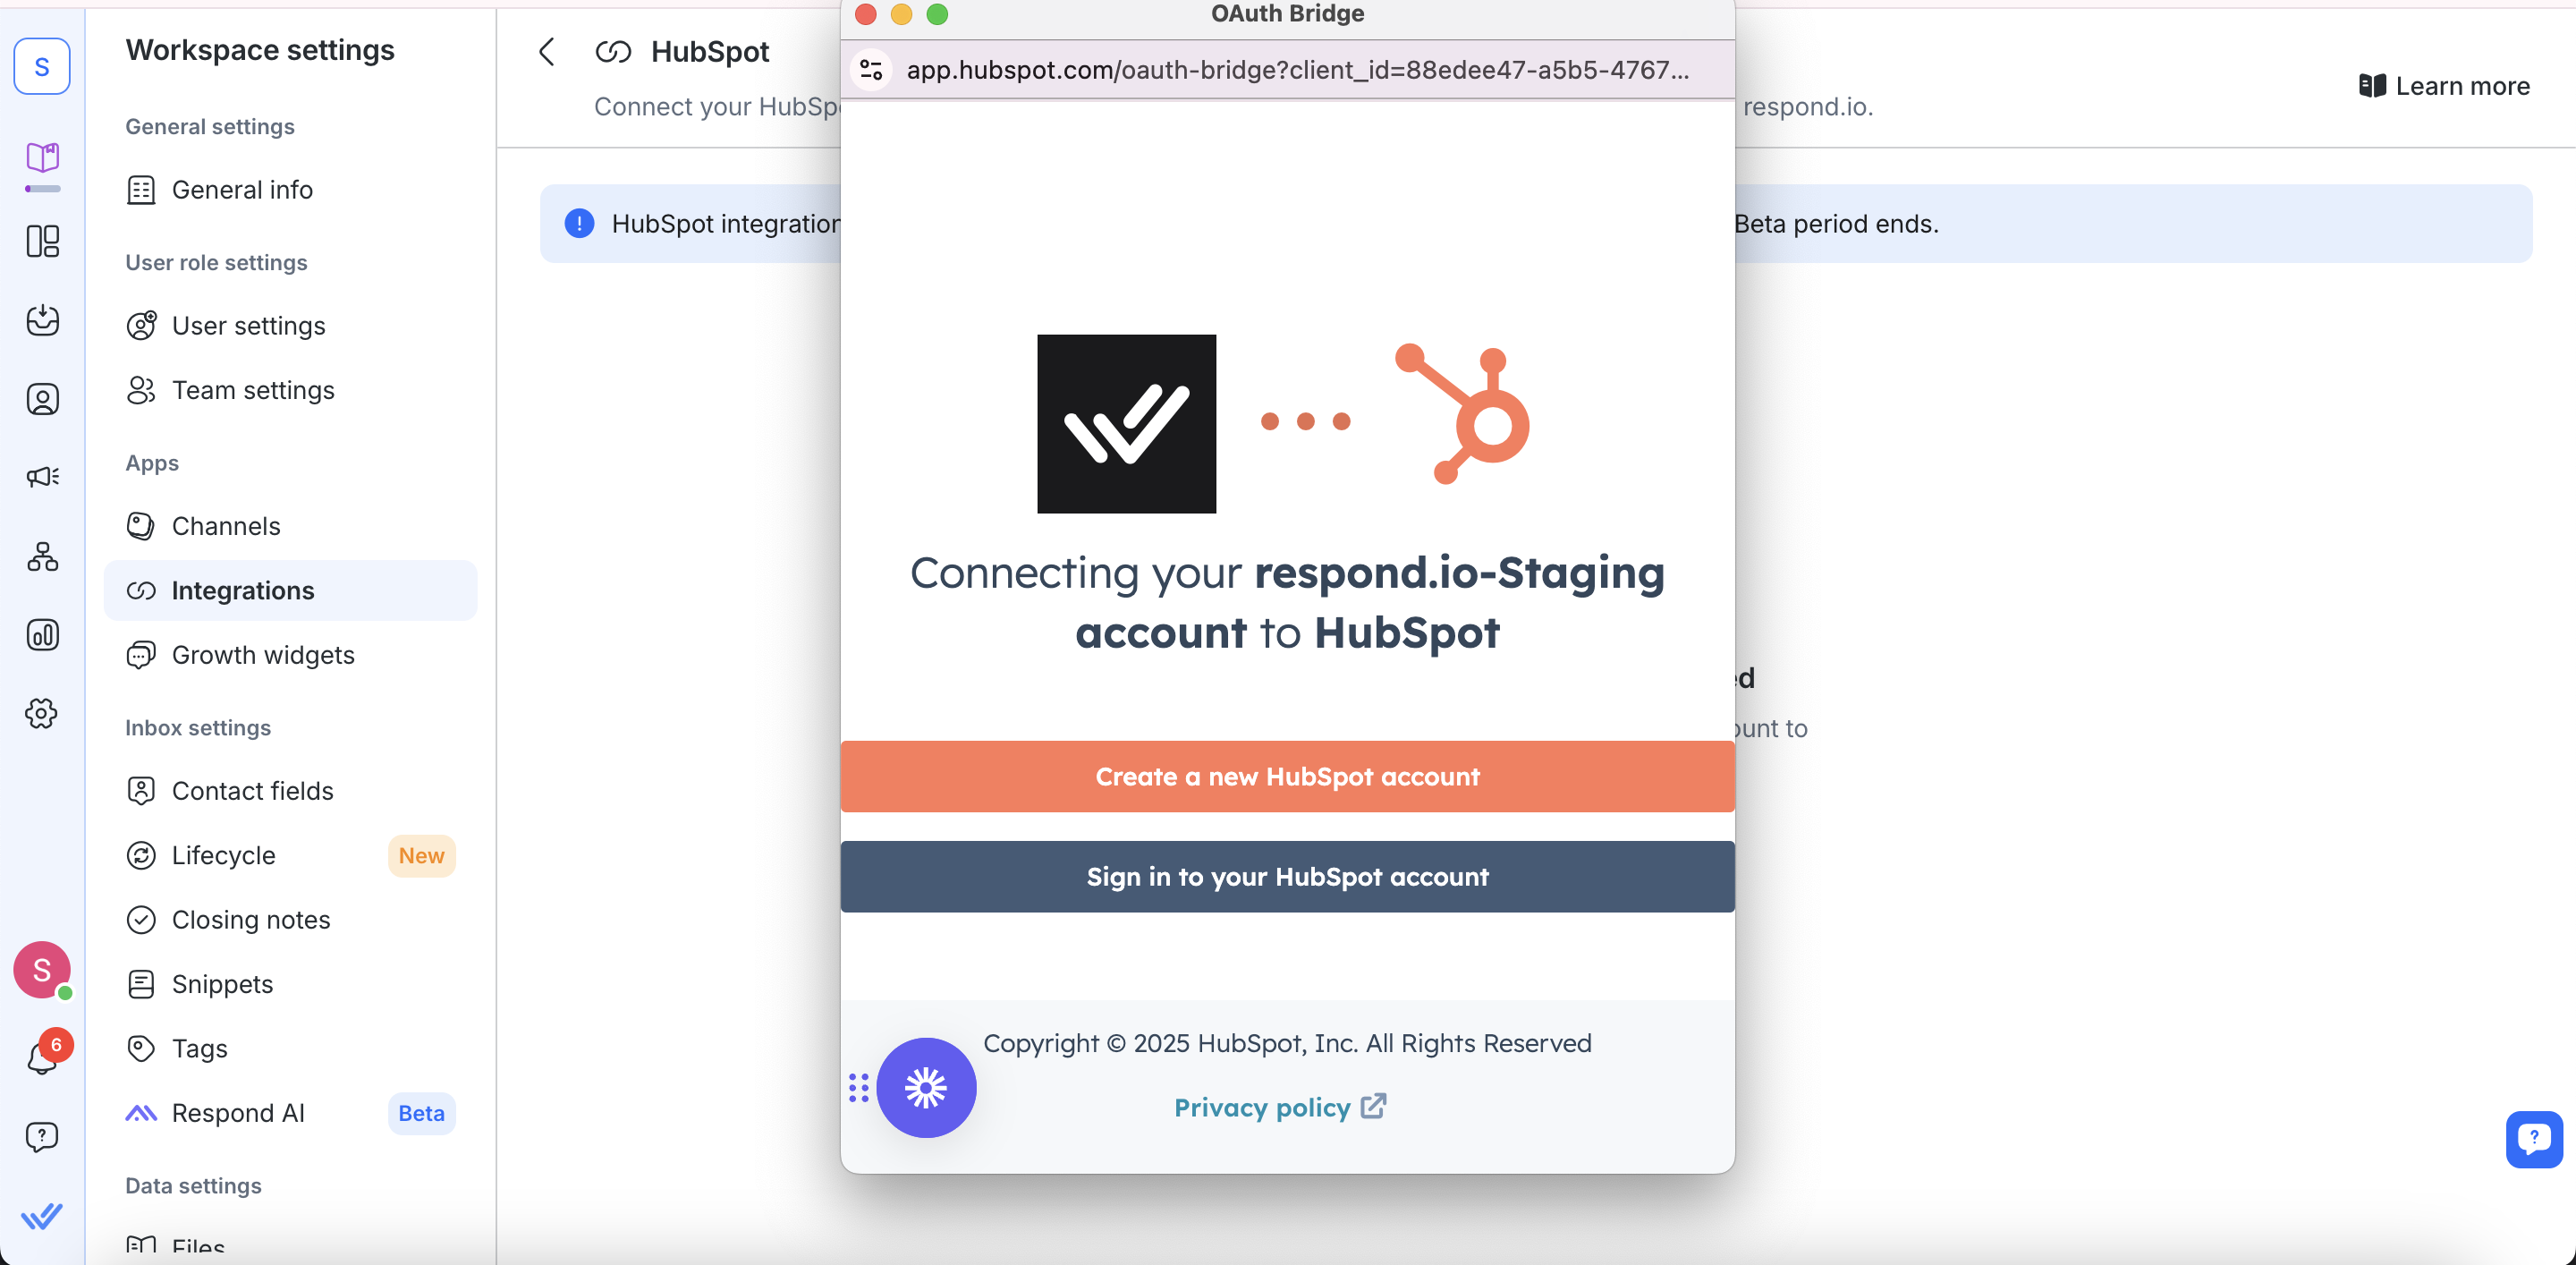
5. Once connected, you’ll see a confirmation message and your HubSpot account details.
Viewing HubSpot Contact Properties in respond.io
You can view HubSpot properties in the Inbox and Contacts modules.
Inbox module
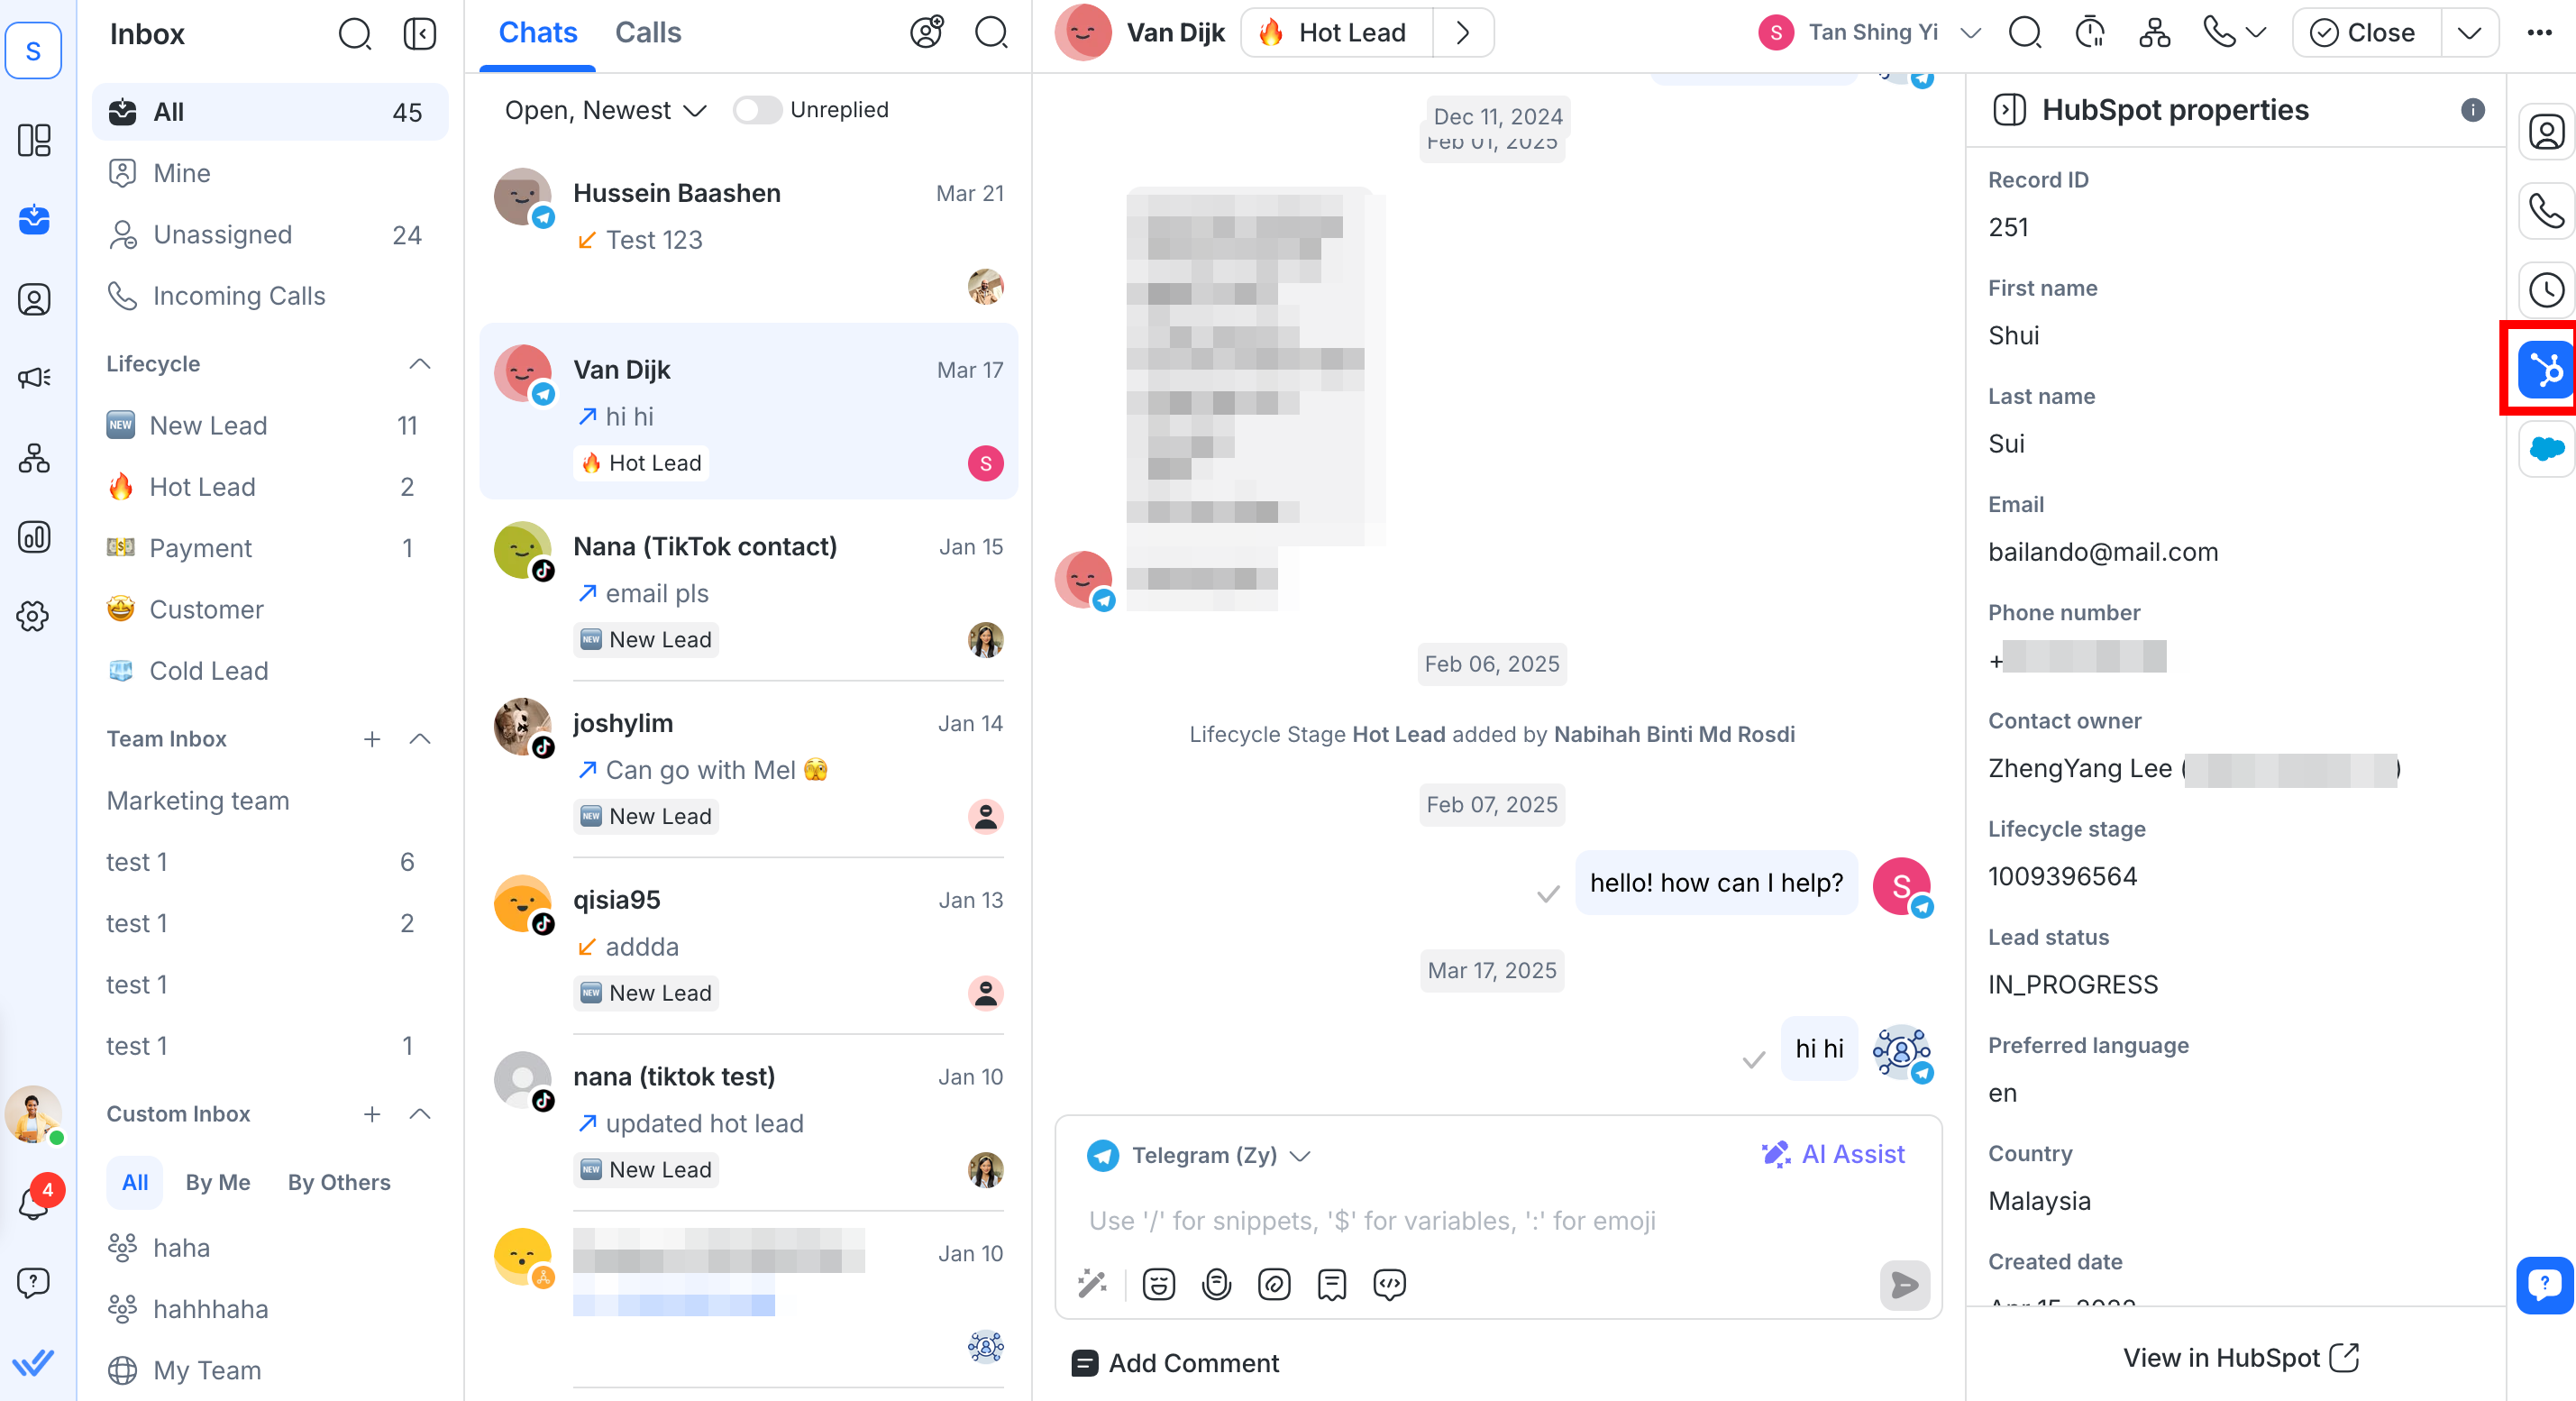
Go to Inbox and click on a Contact to view their HubSpot properties in the right sidebar.
Contacts module
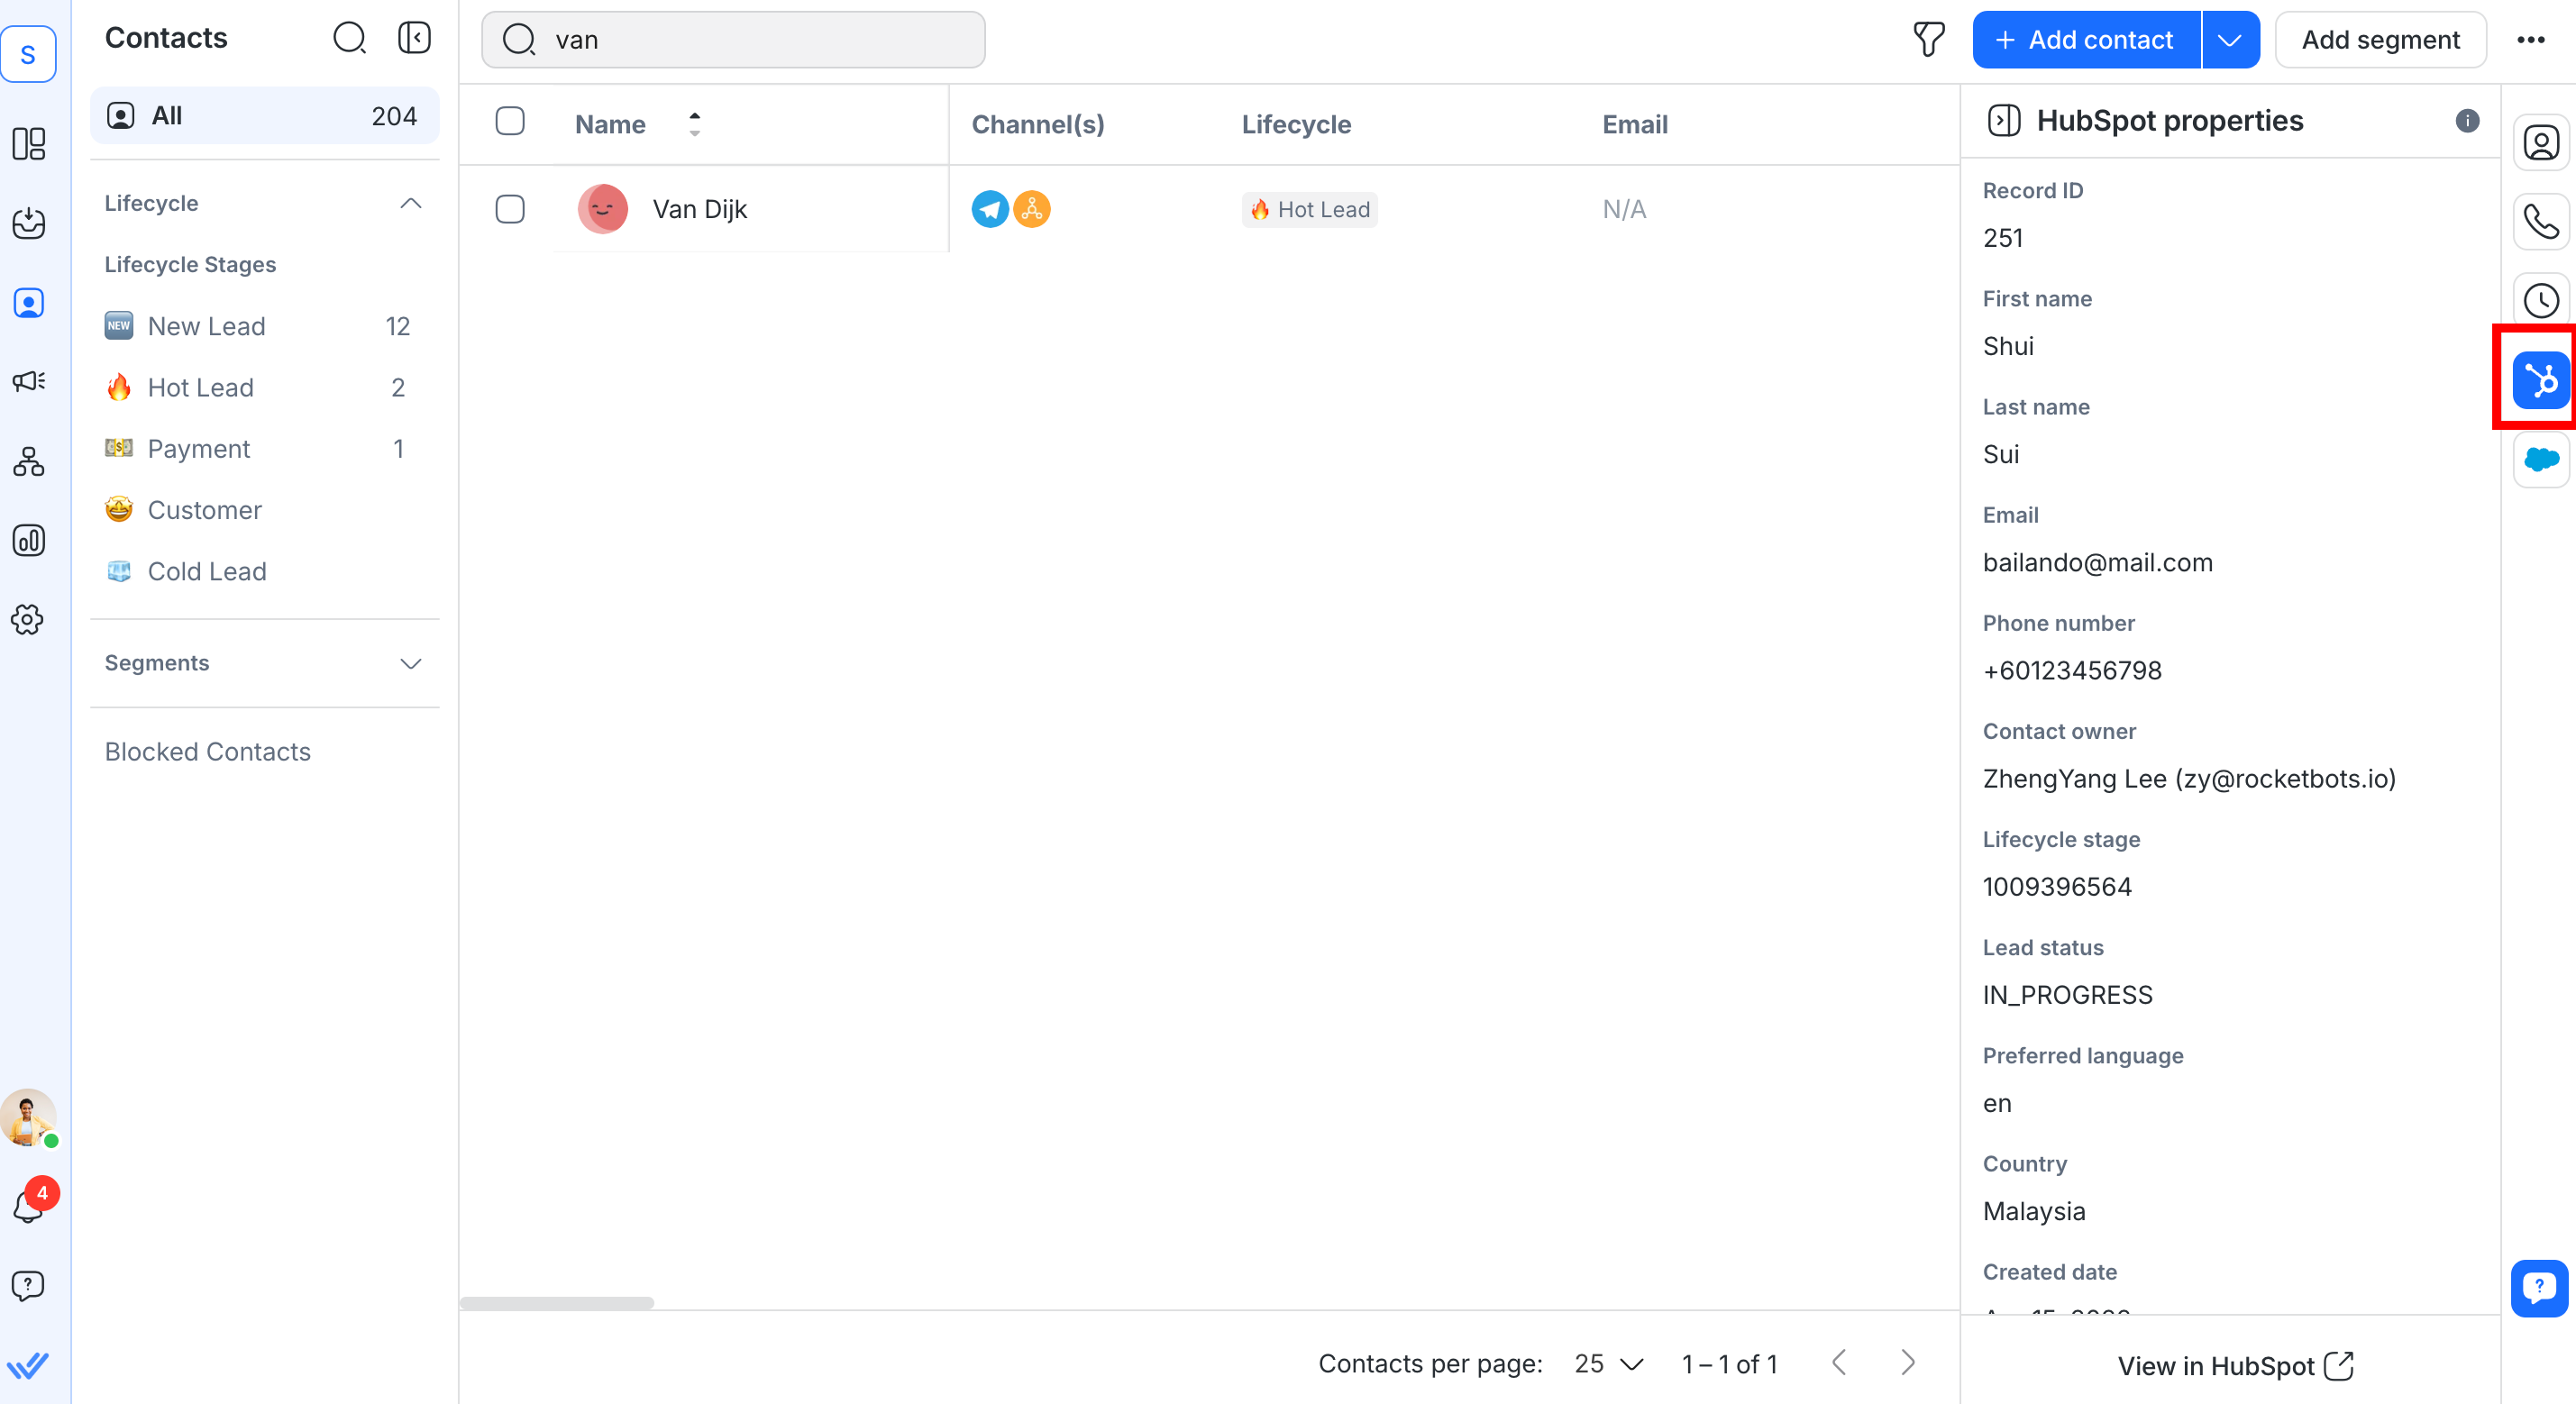
Go to Contacts and click on a Contact to view their HubSpot properties in the right sidebar.
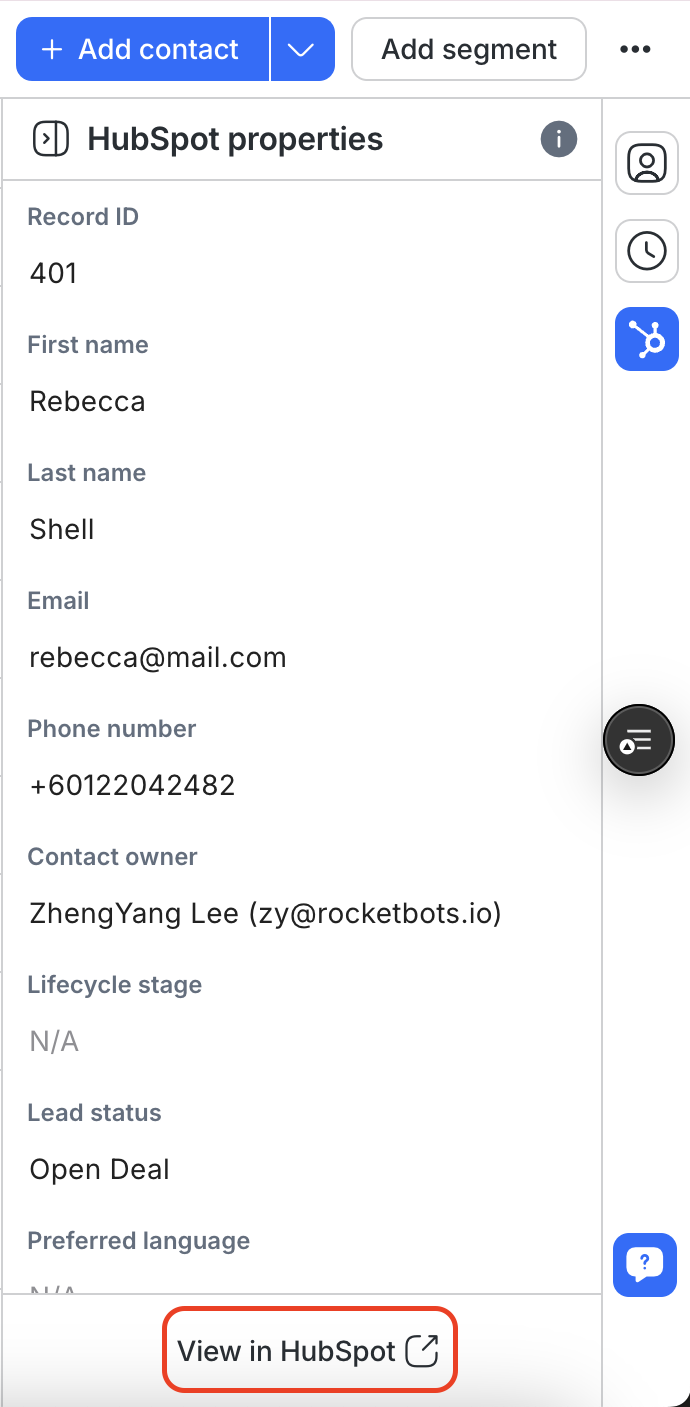
For both the Inbox and Contacts modules, if no match is found, you can verify and update the contact’s email or phone number.
You can then click View in HubSpot to open the Contact’s profile directly in HubSpot.
Selecting and Editing HubSpot Contact Properties in respond.io
You can now customize which HubSpot contact properties are visible in your respond.io workspace and directly edit selected properties within respond.io.
If you already have a HubSpot account connected in respond.io, you’ll need to refresh permissions to enable these updates.
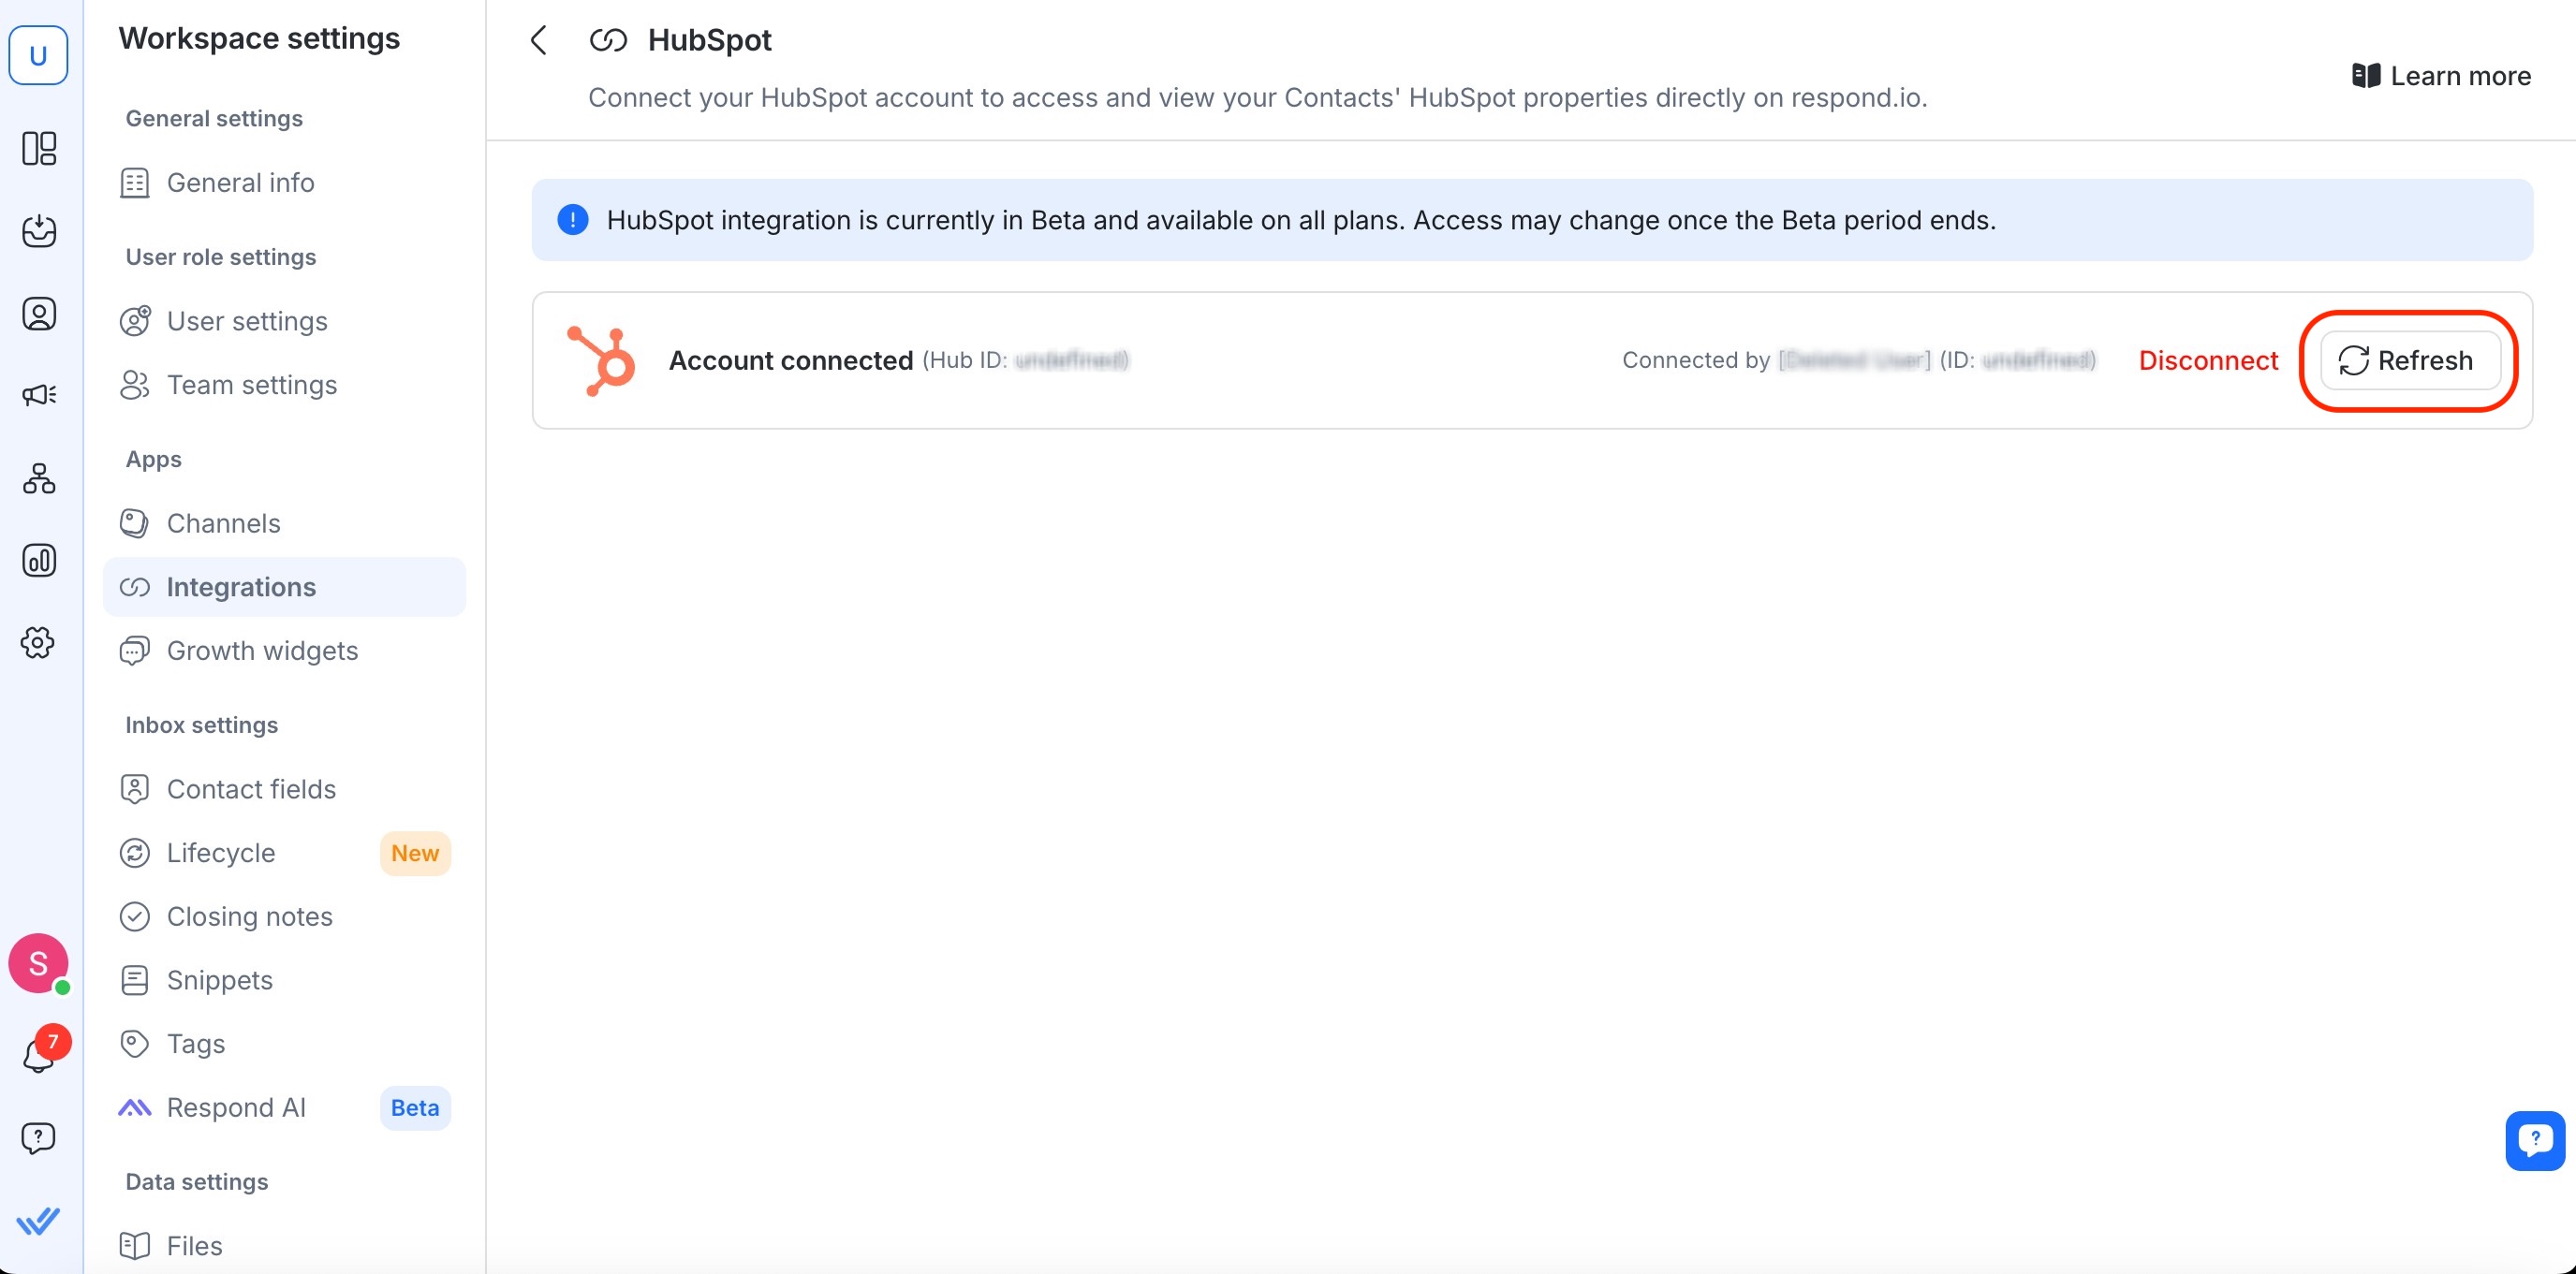
Go to Workspace settings > Integrations
Select HubSpot
Refresh your access token
Selecting HubSpot Contact Properties
Navigate to Workspace settings > Integrations
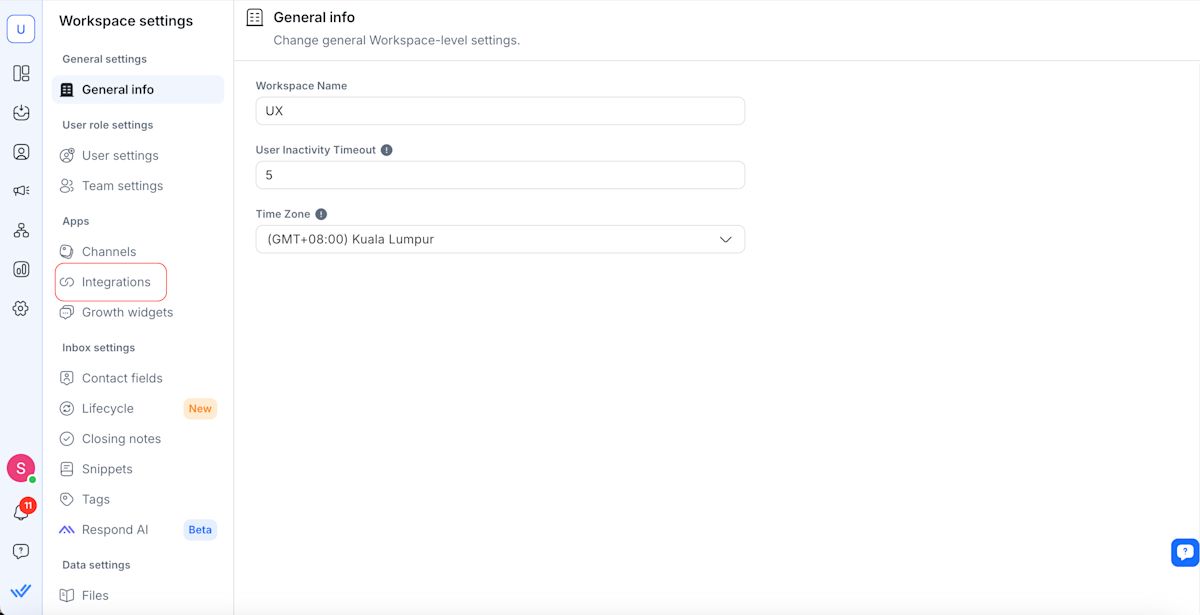
Click Manage next to HubSpot.
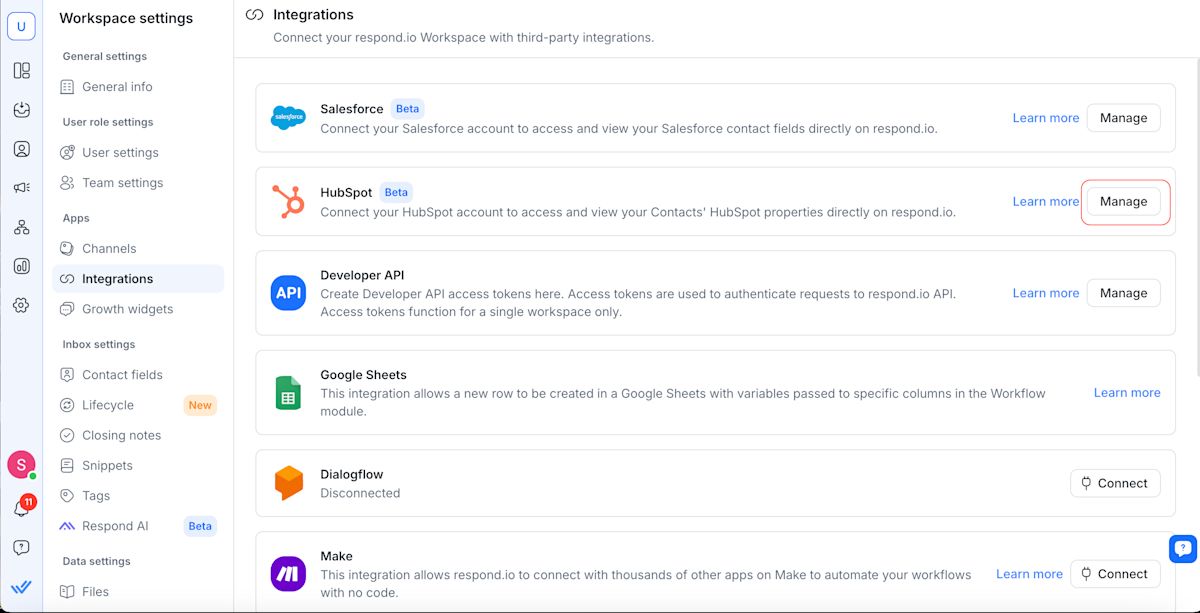
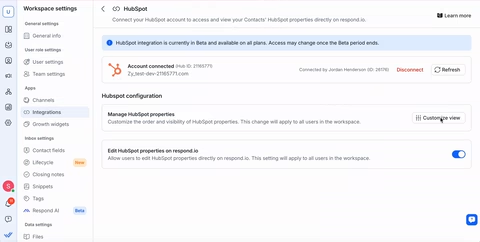
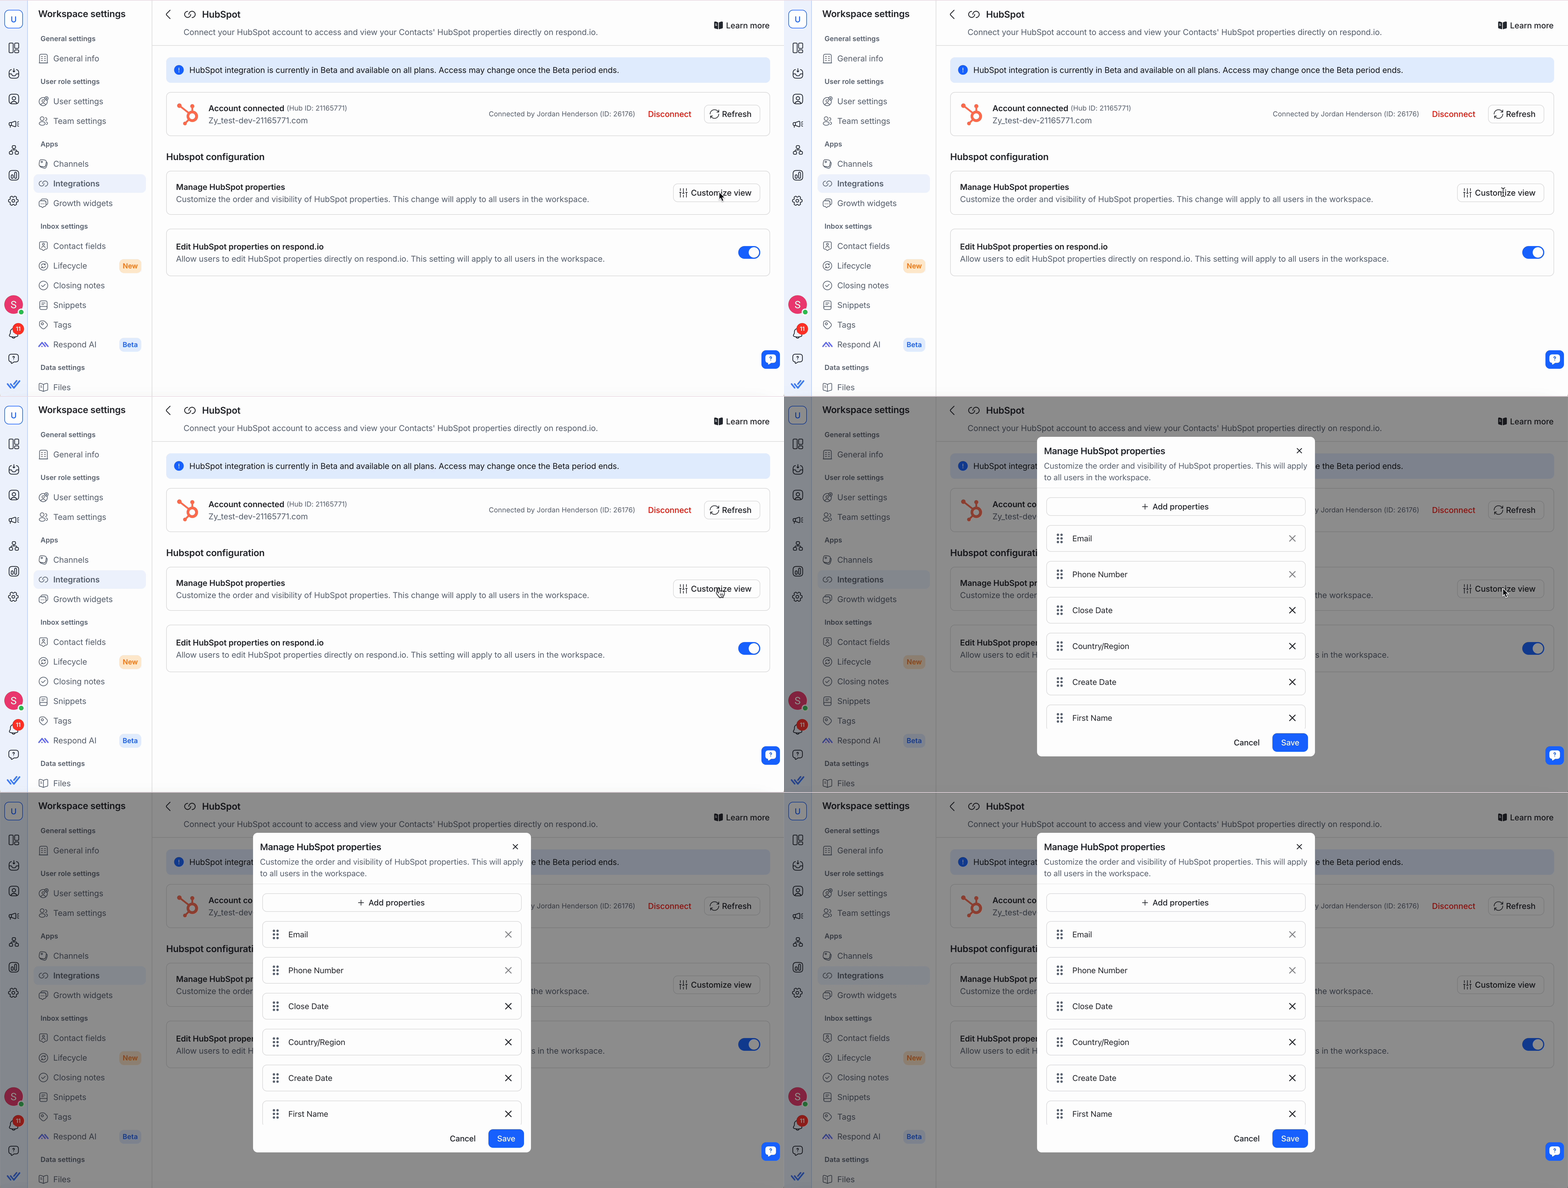
Under Manage HubSpot Properties, click Customize view to choose which contact properties to display in the Inbox and Contacts modules on respond.io.
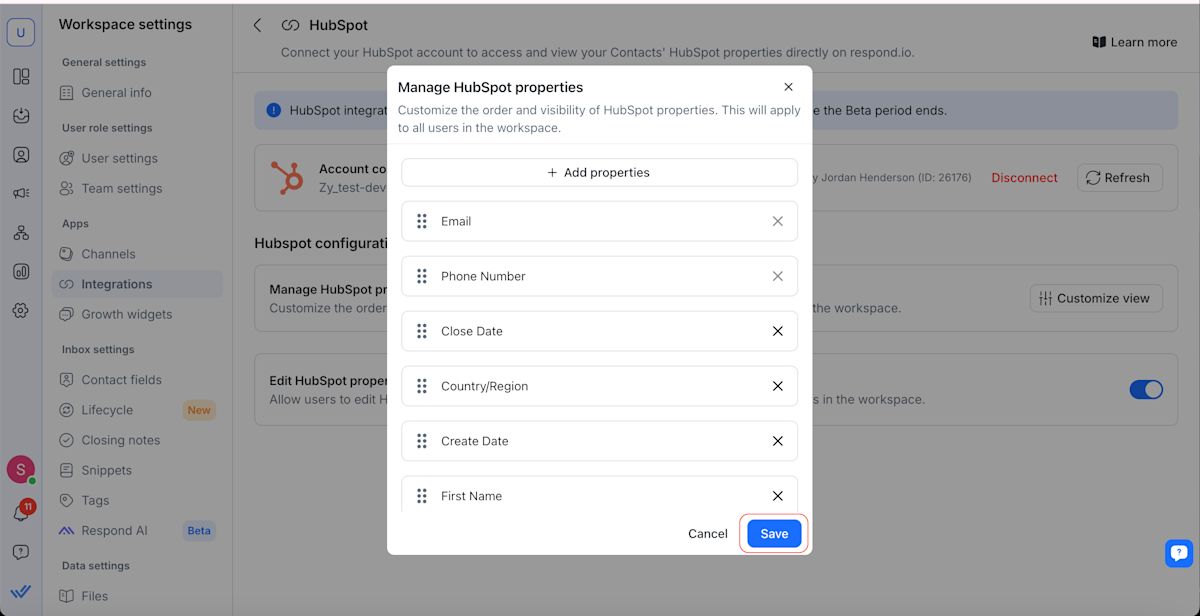
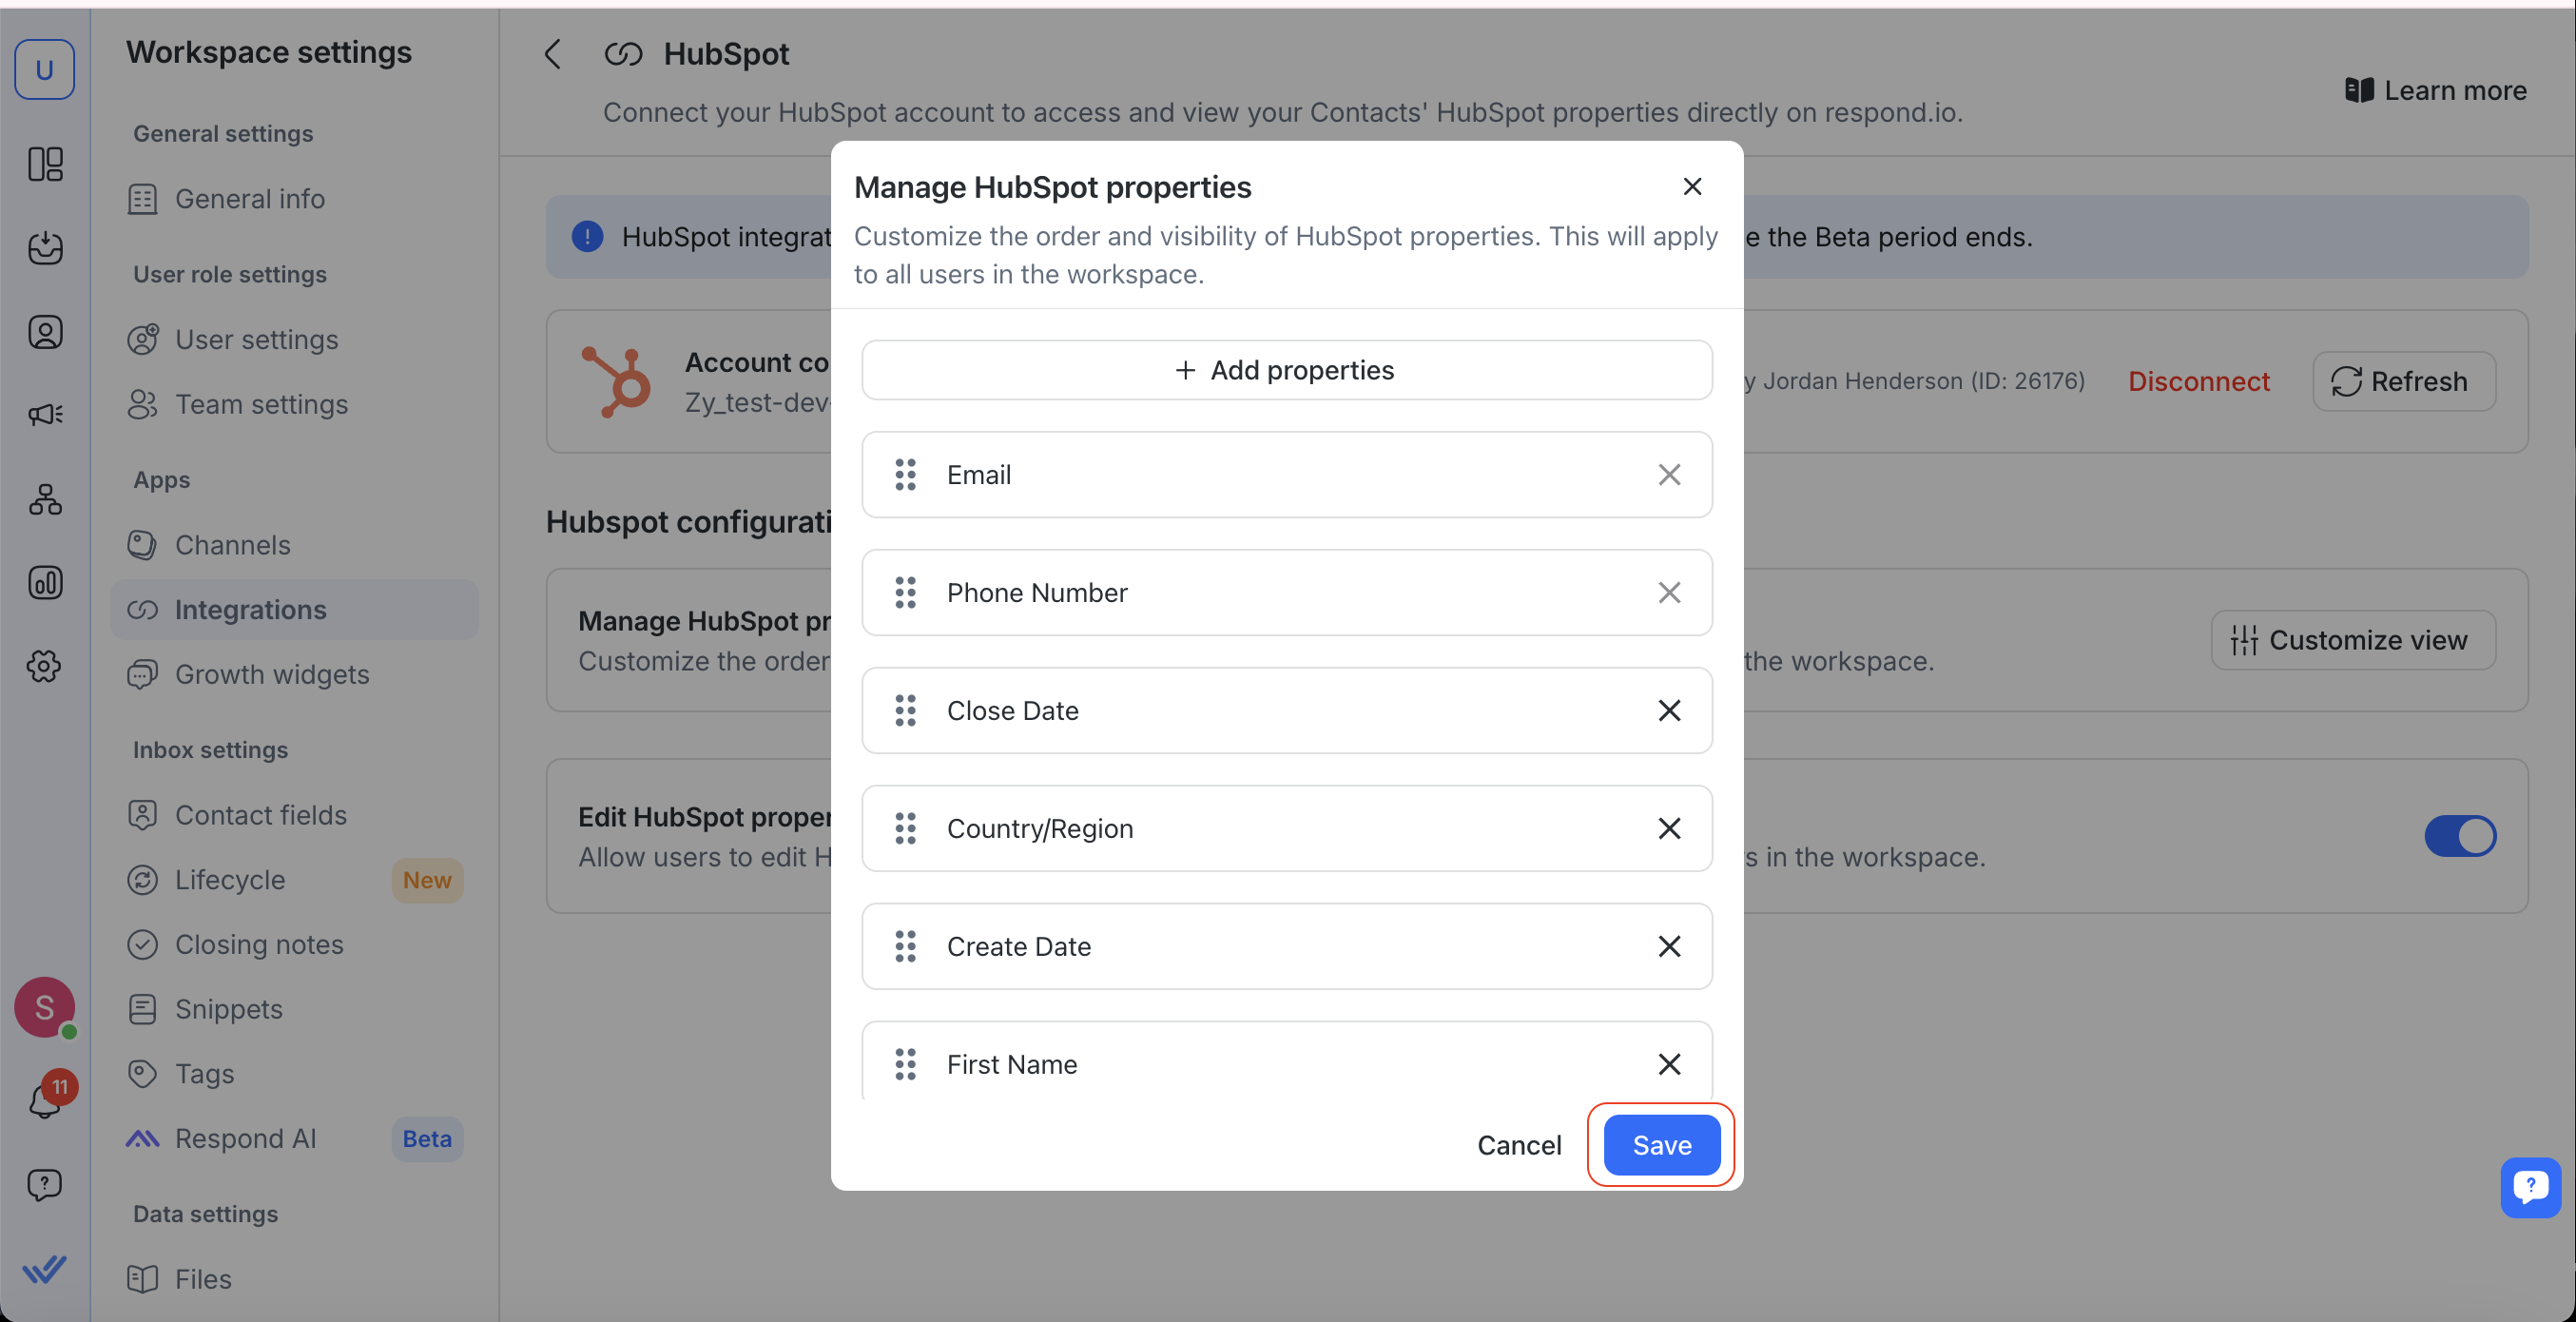
Click Save to apply your settings.
Editing HubSpot Contact Properties
You can now edit certain HubSpot contact properties directly within respond.io.
To enable this feature, go to Manage HubSpot properties and turn on the toggle. Once enabled, all users in your workspace will be able to edit the selected HubSpot properties from respond.io.
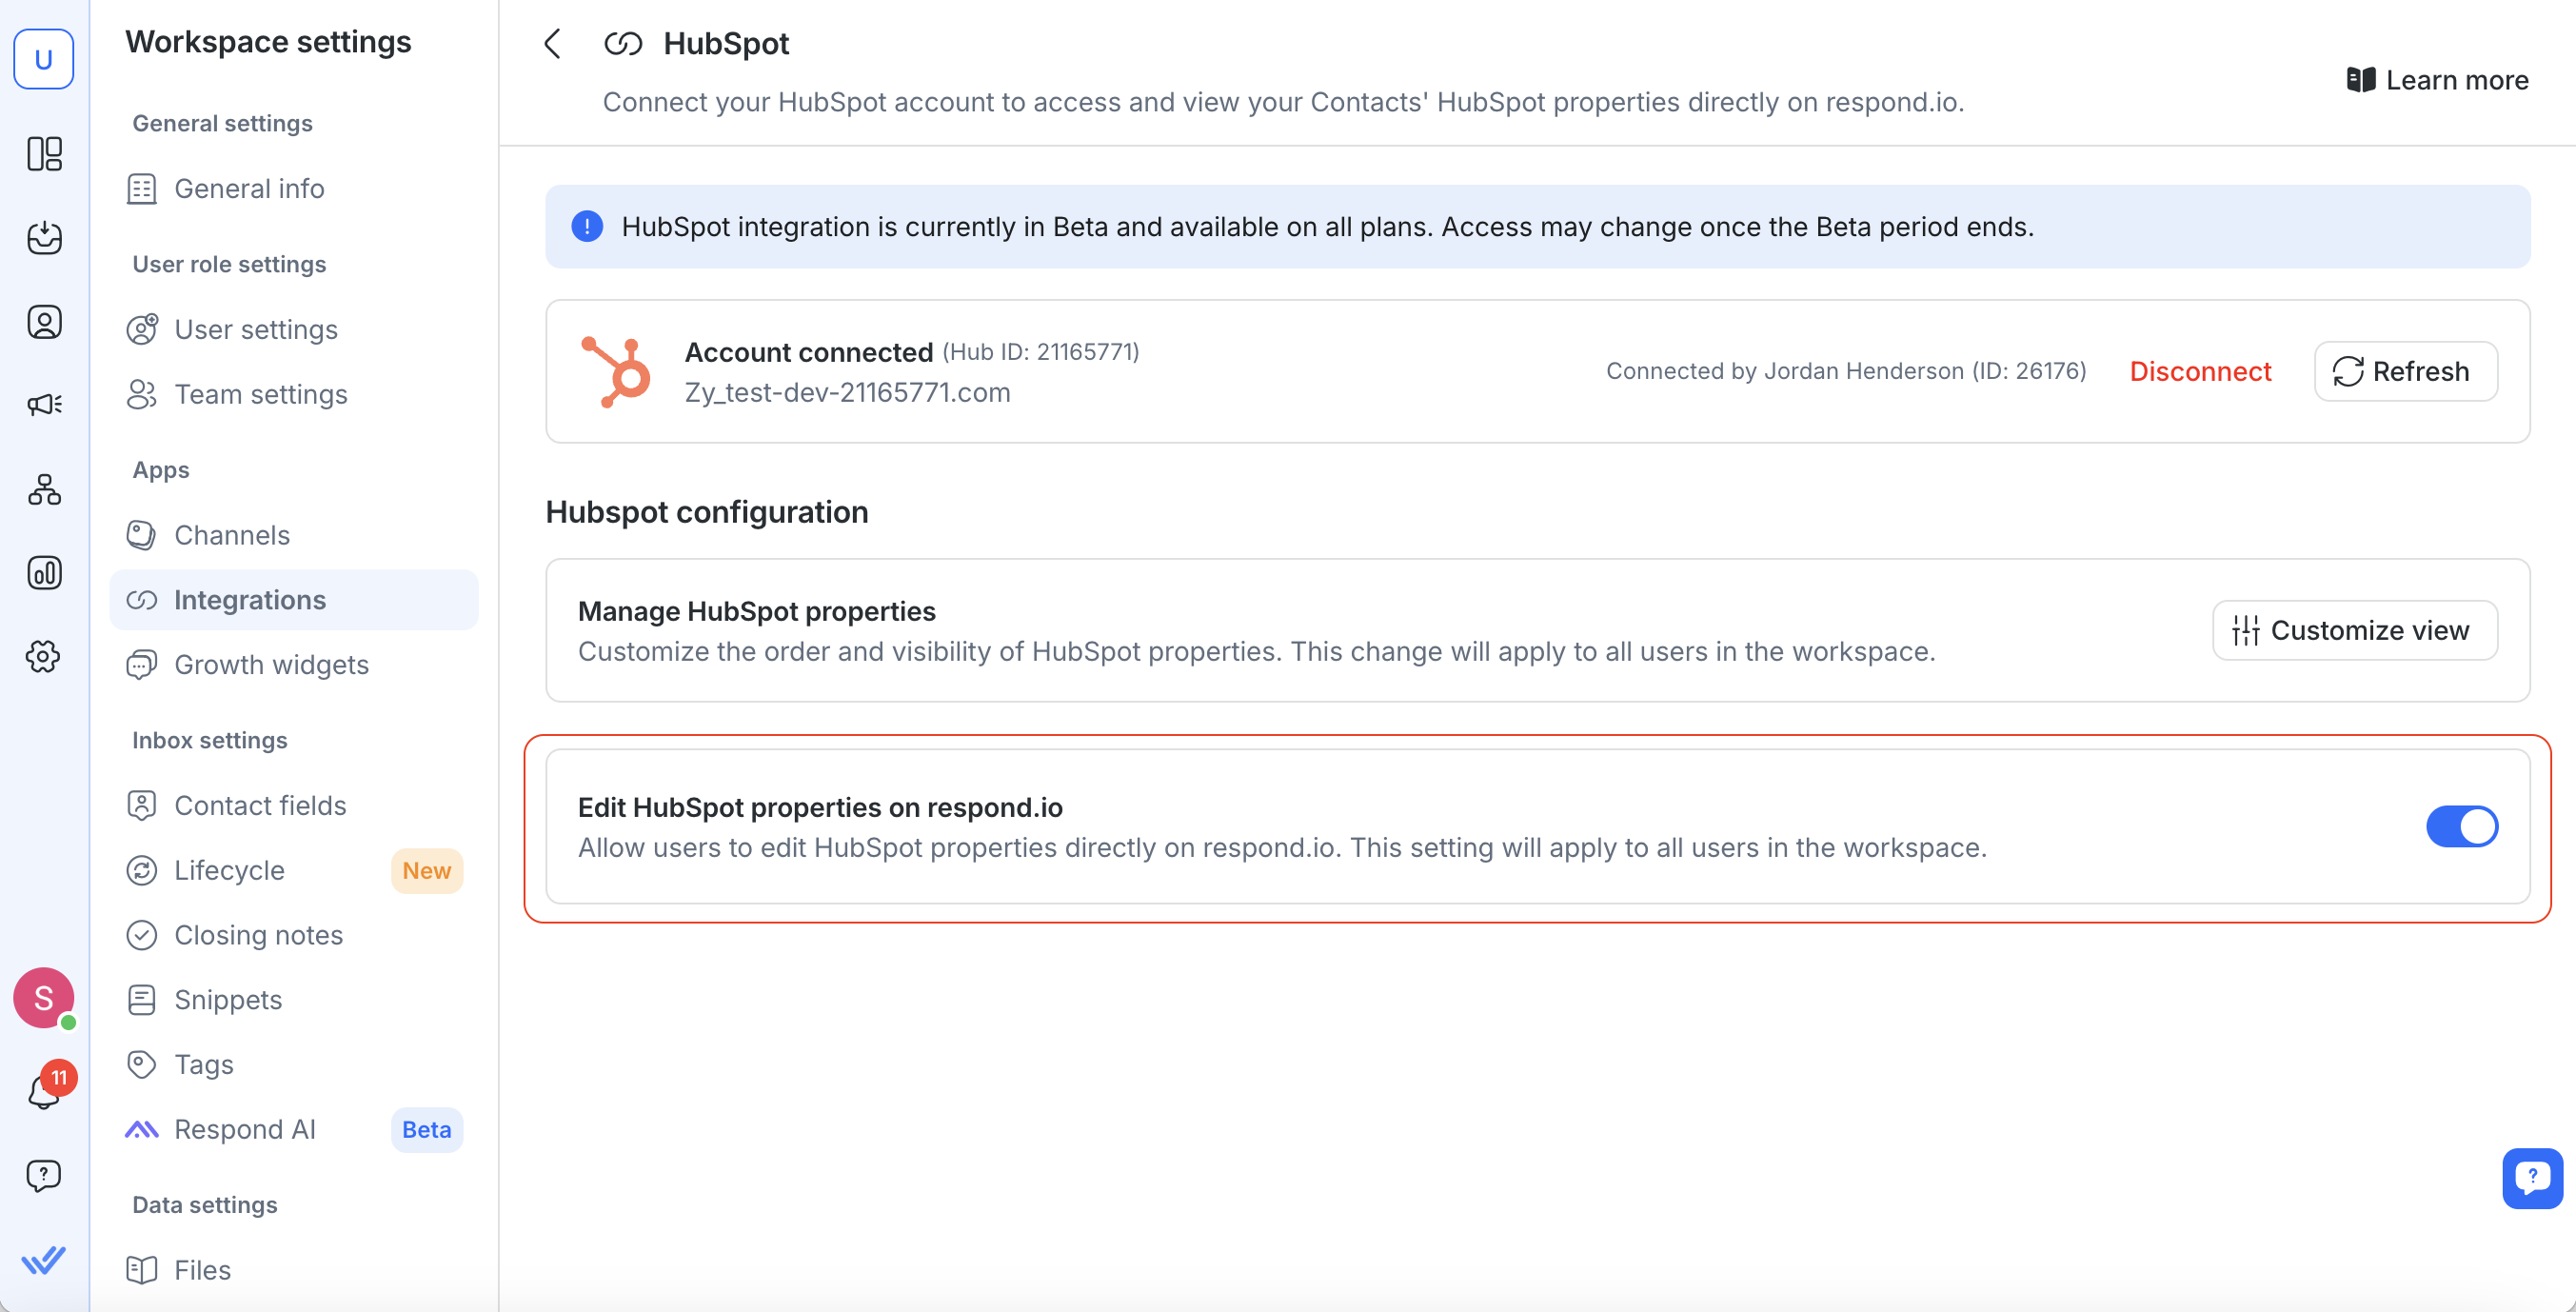
Non-editable fields remain read-only and must be updated directly in HubSpot.
Important Notes:
Email and Phone Number fields are non-editable.
Ensure you have proper permissions in both respond.io and HubSpot to edit fields.
If changes do not appear immediately, refresh your page after 1 minute due to API caching.
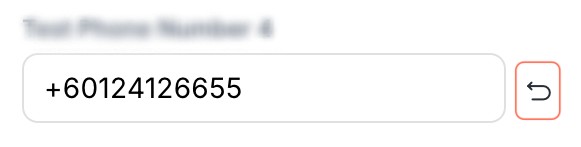
To discard changes, select the Restore icon next to each editable field. This can be accessed in both the Inbox and Contacts module.
Inbox module
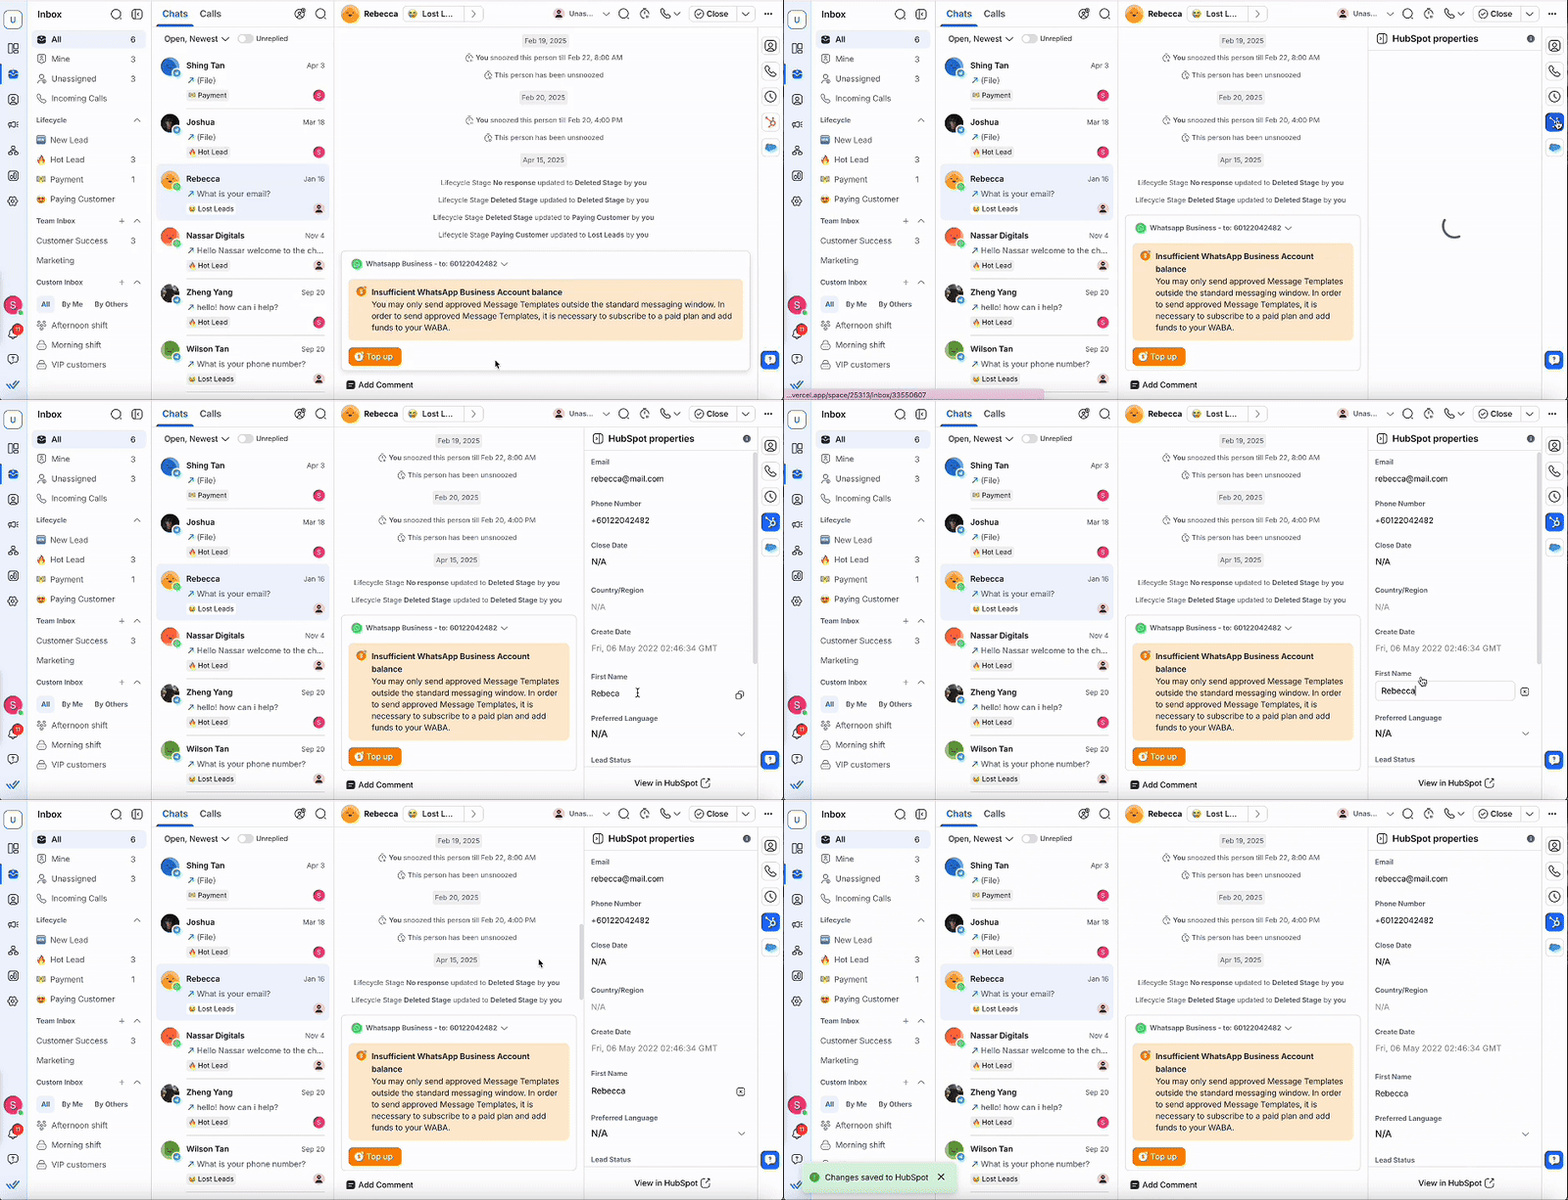
Go to the Inbox module and select a contact.
Select the HubSpot icon.
Click on the HubSpot property you want to edit and update the information. Your changes sync immediately to HubSpot.
Contacts module
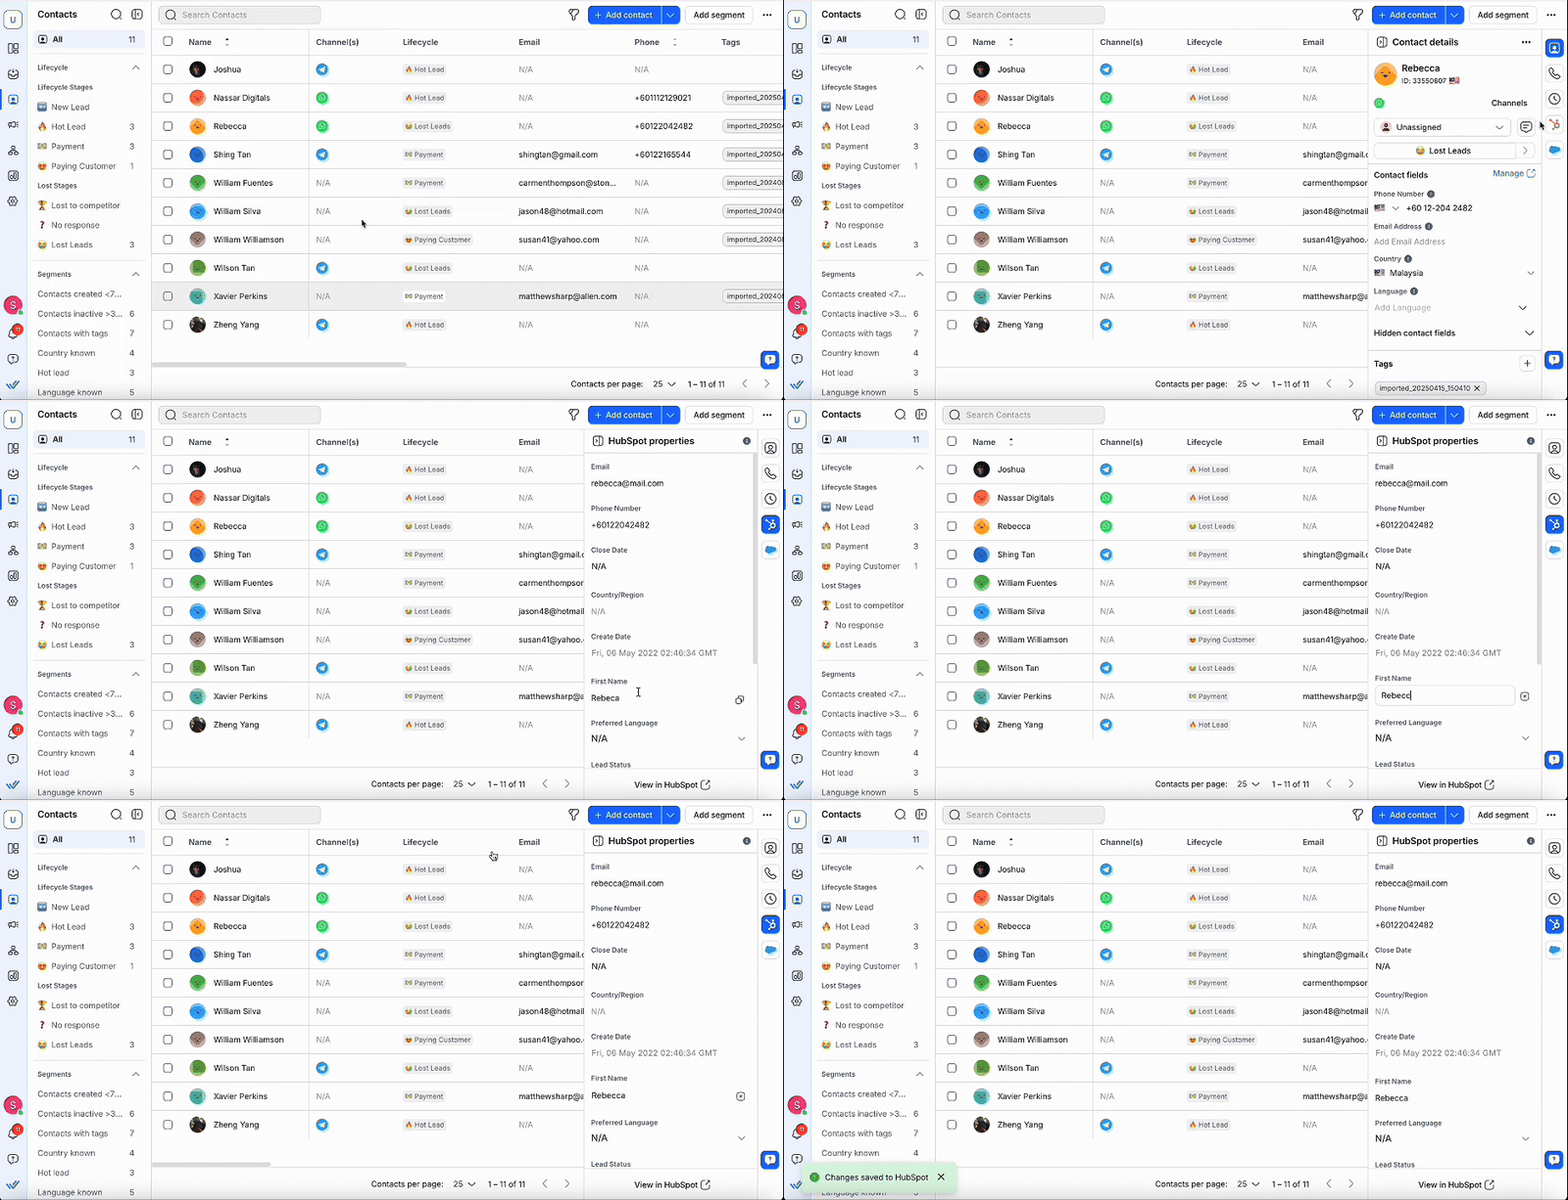
Go to the Contacts module and select a contact.
Select the HubSpot icon.
Click on the HubSpot property you want to edit and update the information. Your changes sync immediately to HubSpot.
Creating HubSpot contacts automatically
Any new contact created in HubSpot will also be automatically created in respond.io, ensuring that your CRM and messaging platform are always in sync. This improves workflow efficiency and helps you respond to new leads faster.
Note: This feature only applies to new contacts added in HubSpot after enabling the setting. Existing HubSpot contacts will not be created automatically on respond.io. To sync existing HubSpot contacts, import them manually into respond.io.
How to Enable
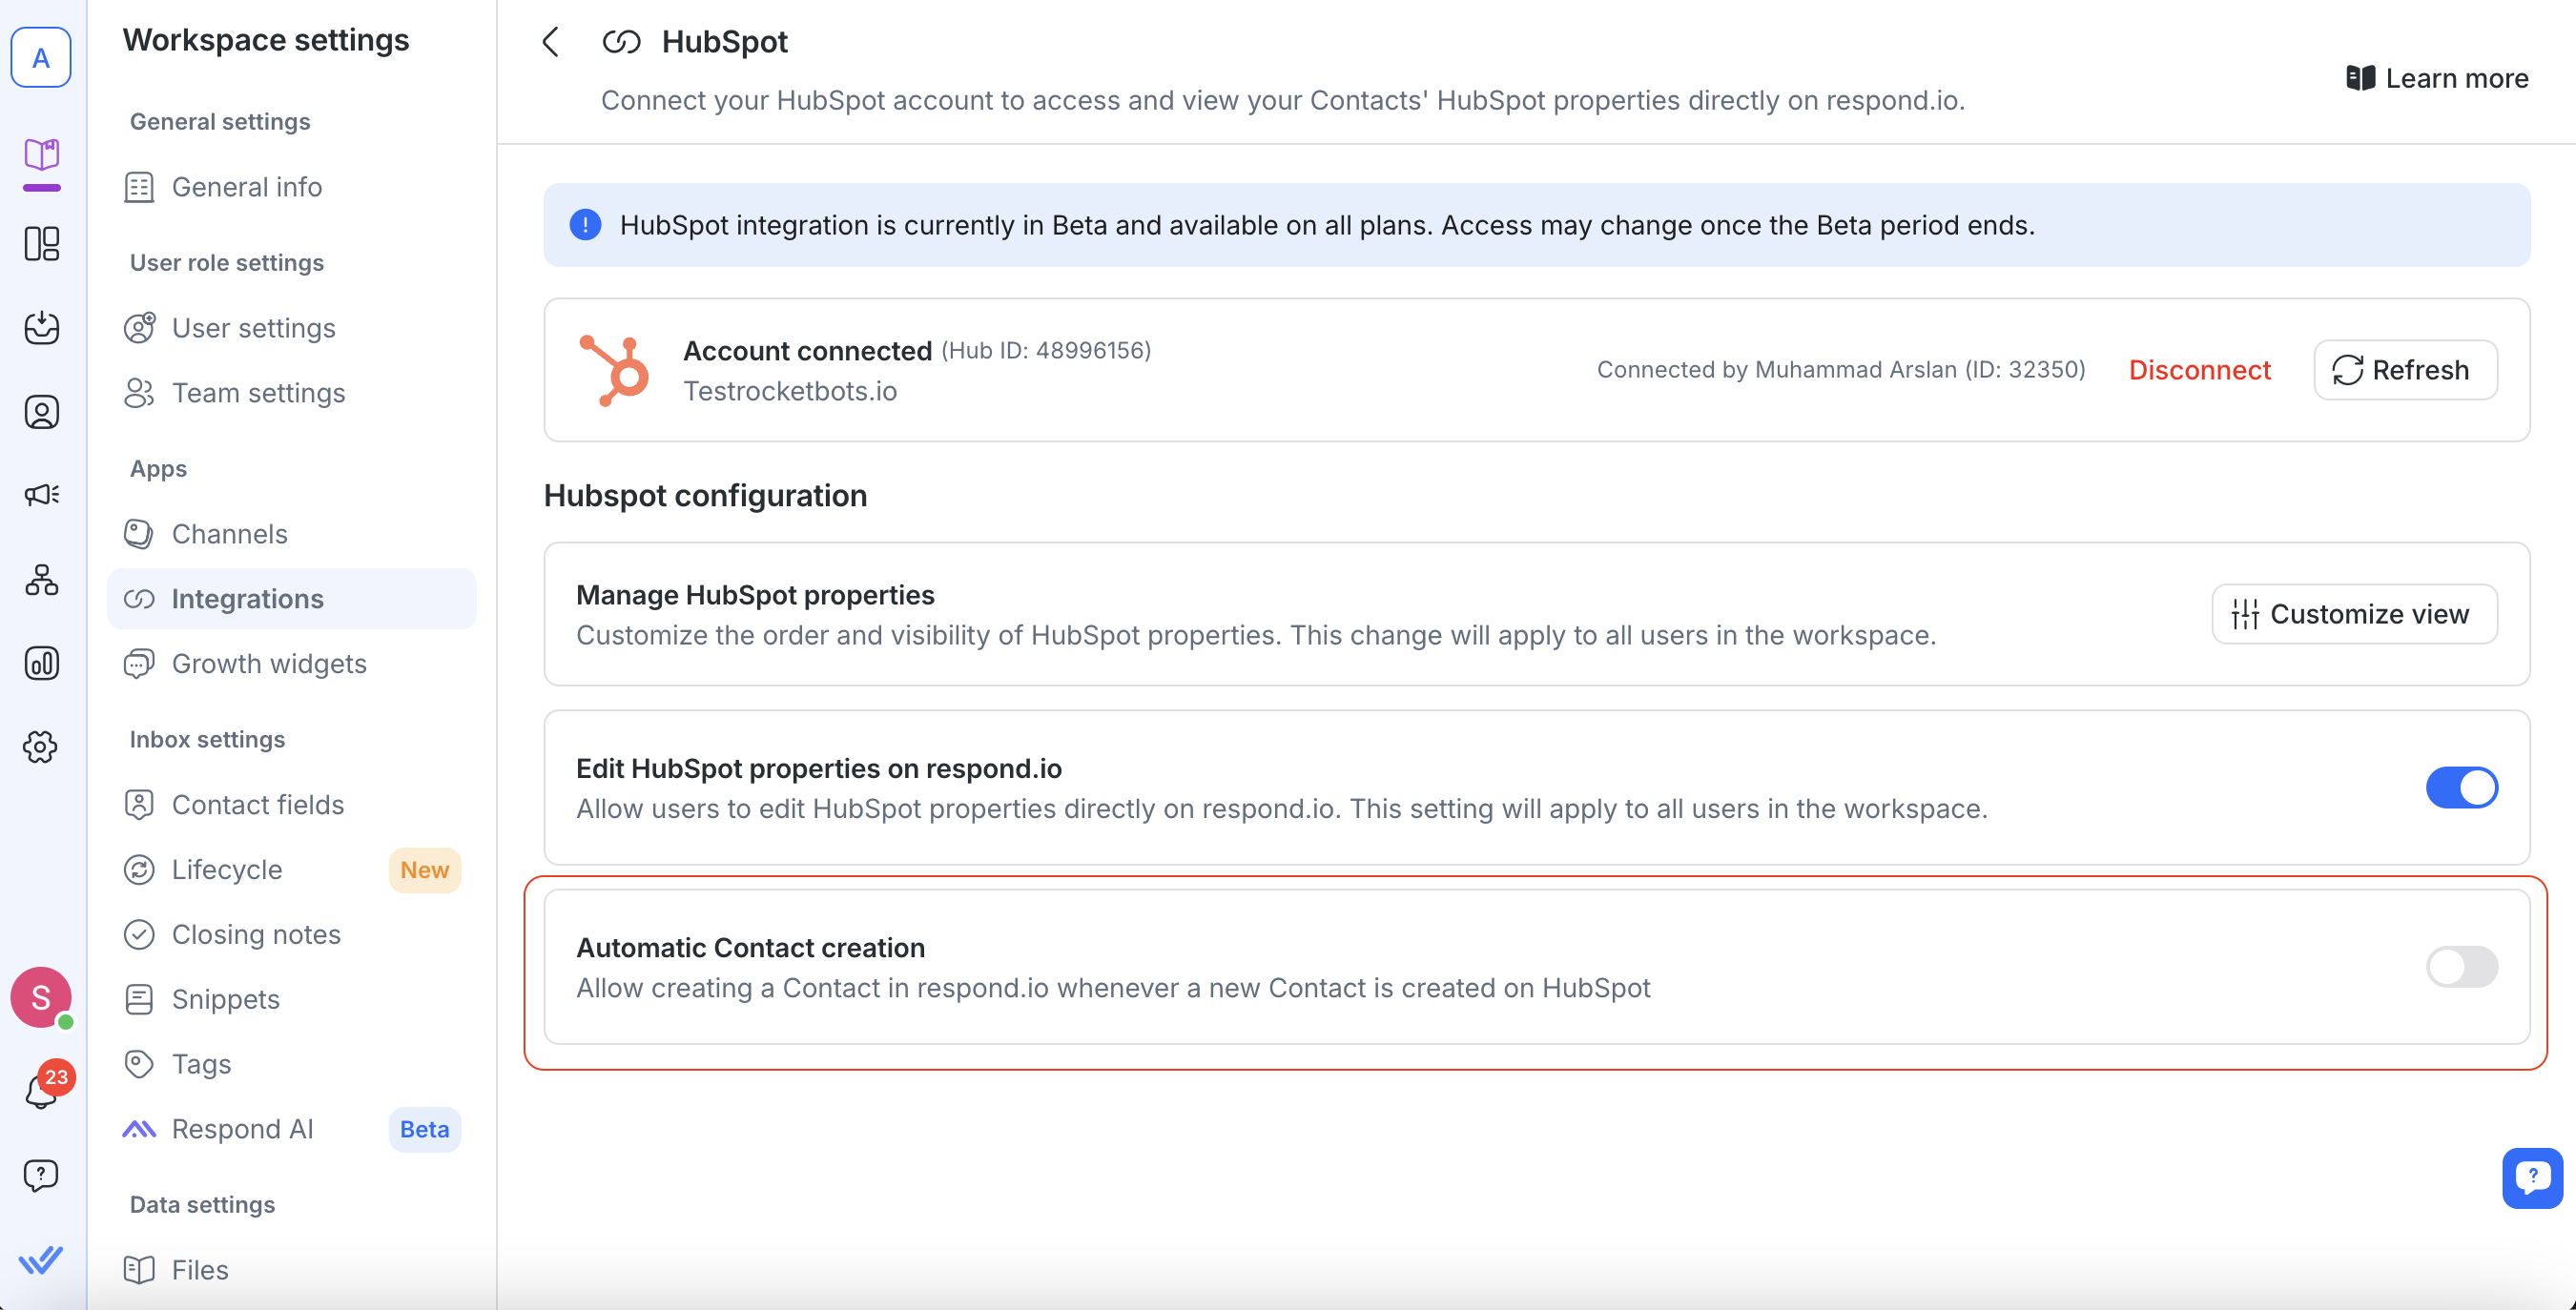
To set it up:
Go to Workspace Settings > Integrations > HubSpot.
Turn on the Create Contacts automatically toggle.
Optional Settings
Two optional checkboxes appear when the main toggle is enabled:
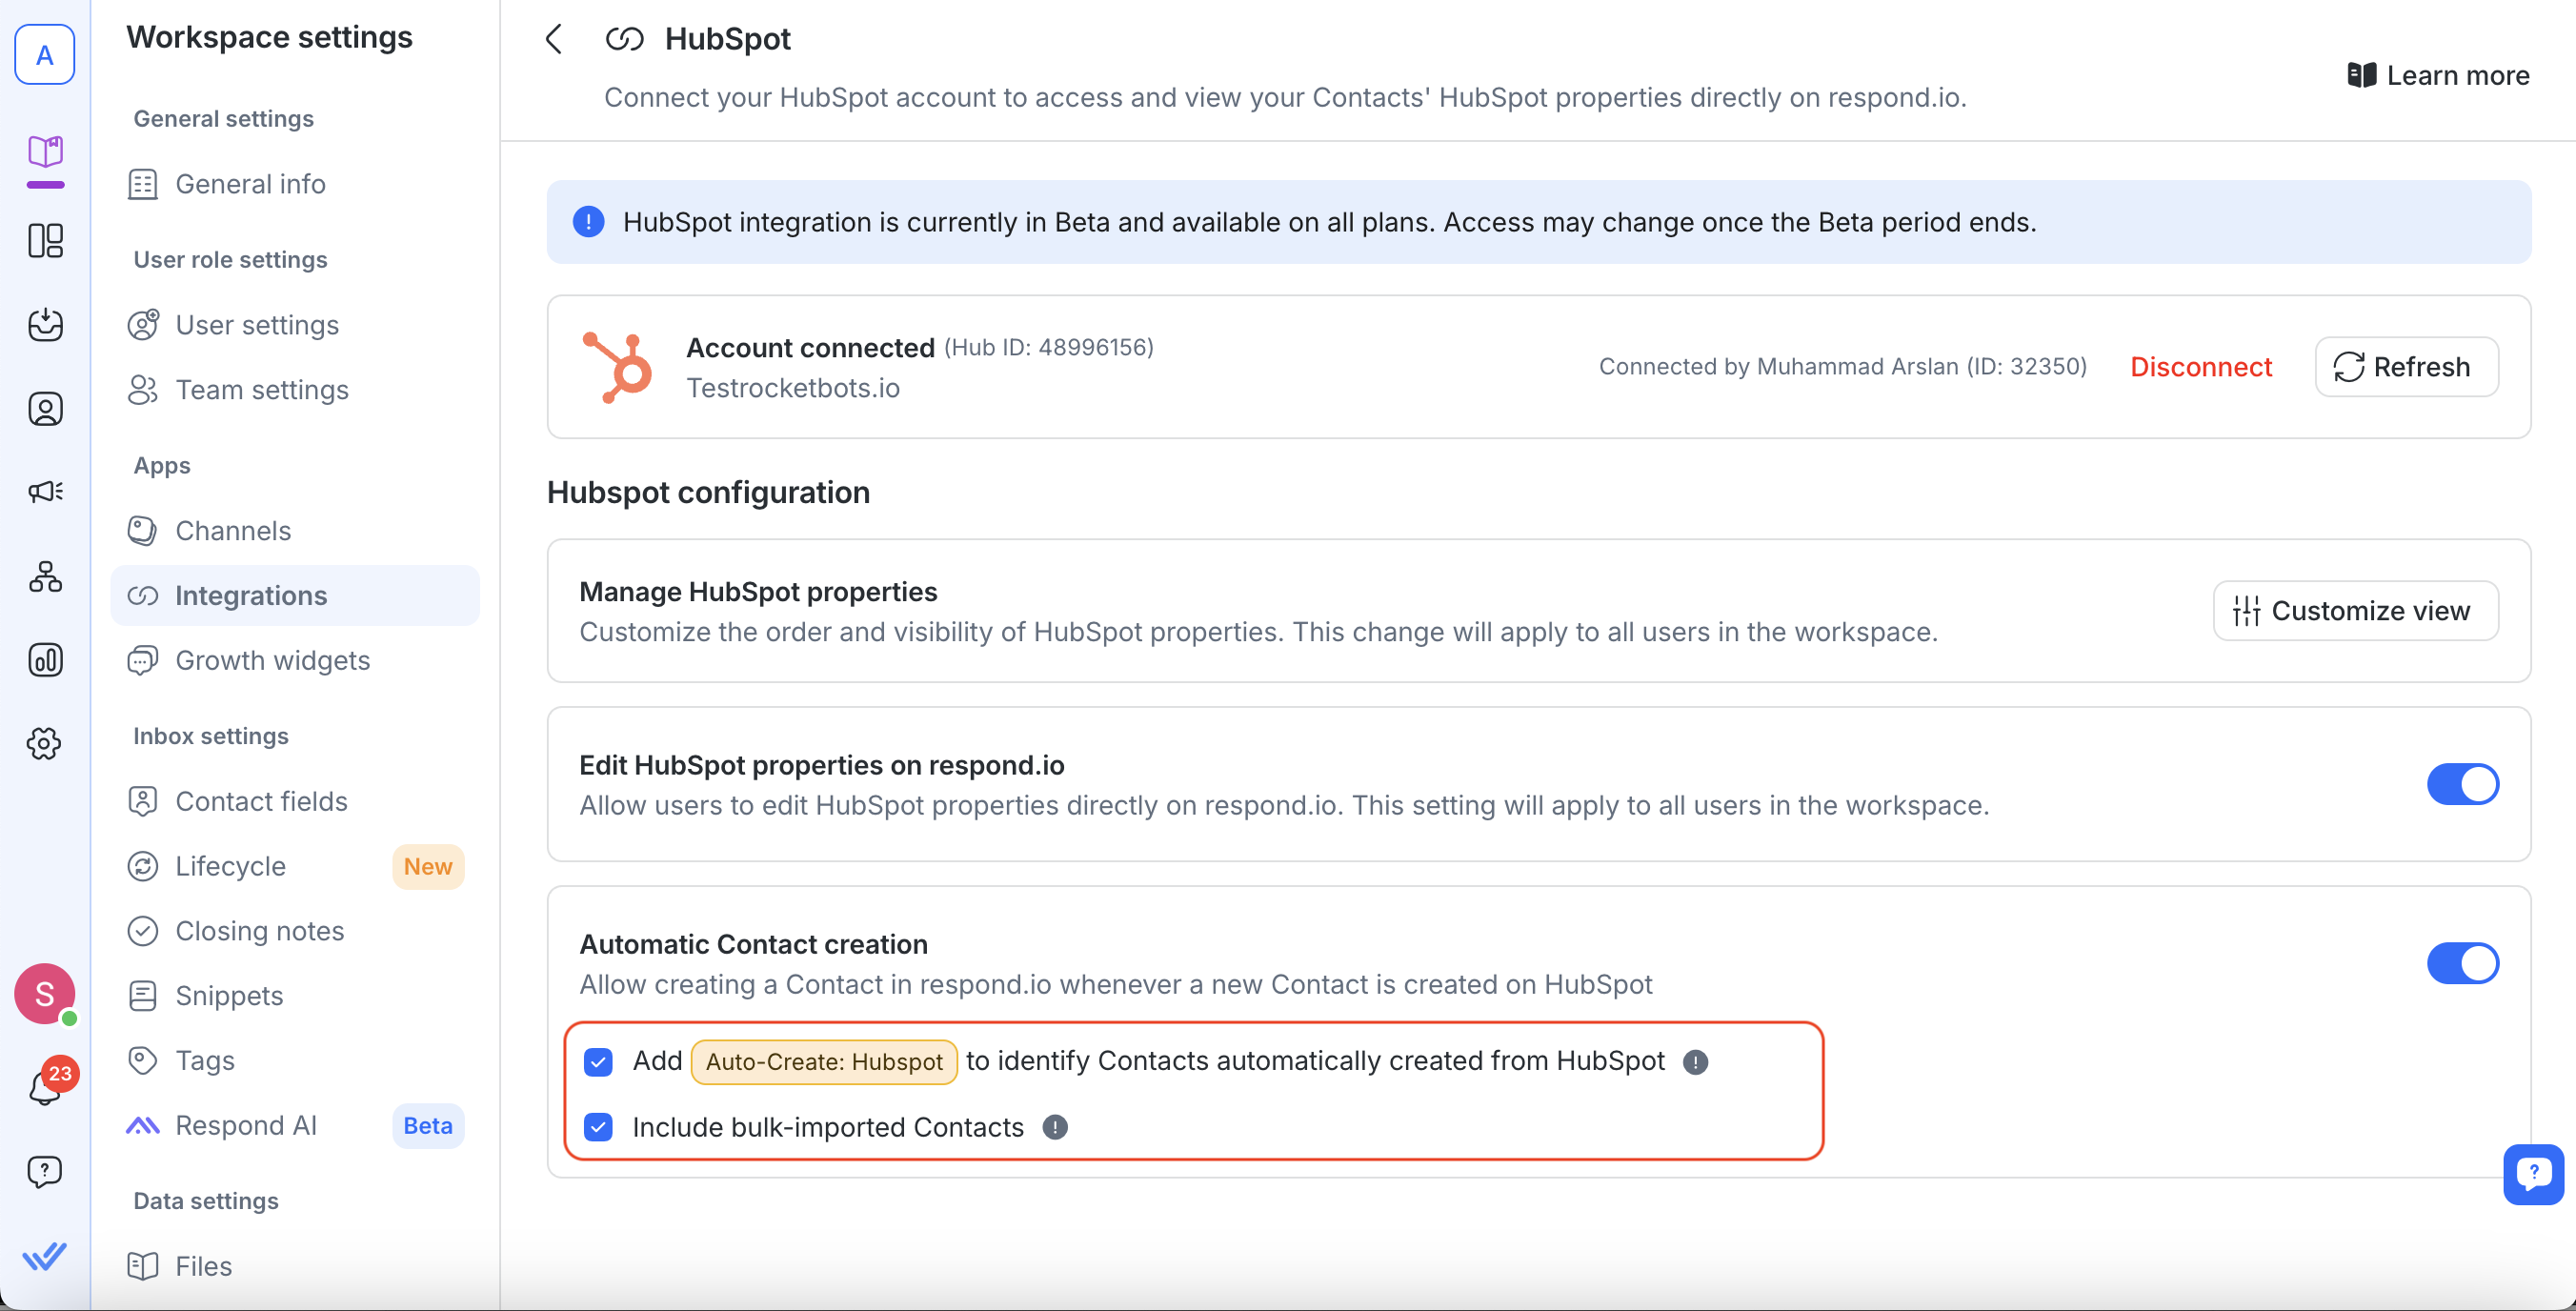
Add “Auto-Create: HubSpot” Tag
Automatically adds a tag “Auto-Create: HubSpot” to Contacts created via this integration.
This helps identify how the Contact was sourced, but will not trigger workflows on respond.io.
The tag is listed in the Tags module and cannot be manually removed or edited.
Include Bulk-Imported Contacts
When selected, Contacts added to HubSpot via Bulk Import will also be created on respond.io.
These Contacts do not count towards MAC (Monthly Active Contacts) and do not trigger workflows unless a conversation is initiated.
FAQ and Troubleshooting
Can I connect multiple HubSpot accounts?
No, each workspace can only connect to one HubSpot account.
Can I edit HubSpot data in respond.io?
Yes, once your Workspace admin enables editing under Manage HubSpot properties. See Editing HubSpot Contact Properties for more details.
Why am I not seeing recent edits from HubSpot in my respond.io Workspace?
Editing Contact fields is only supported from respond.io to HubSpot. Edits made directly in HubSpot will not be reflected in respond.io.
If you'd like to see HubSpot to respond.io field sync supported, you can upvote the feature request here.
What if I disconnect the integration?
Disconnecting will remove access to HubSpot properties in respond.io. You’ll need to reconnect to view HubSpot properties in respond.io again.
Why can’t I view my HubSpot contact properties in respond.io?
If you can’t view your HubSpot properties in our Inbox or Contacts module, check that their email or phone number in respond.io exactly match those in HubSpot. Even minor differences, such as spaces or special characters, can prevent properties from being displayed.
For example, if a phone number is stored as “12 3” in HubSpot but as “123” in respond.io, that Contact’s information won’t be displayed in respond.io. To fix this, update the contact property in HubSpot to match the format used in respond.io.
Can I connect multiple workspaces to the same HubSpot account?
Yes, you can. However, if the same user connects multiple respond.io workspaces to the same HubSpot account, they will share the same refresh token.
If HubSpot is disconnected from one of these workspaces, the refresh token will be deleted, affecting all other connected workspaces. This is a HubSpot behavior.
If you need to disconnect a workspace, we recommend reconnecting the integration in any affected workspaces immediately after.
Why weren’t my existing HubSpot contacts created in respond.io after enabling automatic creation?
The automatic Contact creation feature only works for new HubSpot contacts added after it’s turned on. Existing HubSpot contacts won’t sync automatically, you’ll need to import them manually.


