Managing Contacts in the Inbox helps you keep customer information accurate and organized while staying focused on your conversations. This article explains how to create new Contacts, search for Contacts, messages and comments, perform Contact actions, and view key details in the vertical sidebar.
Create a new Contact
Agents can create individual Contacts from the Inbox module.
To create a new Contact:
Click the Create new Contact button next to the search and filter bar.
Fill in basic information such as name, phone number, and email.
Select Create.
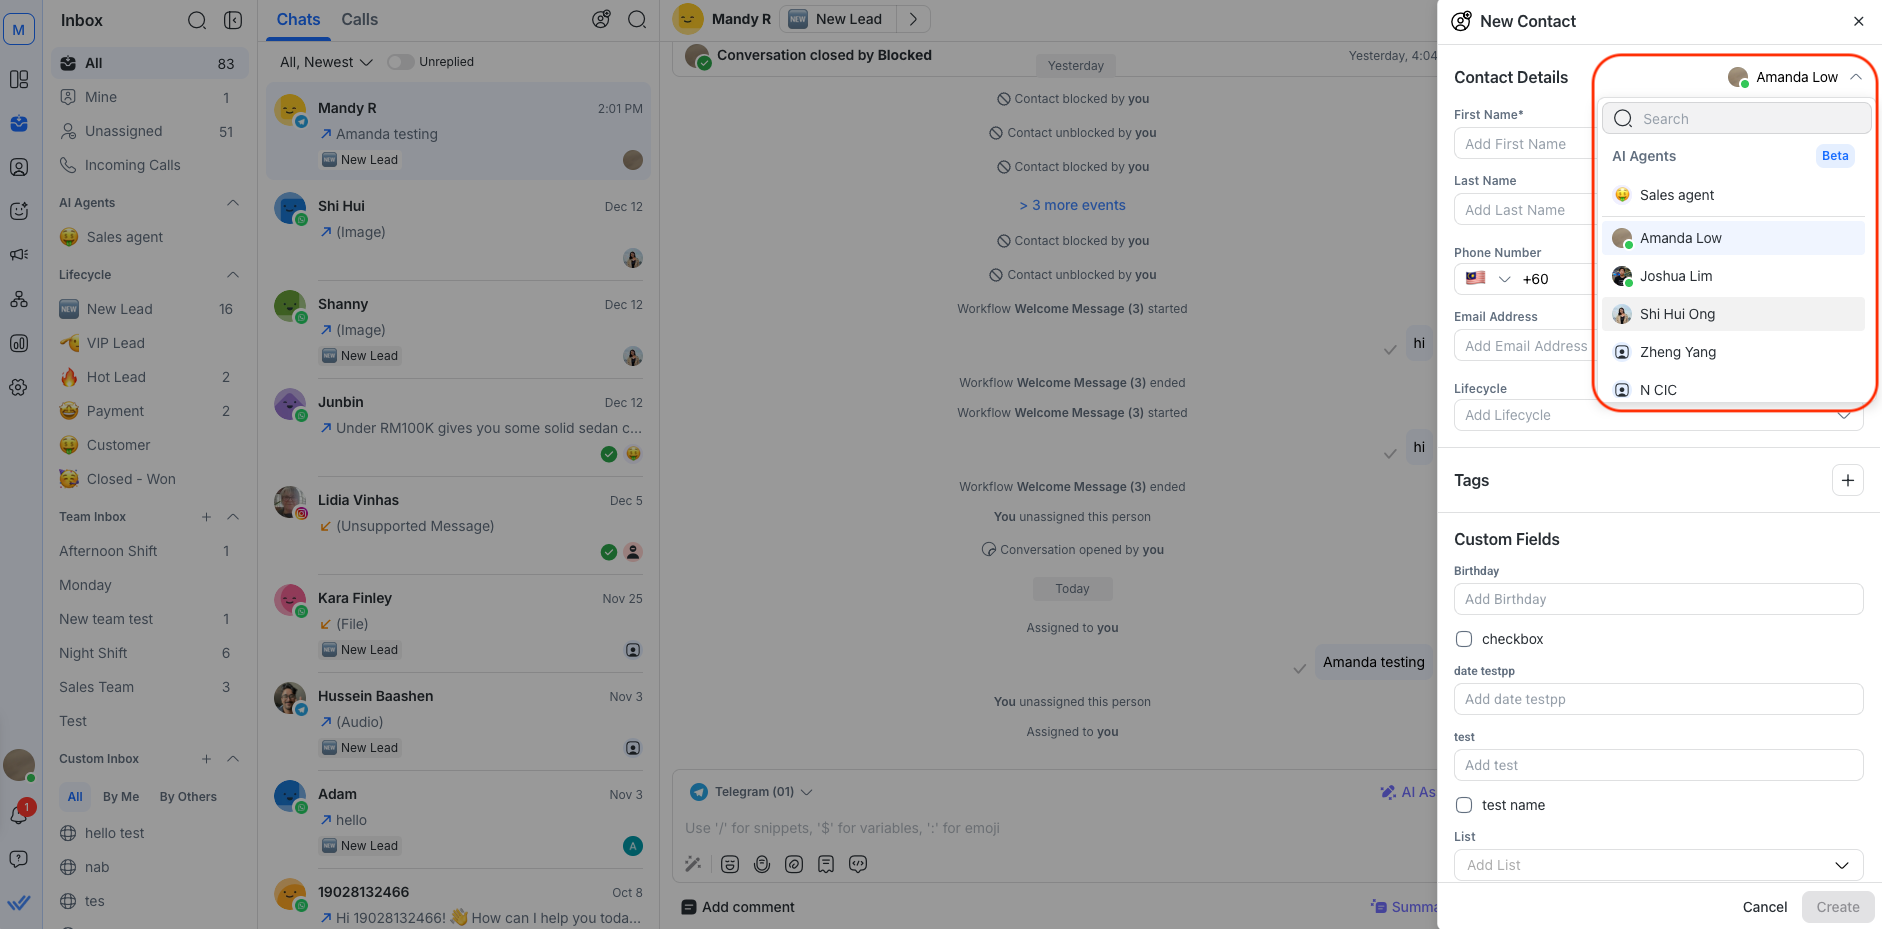
Assign during Contact creation
Optionally, while creating a Contact, assign the Contact to a teammate or an AI Agent.
Search in the Inbox
The Inbox includes a search feature designed to help find information quickly and work more efficiently.
Search for Contacts
Search for specific Contacts directly in the Inbox.
To search for a Contact:
Click the search icon next to the Create new Contact button.
Click the Contacts button below the search bar.
Type the keyword in the search bar.
Search for a Contact using their first name, last name, phone number, email or custom field values (except checkboxes).
Search behavior for Contacts
Contact search behavior depends on the field being searched.
Partial search
Partial search returns Contacts whose searchable fields start with the search term.
For example, searching “car” returns “Carlos” and “Carter”, but not “Scarlet” or “Oscar”.
The following Contact fields are included in partial search:
First name
Last name
Phone number
Email address
Exact match search
Exact match search applies to custom fields and only returns results when the search term exactly matches the field value.
Checkbox, date, and time fields are excluded from exact match search.
Limitations for Contact search
The following Contact fields can’t be searched:
Country
Language
Gender
Assignee
Conversation Status
Checkbox type (custom field)
Date type (custom field)
Time type (custom field)
Tags
To find Contacts using these fields, use filters instead.
Search for messages or comments across all conversations
Find specific messages or comments directly in the Inbox.
To search for a message or comment:
Click the search button next to the Create new Contact button.
Under the search bar, select the Message button to search for a specific message or the Comment button to search for a specific comment.
Type the keyword in the search bar.
Search starts automatically after entering 3 characters, with the most recent messages or comments shown first.
The messages in text format that can be searched include WhatsApp Templates, quick replies, and story replies.
Search behavior for messages and comments across all conversations
Search messages and comments in conversations in the following ways:
Keyword match: Search for one keyword. For example, searching for “fox” returns conversations that contain the word “fox.”
Phrase match: Search for an exact phrase. For example, searching for “quick brown” returns only conversations with that exact phrase.
Emoji: Search using a single emoji followed by a comma. The search starts only after the comma is entered.
Email address: Search by full email address, partial address, or domain. For example, searching for “@gmail” returns all Gmail addresses.
Numbers: Search for exact or multiple numbers. For example, searching for “016 014” returns conversations that contain either number.
Messages and comments search is not filtered based on inbox, sorting, or conversation status.
Search for messages or comments from a conversation
Search for a specific message or comment within a Contact’s conversation.
To search for a message or comment in a conversation:
Select the Contact.
Click the search button at the top right.
Enter the keyword in the search bar.
Use the arrows or the search results dropdown to navigate through the search results in the conversation.
Search behavior for messages or comments from a conversation
Here’s what to know for search behavior in a Contact’s conversation:
Recent searches appear in the same dropdown.
Broadcasted messages cannot be searched.
Search only returns results when the keyword matches a complete word or phrase in the conversation.
Search is not case-sensitive. For example, searching for “cat” also returns “CAT”.
Contact actions
Contact actions help keep conversations with Contacts organized and efficient.
Assign a Contact
A Contact can be assigned to an Agent to make it clear who is responsible for handling the conversation. This keeps the Inbox organized and ensures conversations are handled promptly.
An AI Agent can also assign a conversation automatically — for example, escalating to a human agent, a specific team, or another AI Agent once it has done its part. AI Agents check agent availability before assigning, so Contacts reach an online agent faster.
Learn more about how to assign an Agent to a Contact.
Unassign a Contact
A Contact can be unassigned from an Agent if the conversation needs to be handled by someone else. This moves the Contact back to the Unassigned Inbox for another Agent to pick up.
Learn more about how to unassign an Agent from a Contact.
Snoozing a Contact
A Contact can be snoozed to temporarily exclude them from the Contact list until a specified time, at which point they automatically reappear. This helps set quick reminders for follow-ups.
To snooze a Contact:
Select the Contact in the conversation list.
Click the snooze button or select Snooze from the quick actions menu.
Choose a snooze duration from the dropdown.

Once the selected snooze time ends, the Contact will reappear in the conversation list with the status changed back to its previous state.
Whether a snoozed Contact is hidden or remains visible in the conversation list depends on the filter in use:
Open or Closed: Snoozed Contacts will be temporarily hidden until the snooze time ends.
All or Snoozed: Snoozed Contacts will still appear.
When a Contact is snoozed, they will not appear in the Mine list until the specified time.
Contacts that have been blocked cannot be snoozed. The snooze icon will not be available for blocked Contacts.
Unsnoozing a Contact
A Contact can be unsnoozed before it reaches the snooze duration.
To unsnooze a Contact:
Select the snoozed Contact in the conversation list.
Click the unsnooze button or select Unsnooze from quick actions.
The Contact immediately reappears in the Mine Inbox or the relevant inbox based on the applied filters. Their conversation status reverts to what it was before snoozing.
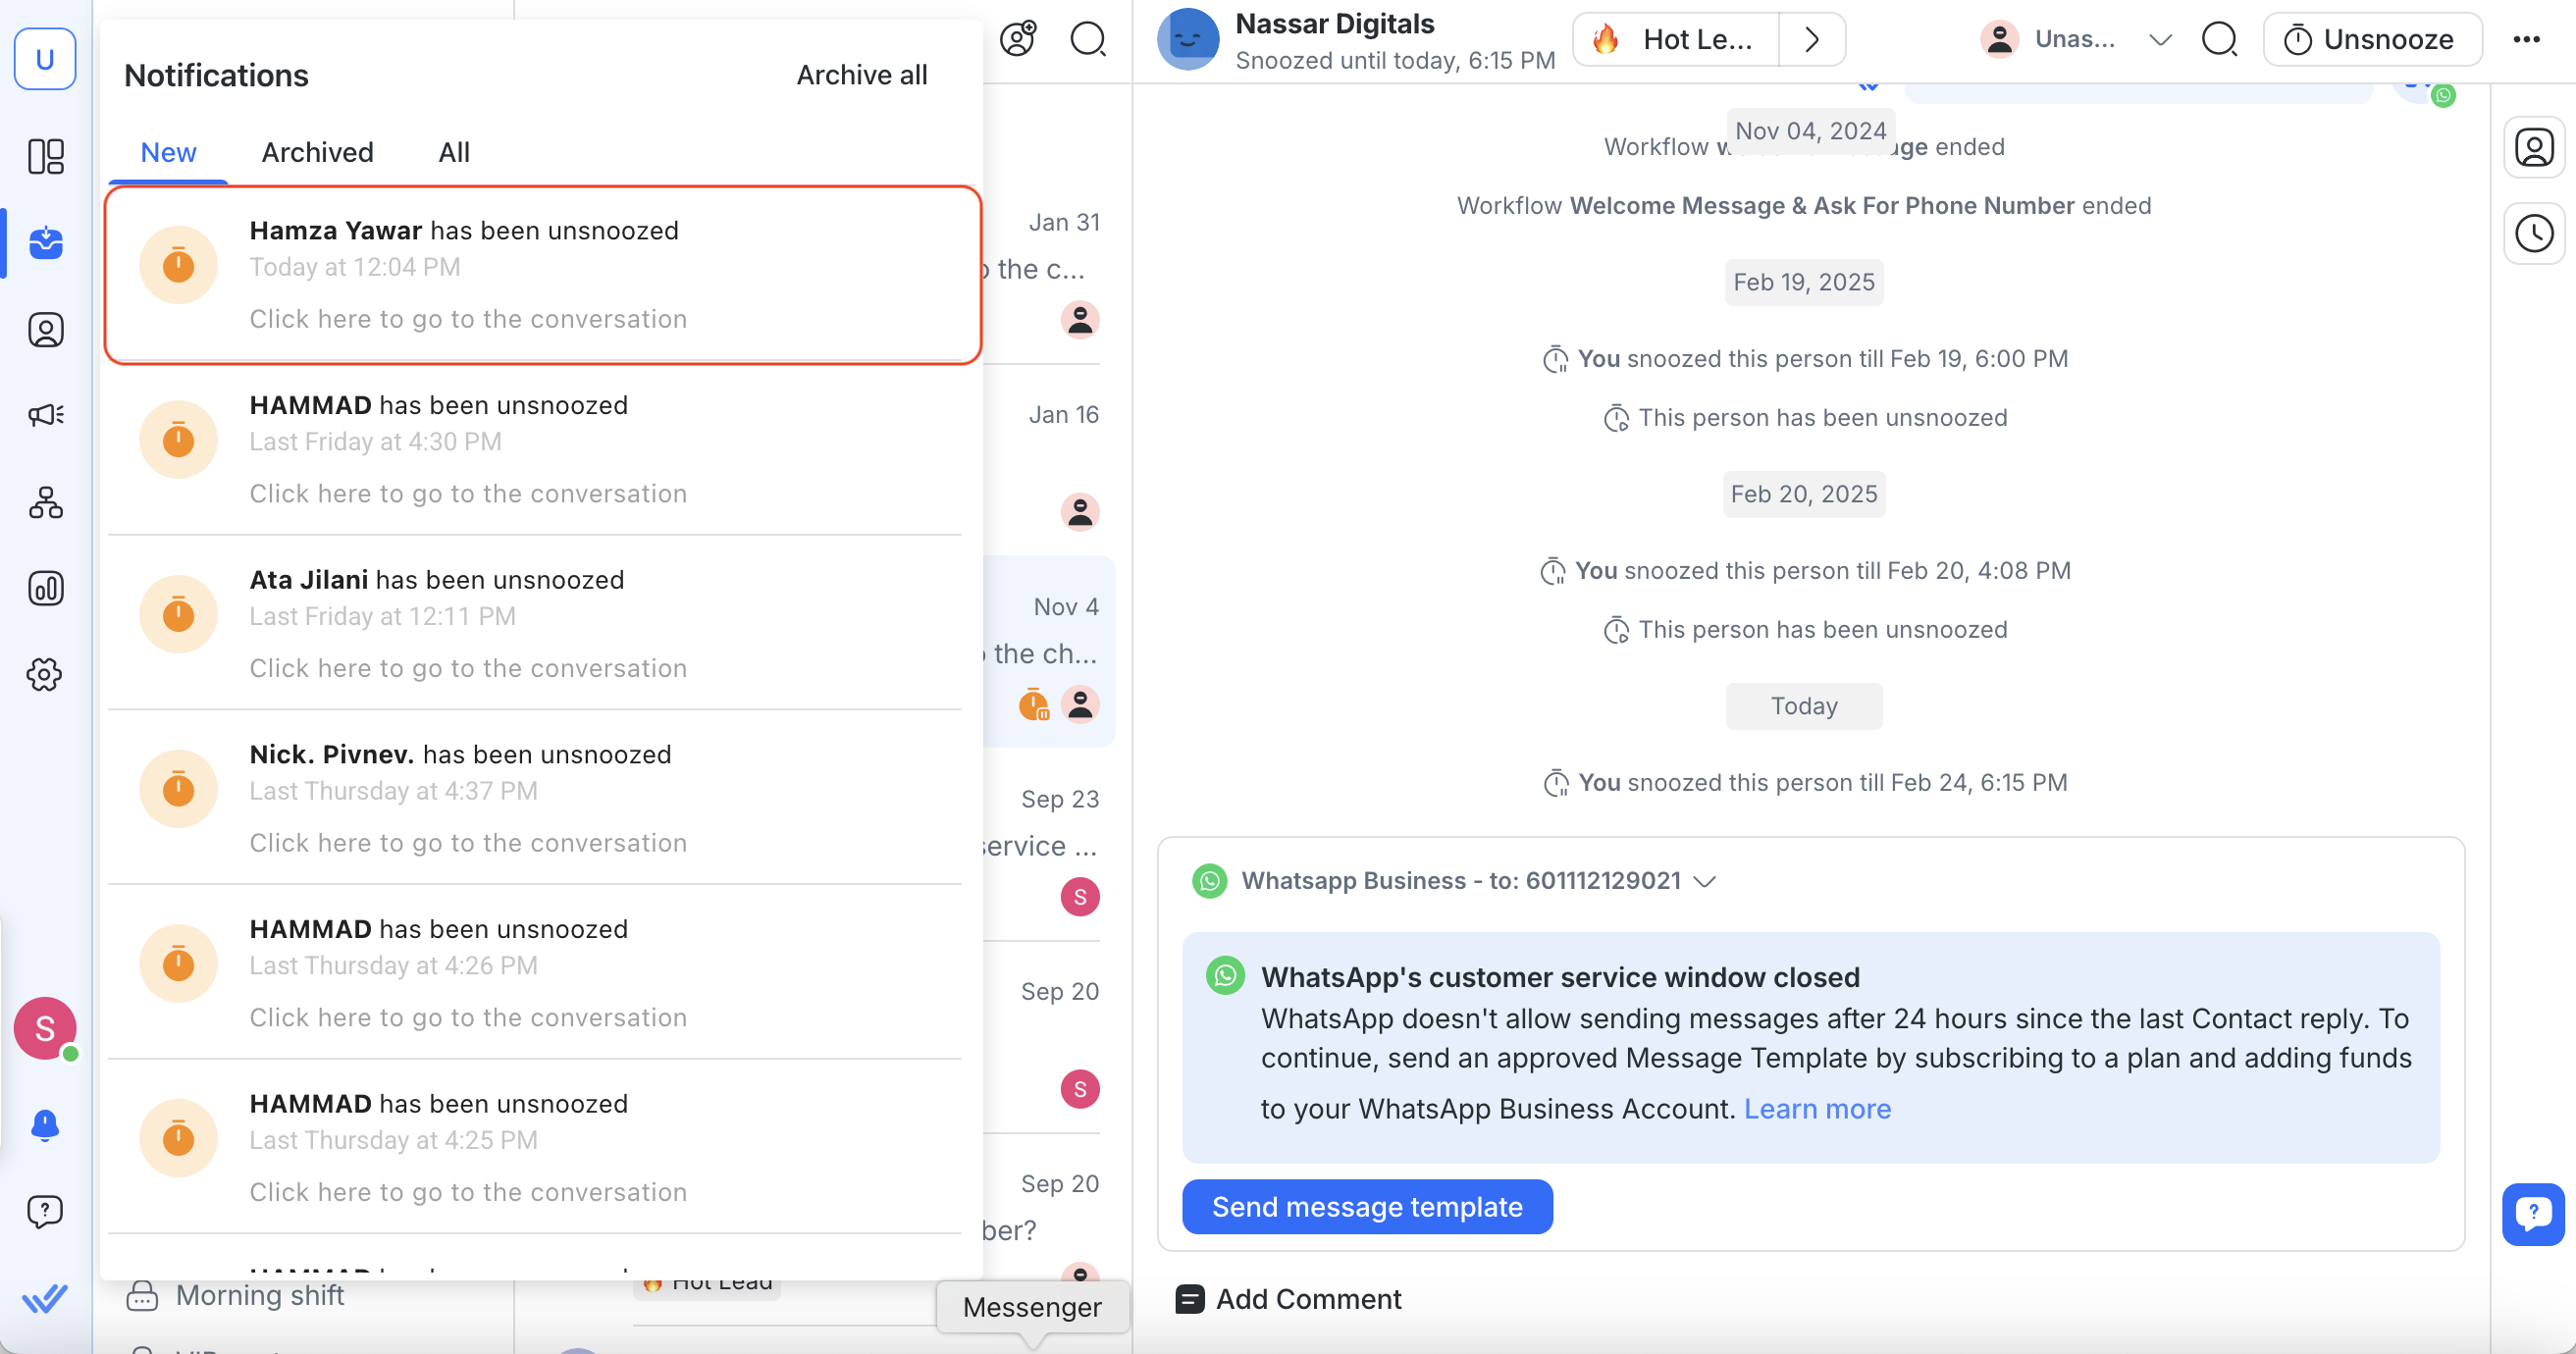
Indicators show when a Contact is snoozed:
Snooze reminder subtext: When a Contact is snoozed, a subtext showing when the snooze ends appears under the Contact’s name. This subtext disappears once the Contact is unsnoozed.

Hover tooltip: Hover over the snooze icon to see the exact unsnooze timestamp.

Notifications also appear when the Contact is unsnoozed:
Push notification:
When the snooze ends, a push notification is sent to the assigned agent(s) according to the Workspace notification settings.

Notification center: A notification with a snooze icon appears in the notification center, prompting the agent to open the conversation.
Blocking a Contact
If a Contact is sending spam messages, block the Contact.

Here’s how to block the Contact:
Click the More actions button at the top.
Select Block Contact.
After a Contact is blocked, messages can no longer be sent to or received from them.
Learn more about how to block Contacts and the implications of blocking them.
Unblocking a Contact
Unblock a Contact via the same More actions button.
Once a blocked Contact is unblocked:
The conversation is moved back to the All or other inboxes depending on the conversation filters applied.
The conversation will remain closed.
The message composer will be enabled, so messages can be sent.
The conversation window will be enabled, so messages can be received from the Contact.
The Contact is moved to All or other Segments depending on the filters.
Shortcuts
Use the Shortcut button to trigger Workflows for a Contact.
To use a Shortcut:
Click the More actions button at the top.
Select Shortcuts.
Search the available Shortcuts for the Contact.
Select the Shortcut to start the Workflow for the Contact.
Ongoing Workflows
View and select Workflows by selecting More actions button > Ongoing Workflows.
View and search the ongoing Workflows for the Contact
Choose and stop a Workflow for the Contact
Stop all Workflows for the Contact
Contact details in vertical sidebar
Access the Contact’s key information without leaving the Inbox, such as their phone number, email, country, and language.
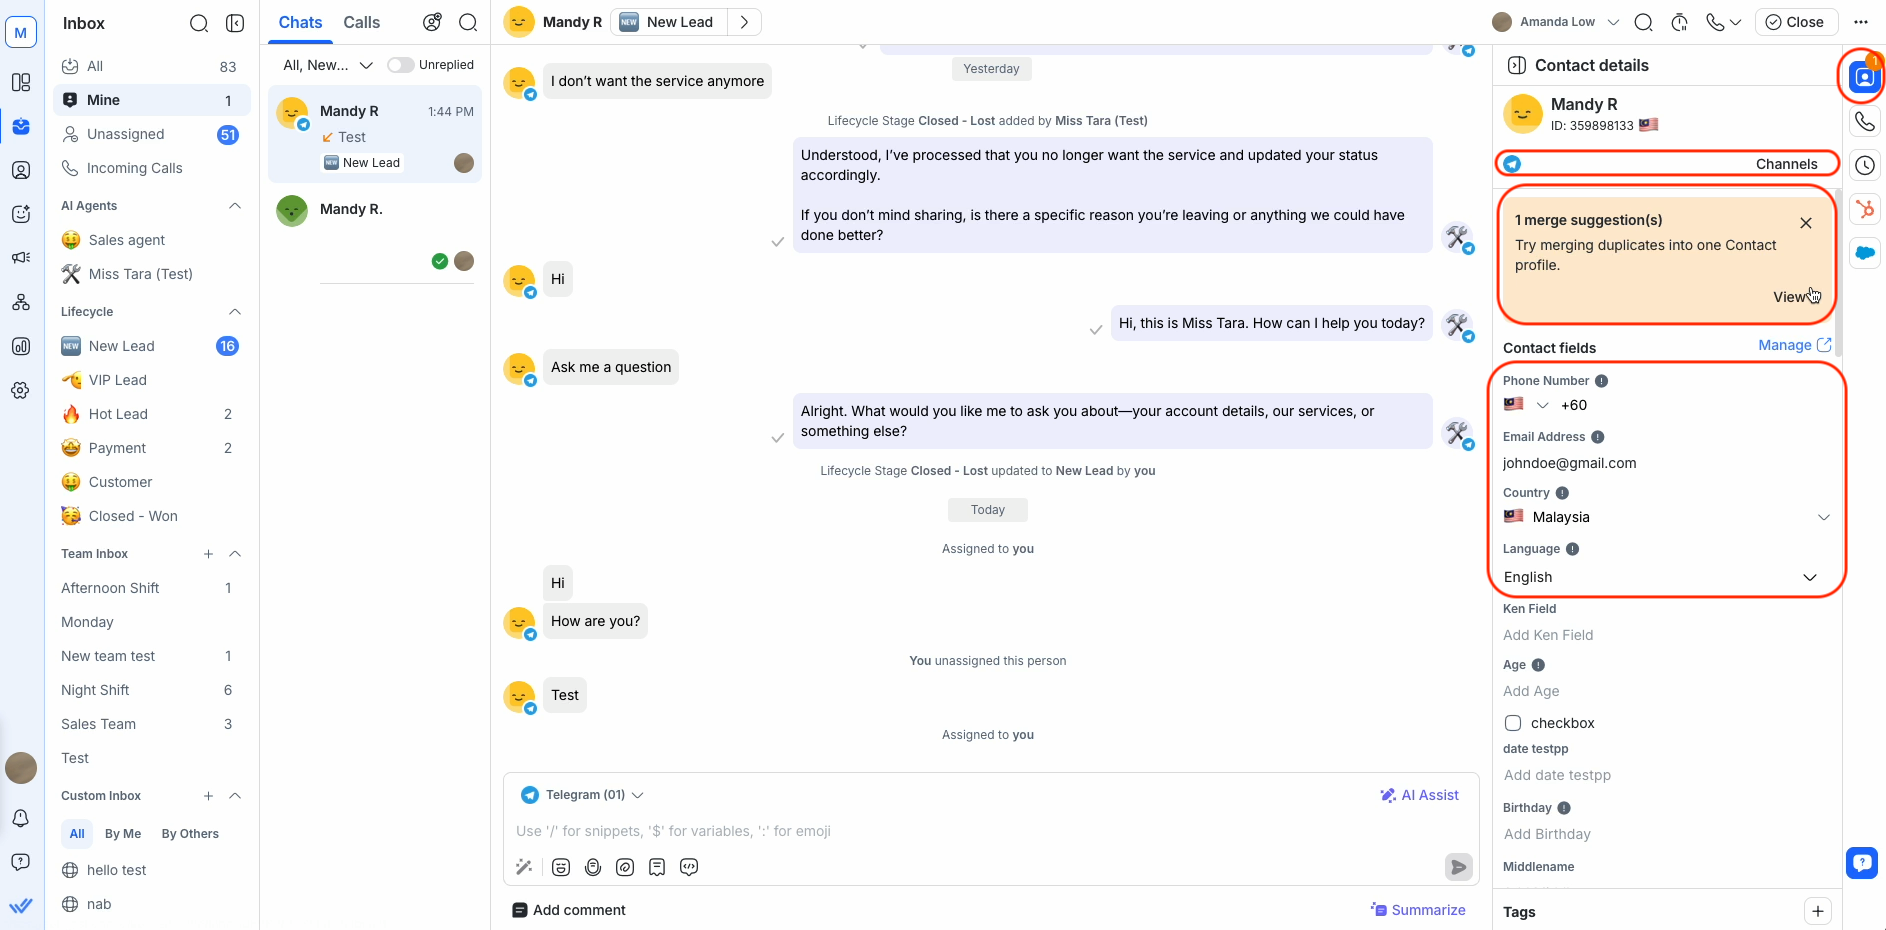
To update the information, click the field to edit.
The Inbox and the Contacts module both read from the same underlying Contact record, so any field updated here is instantly reflected in the Contacts module, and the reverse is also true.
Learn more about Contact details.
Merge suggestions
The merge suggestions card displays in the Contact details when potential duplicate Contacts are detected. It will list all Contacts with the same phone number or email address as the selected Contact.
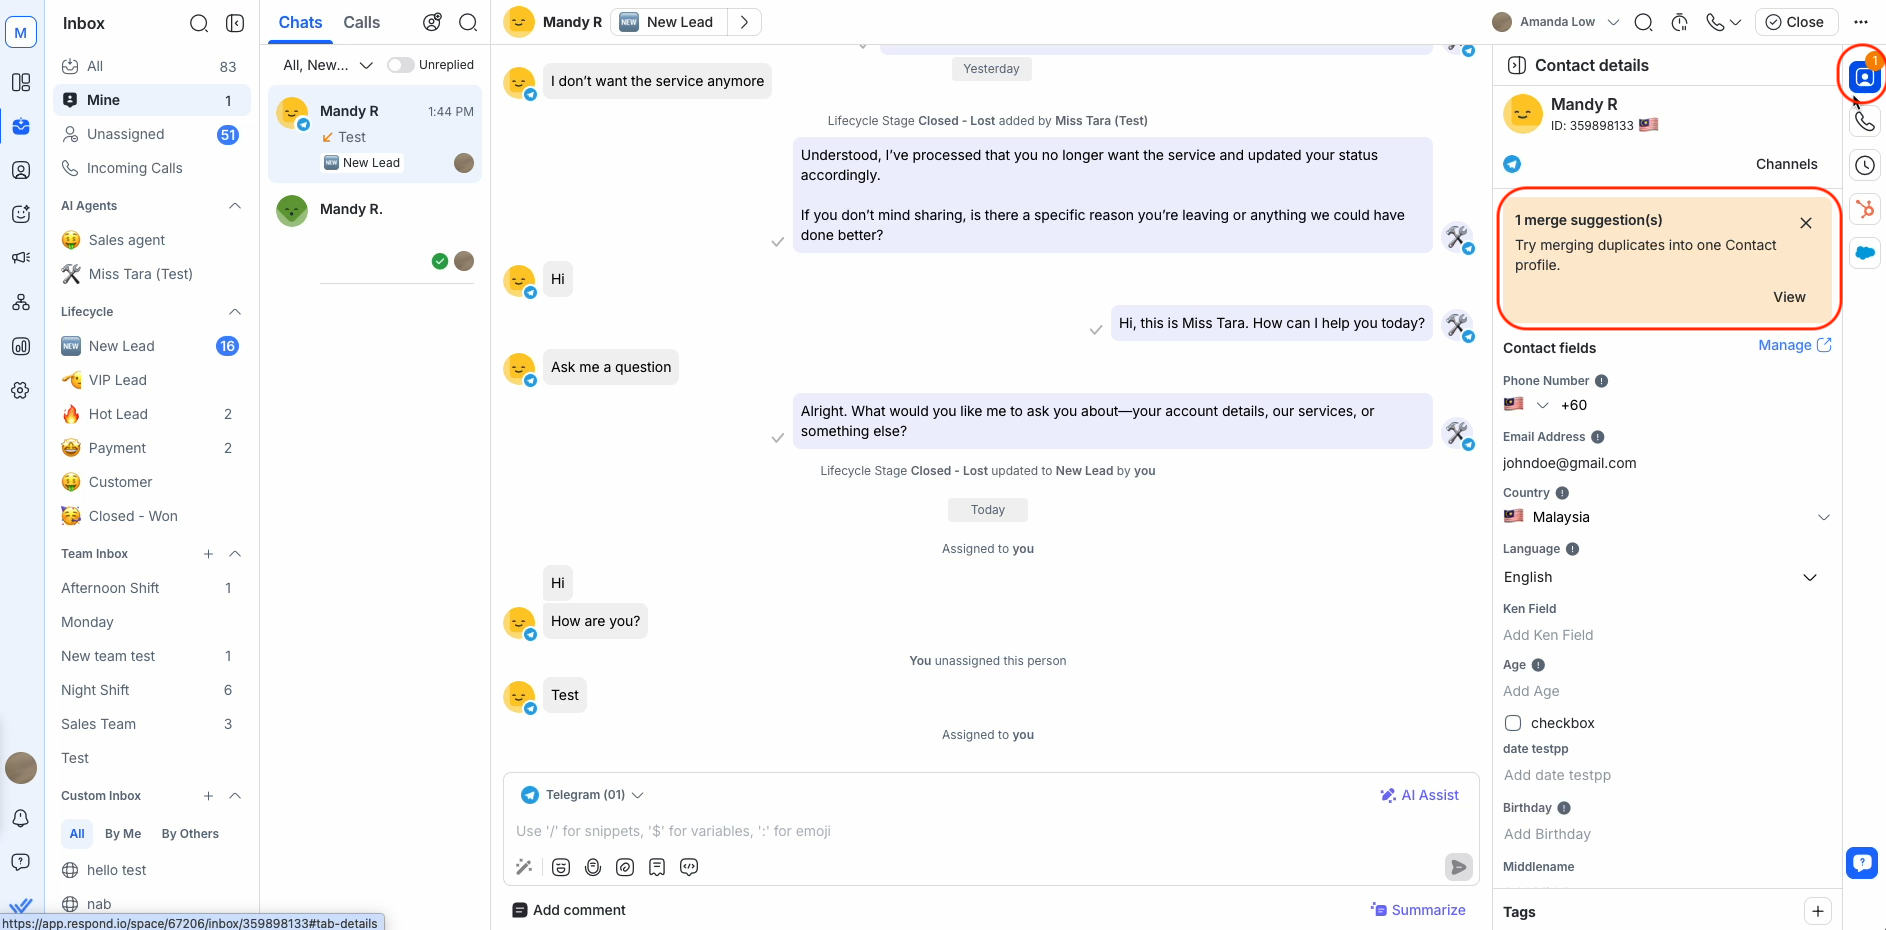
If they are duplicate Contacts, merge them.
Learn more about merge suggestions.
Channels
The Channels associated with a Contact appear here, with indicators showing their status.
There are 3 types of Channels:
Learn more about Contact Channels.
FAQ and troubleshooting
Are Contact details the same in the Inbox and the Contacts module?
Yes. Both the Inbox and the Contacts module display the same underlying Contact record — there is only one copy of each Contact’s data. Updating a field in one place updates it everywhere else.
If a name or detail appears different between the two, it’s a display issue rather than a data mismatch — see the next FAQ for the most common cause.
Why is there a mismatch between Contact names in the conversation?
You might notice that the Contact name shown in a conversation doesn’t match the name displayed in other areas like Contact details or the Contact drawer. This inconsistency is often caused by browser translation plugins, such as the Google Translate plugin.
Here's what you can do:
1. Disable the Google Translate plugin:
Click on the Google Translate plugin icon in your browser toolbar.
Turn off the translation feature for the platform or disable the plugin entirely.
2. Set your preferred language on the platform:
Go to Settings > Profile > Language
Choose your preferred language and save your changes.
If the issue continues after you disable the plugin and set your preferred language, contact our support team for help.
If you’d like more language options, you can submit a feature request on our Canny page.


