Se você se inscreveu e já está logado, a primeira coisa que deve fazer é concluir o módulo de integração no seu Espaço de trabalho.
O módulo de integração foi criado especificamente para usuários iniciantes, para ajudar você a configurar o respond.io corretamente e começar a gerenciar conversas com clientes imediatamente.
Ao concluir o módulo de integração, você:
Conecte um canal para que as conversas com clientes comecem a chegar ao seu Inbox
Configure o ciclo de vida para organizar os Contatos com base no seu processo de vendas
Configure um Agente de IA para automatizar conversas e reduzir trabalho manual
Convide colegas para o seu Espaço de trabalho para colaborar e distribuir a carga de trabalho
Após concluir essas etapas, seu Espaço de trabalho estará totalmente configurado para receber, gerenciar e automatizar conversas.
O que é o módulo de integração?
Se você é um novo usuário da plataforma respond.io, a primeira ação que deve tomar é concluir o módulo de integração.
O módulo de integração é uma lista de verificação estruturada, passo a passo, criada para orientar usuários iniciantes na configuração essencial do Espaço de trabalho.
Completar essa lista de verificação de integração garante que seu Espaço de trabalho esteja corretamente configurado para que você possa:
Receba e gerencie conversas com clientes
Acompanhar leads e clientes usando o ciclo de vida
Automatizar conversas usando Agentes de IA
Colaborar com seus colegas

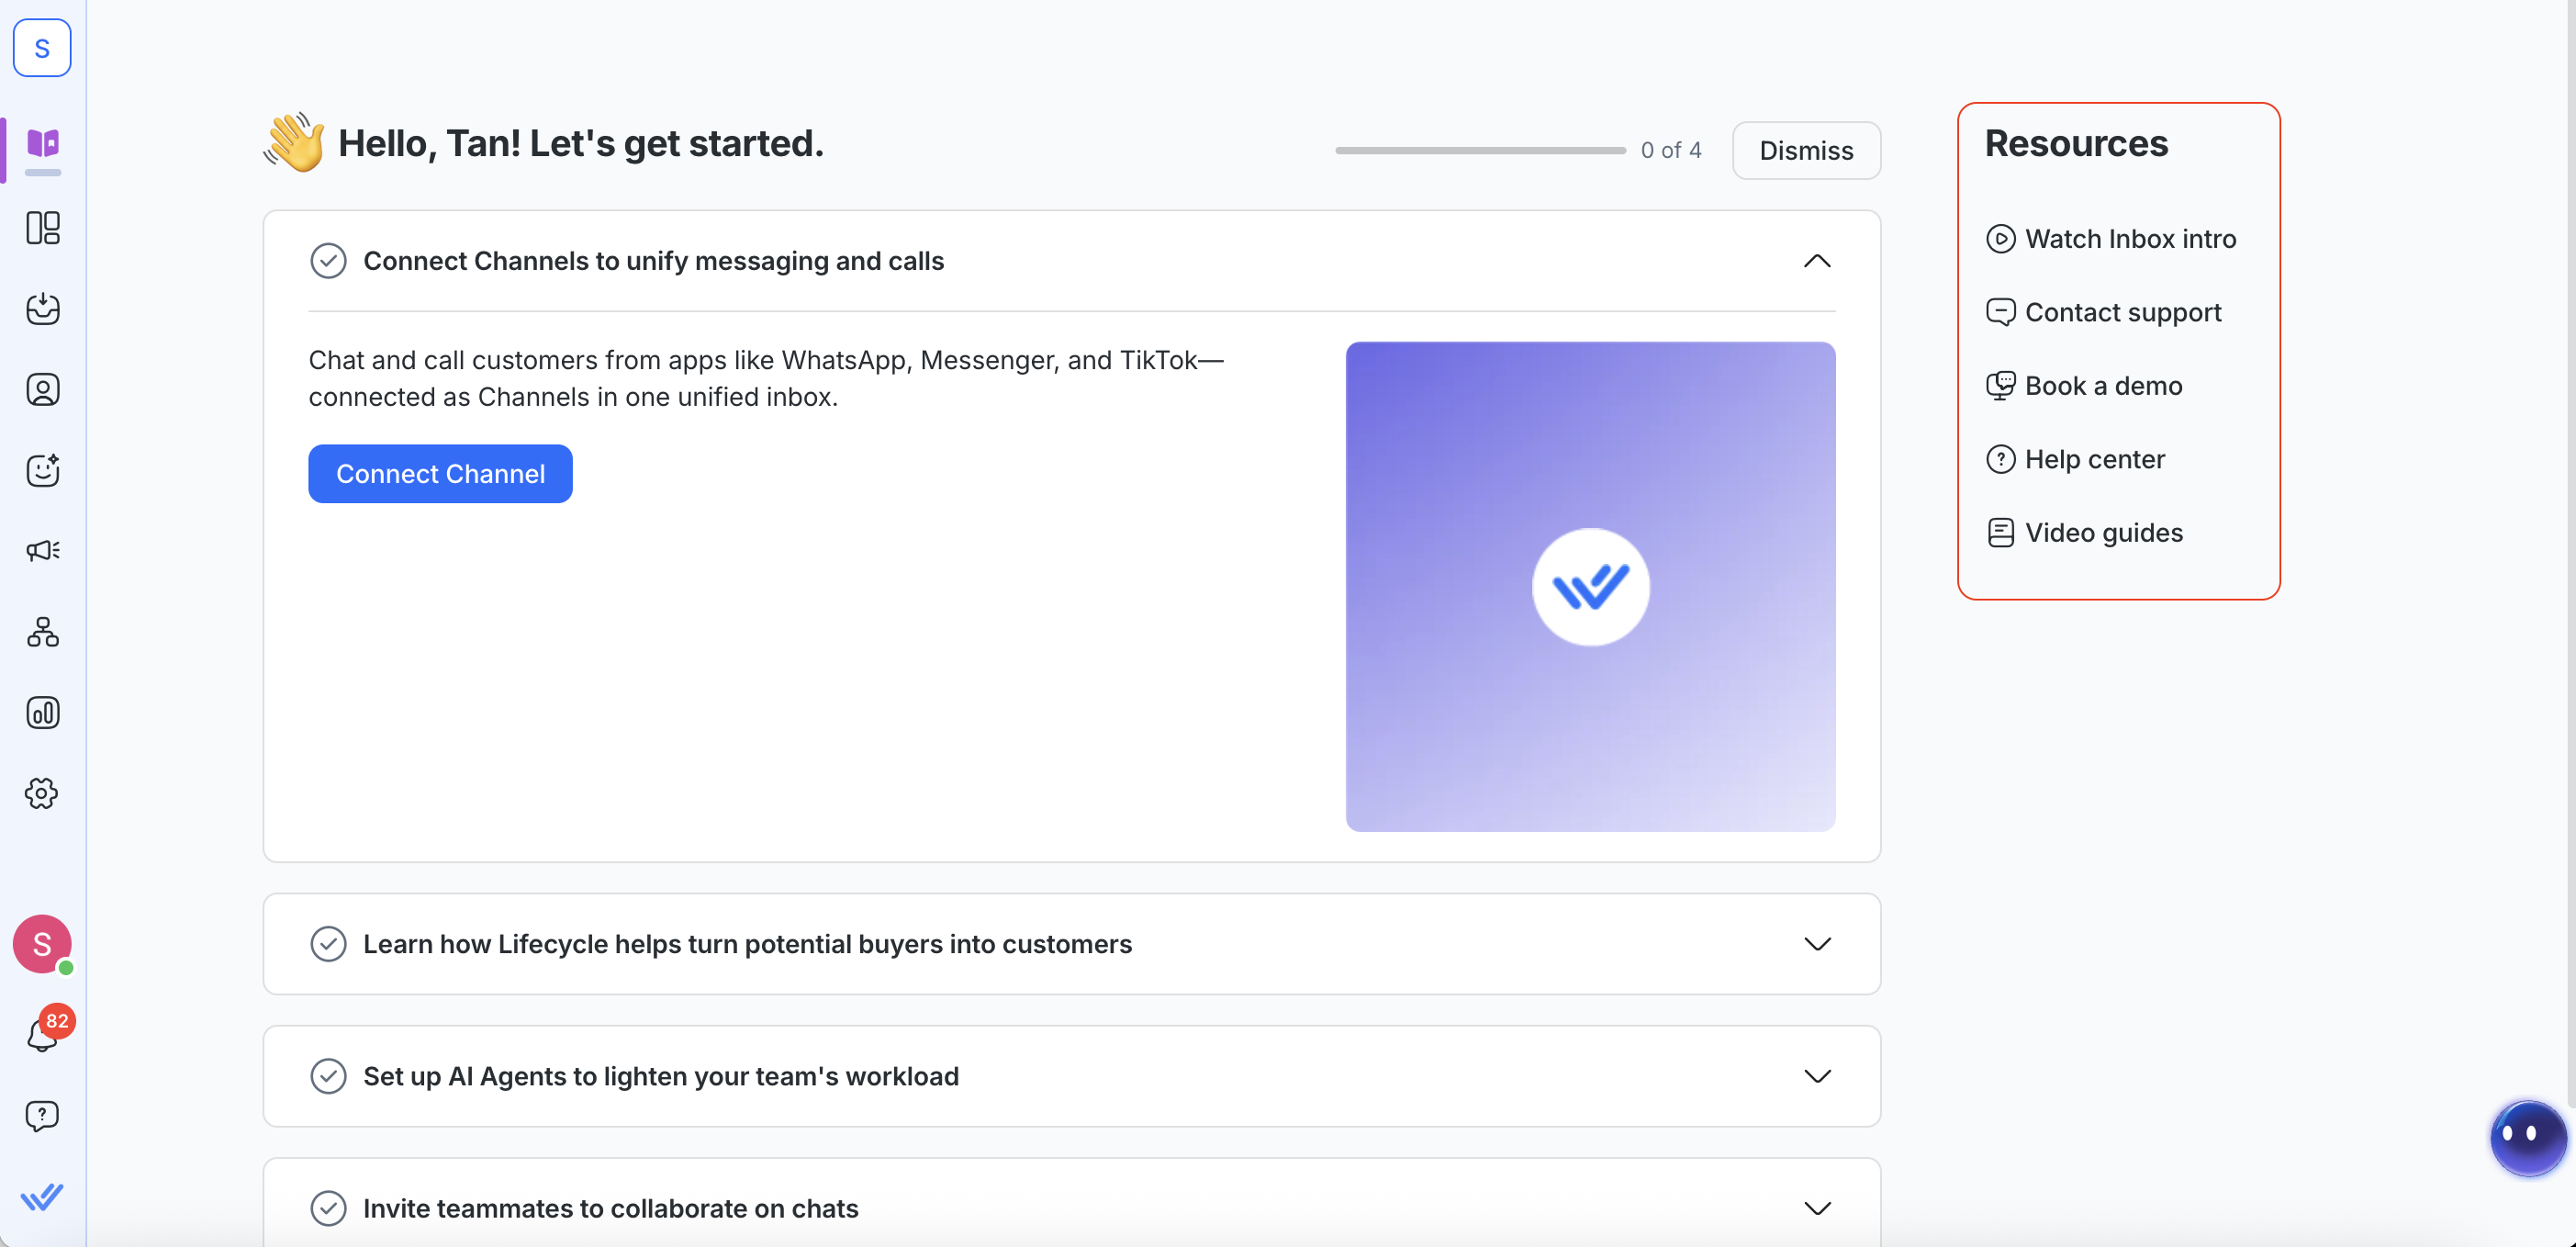
Etapa 1: Conecte canais para unificar mensagens e chamadas
Para começar, conecte pelo menos um canal de mensagens ao seu Espaço de trabalho. Isso significa que seus clientes podem entrar em contato pela plataforma que preferirem e sua equipe pode gerenciar tudo em um só lugar.
Depois de conectar um canal:
Mensagens de clientes aparecem no seu Inbox
Sua equipe pode responder a partir de um único Espaço de trabalho
Conversas de diferentes plataformas ficam centralizadas em um só lugar
Você também pode gerenciar chamadas (quando suportado)
Veja nossa lista de canais de suporte e aprenda como configurá-los aqui.

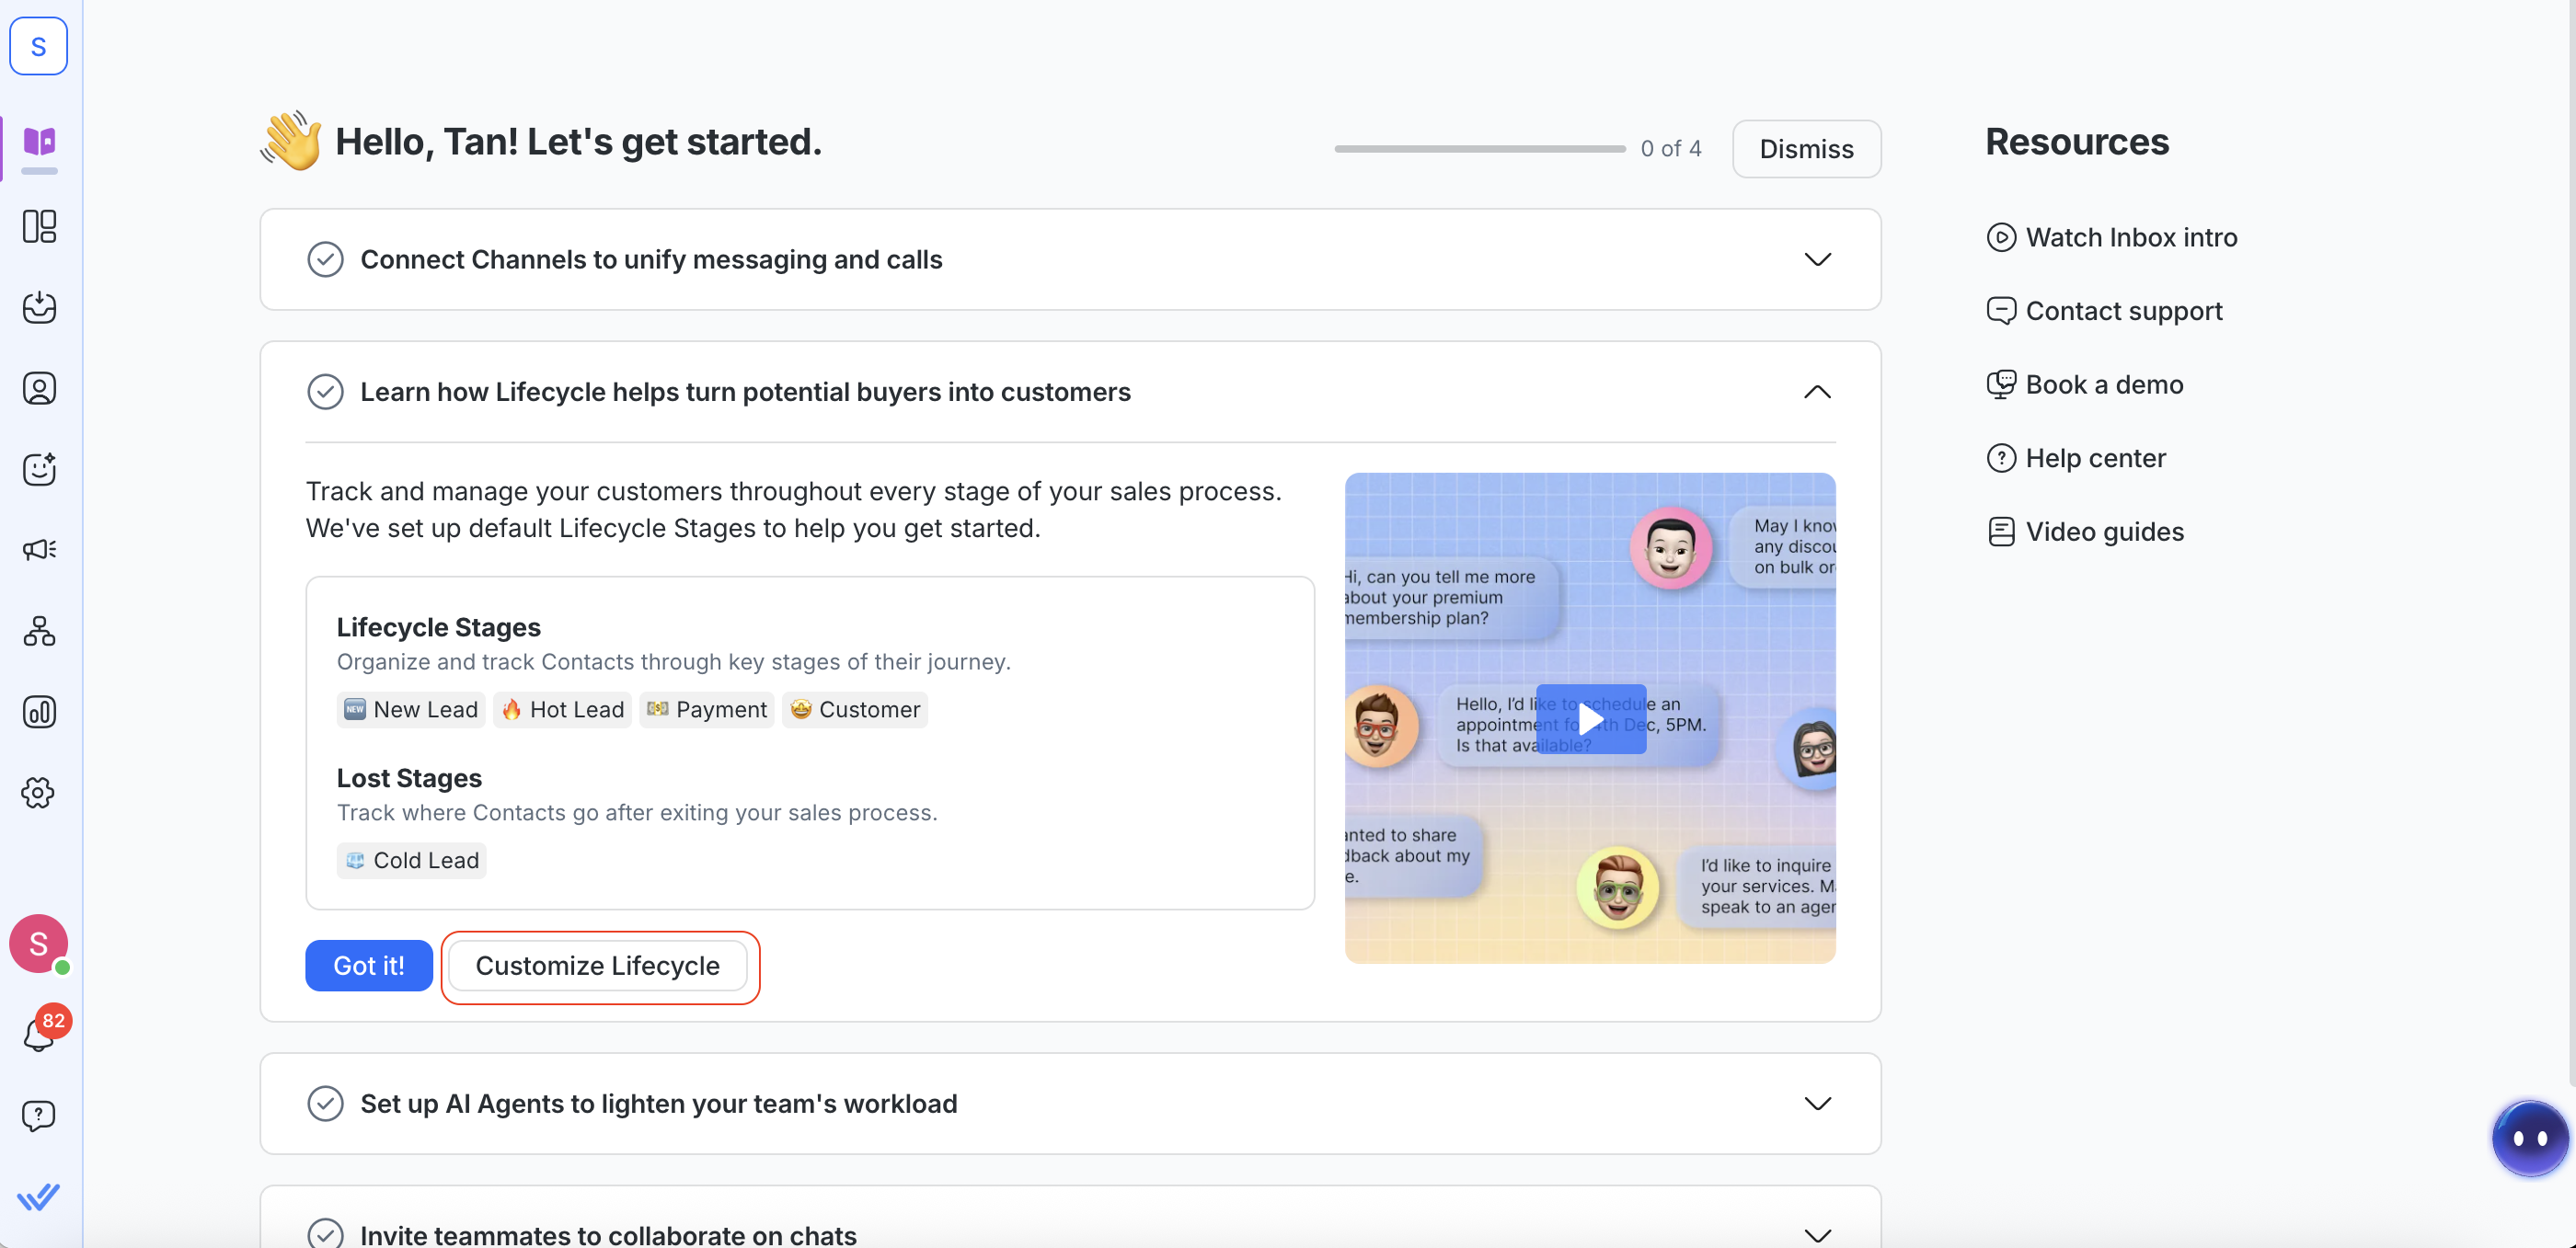
Etapa 2: Como o ciclo de vida ajuda a transformar potenciais compradores em clientes
Depois que seu canal estiver conectado e as conversas chegarem, pode ser útil rastrear e organizar os Contatos com base em sua posição no processo de vendas.
O ciclo de vida ajuda você e sua equipe:
Acompanhar novos leads desde a primeira mensagem
Identificar Contatos com alta intenção
Monitorar o progresso de conversão entre os estágios
Ver o desempenho do pipeline no módulo de Relatórios
Organizar Contatos com base na prontidão para vendas
Todo Espaço de trabalho inclui estágios padrão do ciclo de vida. Isso permite que você comece a rastrear Contatos imediatamente, sem configuração adicional.
Se seu processo de vendas for diferente, você pode personalizar o ciclo de vida adicionando ou removendo estágios. Clique em Personalizar o ciclo de vida para alinhar o ciclo de vida ao seu funil de vendas.
Saiba mais sobre ciclo de vida.
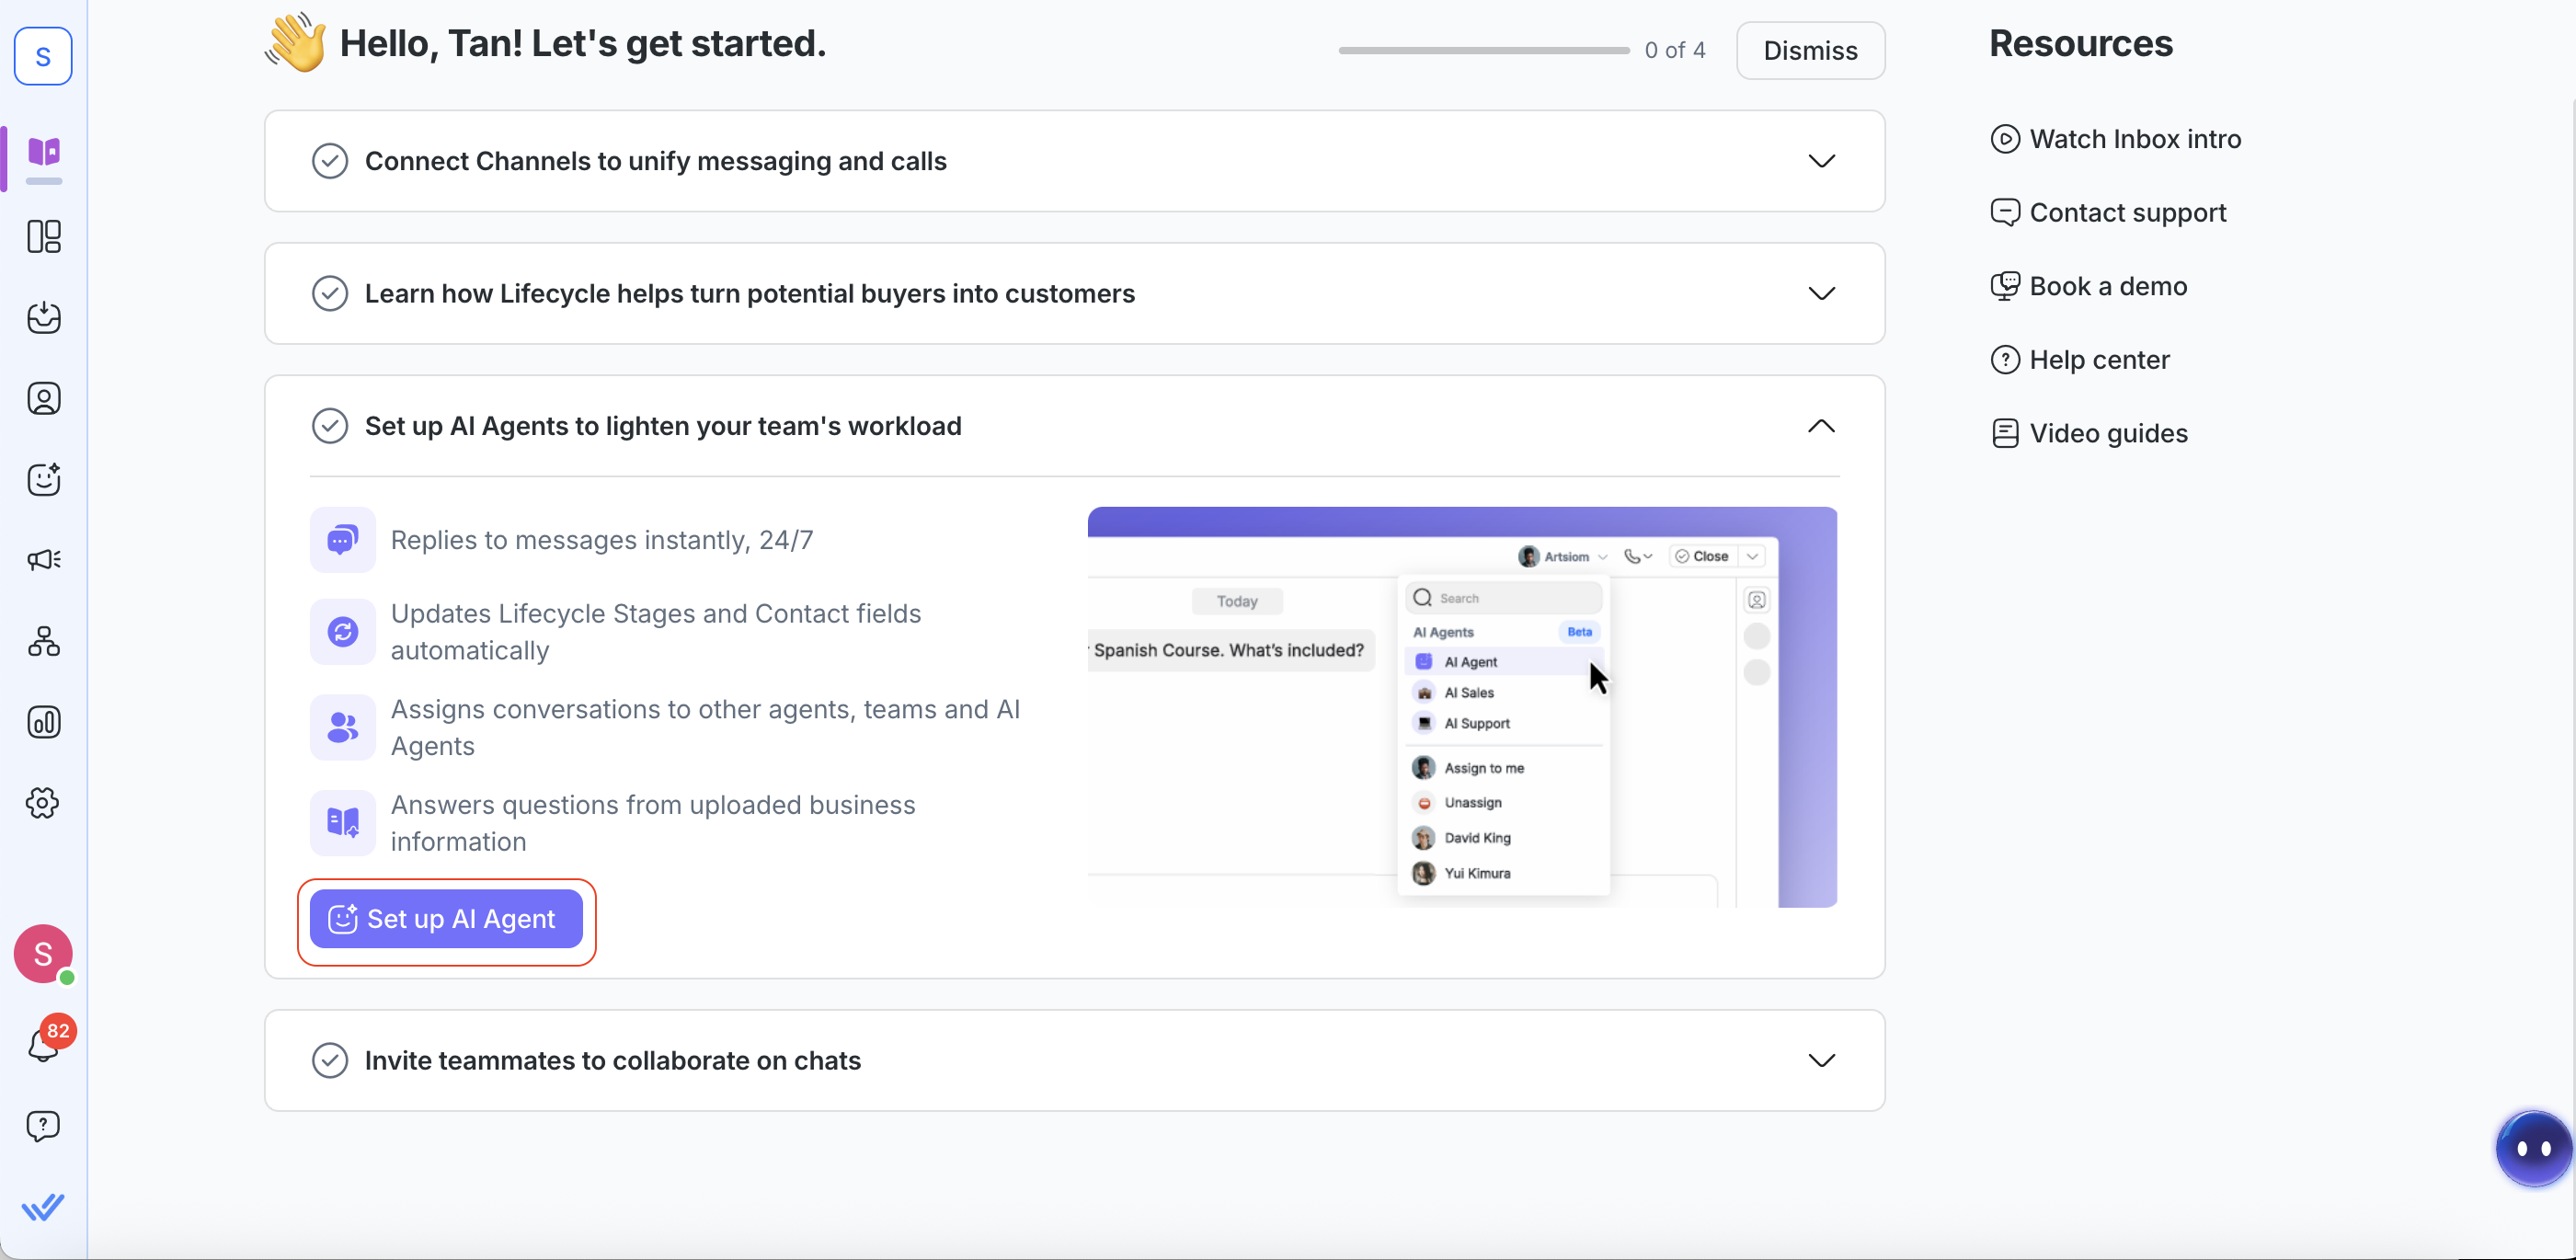
Etapa 3: Configure Agentes de IA para reduzir a carga de trabalho da sua equipe
Agora que você conectou um canal e configurou estágios do ciclo de vida que correspondem ao seu funil de vendas, você está pronto para introduzir uma automação para gerenciar conversas automaticamente.
A melhor automação para isso são os Agentes de IA. Desde responder clientes 24/7 até atribuir conversas a outros agentes ou equipes, os Agentes de IA podem ajudar sua equipe a reduzir o trabalho manual e melhorar os tempos de resposta.
Clique em Configurar Agente de IA para criar seu primeiro Agente de IA.
Saiba mais sobre:
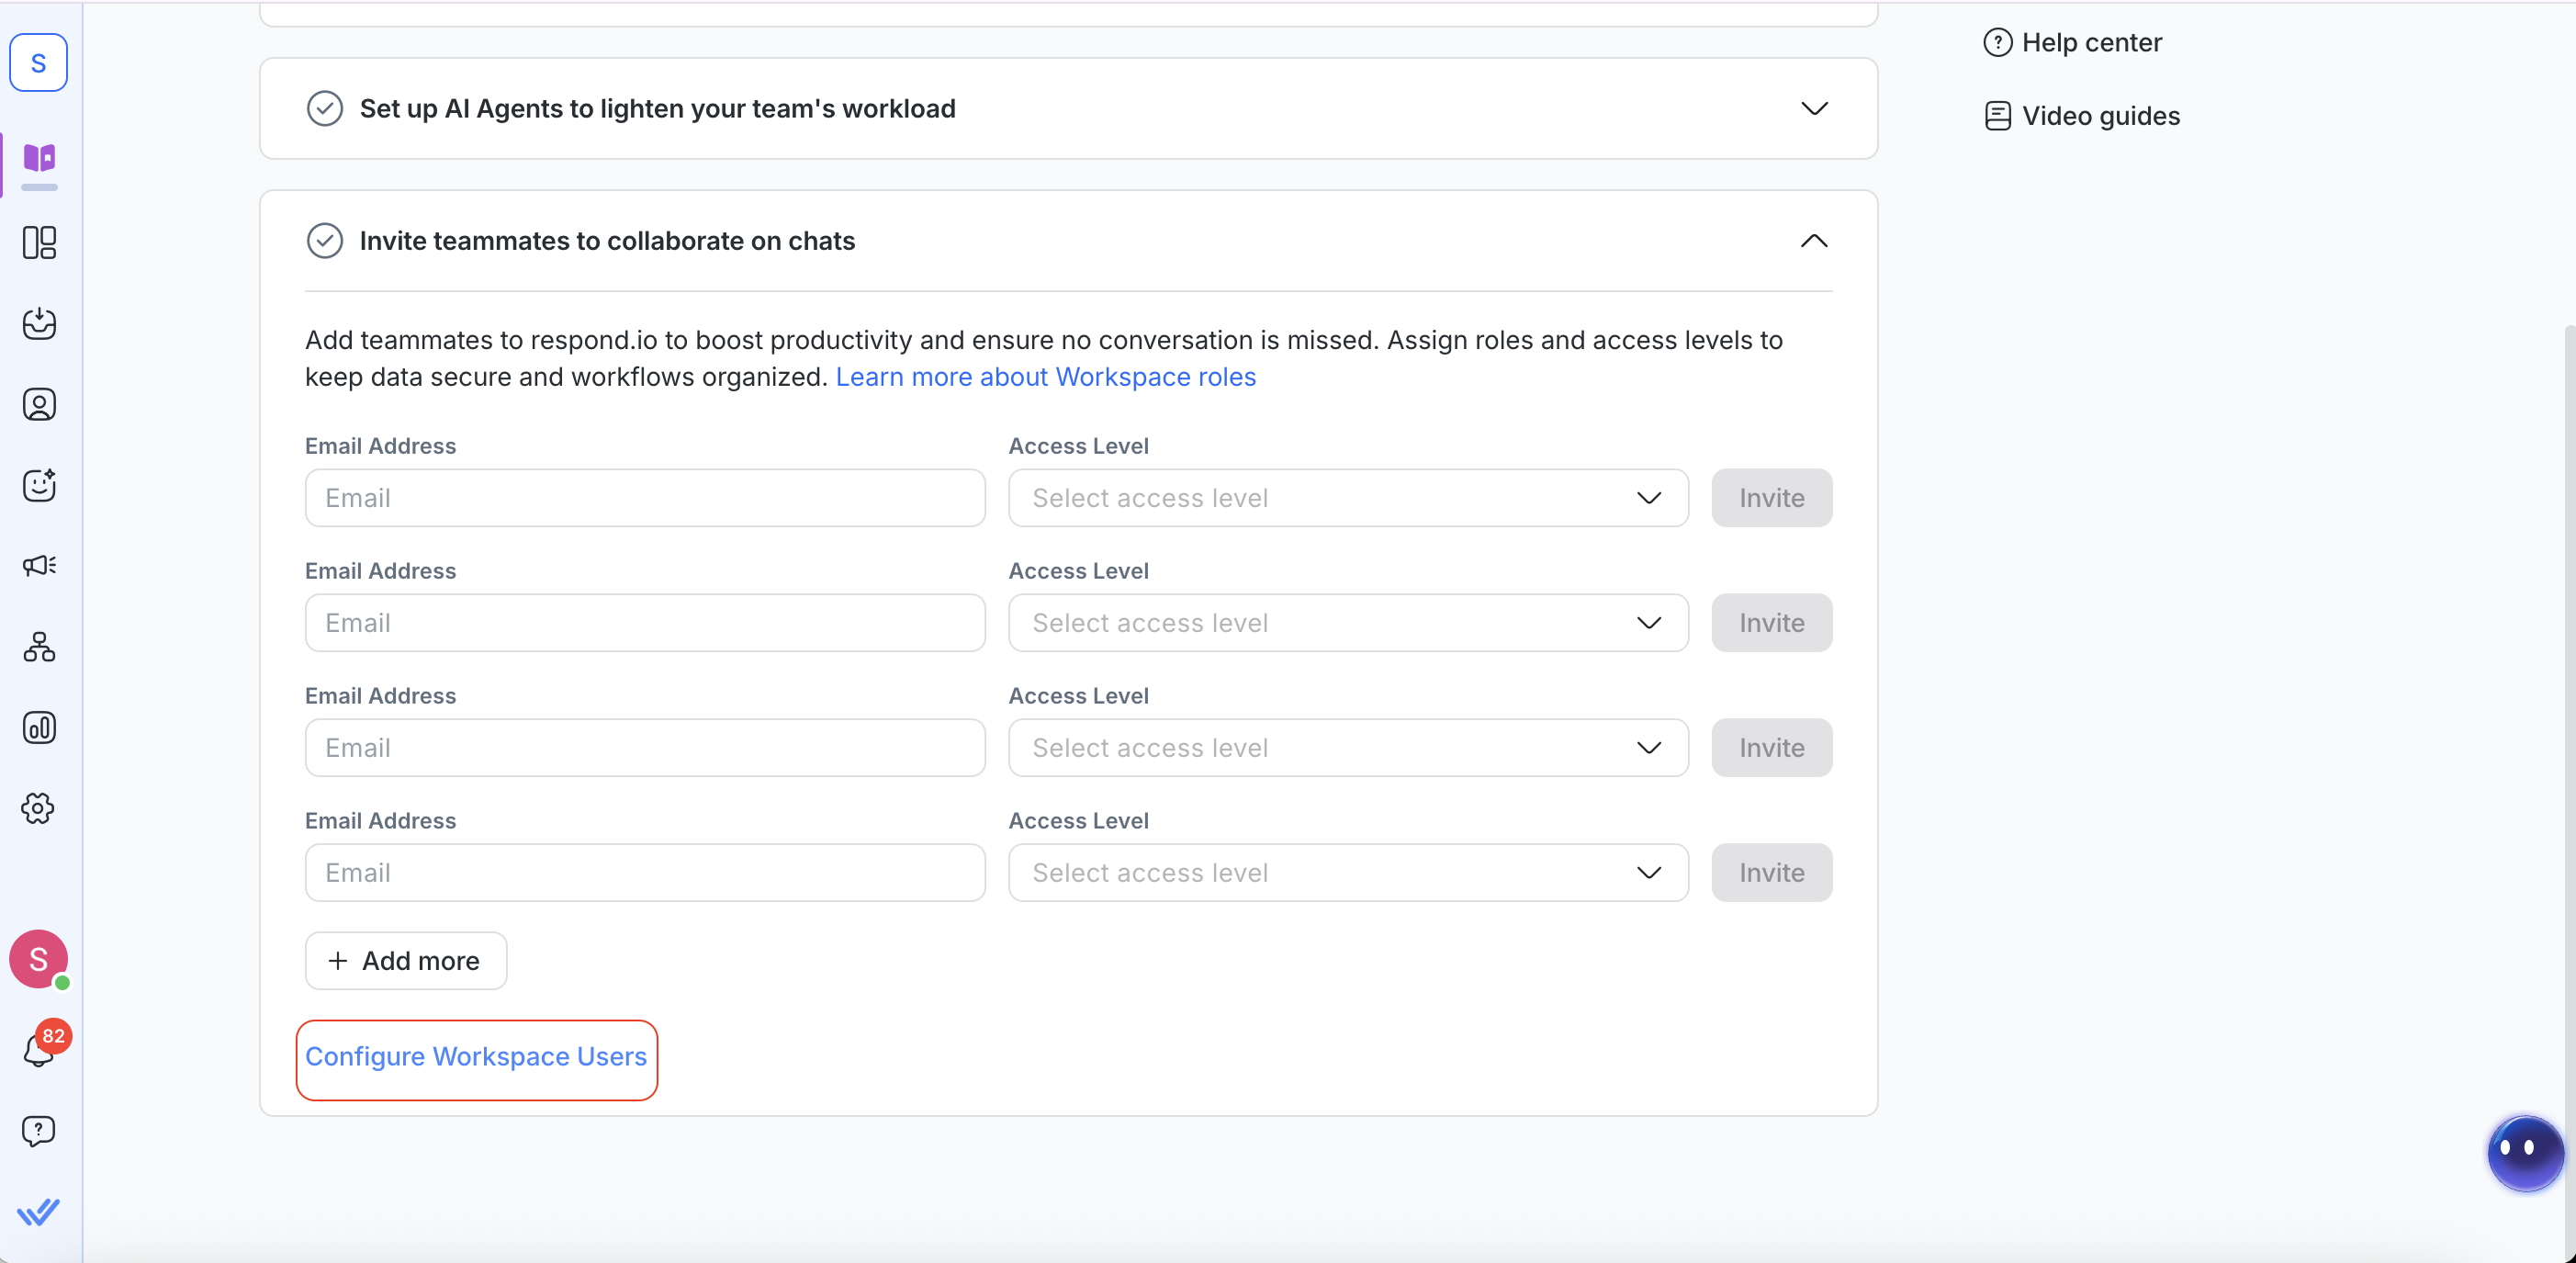
Etapa 4: Convide colegas para colaborar nos chats
Agora você está pronto para convidar o resto da sua equipe! Isso permite que você e sua equipe compartilhem o acesso ao Inbox, atribuam conversas e gerenciem a distribuição da carga de trabalho.
Veja como adicionar um novo usuário:
Digite o endereço de e-mail do colega
Selecione o nível de acesso deles (proprietário, gerente ou agente)
Clique em Convidar
Um e-mail de convite será enviado a eles. Eles devem clicar no link do e-mail para aceitar o convite e obter acesso ao seu Espaço de trabalho.
Se quiser revogar o acesso ou editar o nível de acesso deles, clique em Configurar usuários do Espaço de trabalho no módulo de Integração.
Saiba mais sobre adicionar novos usuários.
Recursos no módulo de Integração
No lado direito do módulo de Integração, você encontrará uma lista de recursos. Essa lista oferece atalhos para aprendizado e suporte.
A lista de recursos inclui:
Um vídeo passo a passo explicando como usar o módulo Inbox
Links diretos para contatar a equipe de suporte
Um link para agendar uma demonstração com a equipe de vendas
Acesso ao Centro de Ajuda do respond.io
Uma coleção de vídeos tutoriais do respond.io
Próximos passos
Parabéns por concluir sua jornada de integração com respond.io! Você está oficialmente pronto para começar a gerenciar conversas em grande escala.
Para manter o ritmo, você pode:
Configure o Inbox para suporte omnicanal


