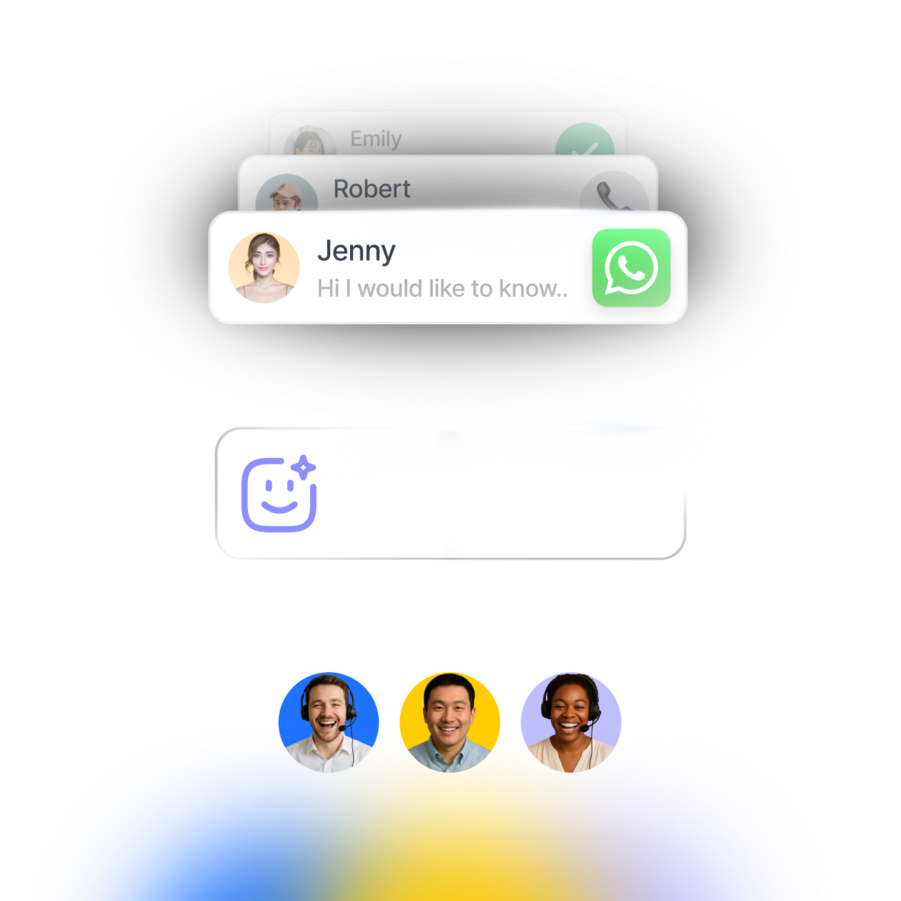
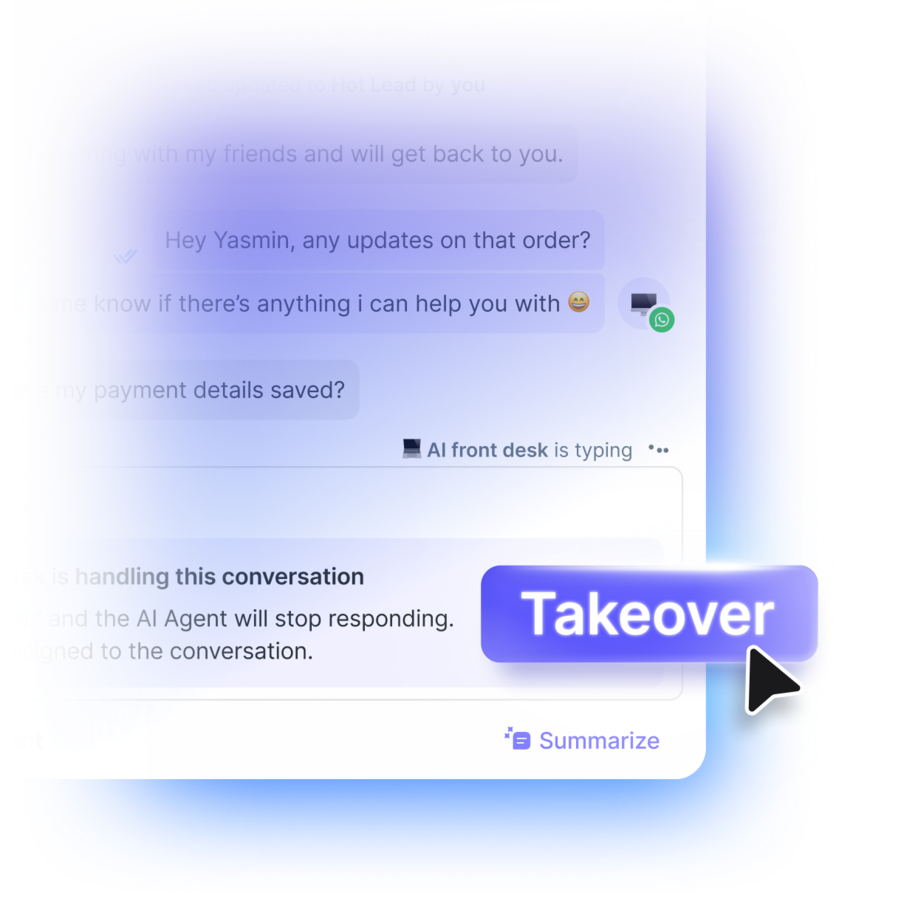
How To Article

How To Use respond.io As A Dialogflow CRM [July 2023]

Iaroslav Kudritskiy
July 12, 2019

Ever wished you had a CRM for Dialogflow? We did too, so we built one. This is a best practices article for using respond.io as a Dialogflow CRM. We'll discuss things like creating a Dialogflow Human Handoff, how to integrate Dialogflow with your website, and popular integrations like our Chatbase Dialogflow Integration. Check out the table of contents below to skip to what you're looking for:

5 Simple Ways To Use respond.io with Dialogflow Integration

  1. Record, Attribute & Export Dialogflow History with respond.io
  2. Use Dialogflow To Automatically Tag Contacts
  3. Send a Dialogflow Broadcast
  4. Unsubscribe Dialogflow Contacts from Broadcasts
  5. Create Custom Dialogflow Notifications

Build Hybrid Human + AI Sales & Support Messaging Using respond.io as A Dialogflow CRM

  1. Use respond.io Automations to Onboard New Contacts
  2. Handling FAQs & Using respond.io As A Dialogflow CMS
  3. Fallbacks & Building a Dialogflow Human Handoff

What is Dialogflow

Ever since Facebook announced bot integration on it's Facebook Messenger platform, the idea of using bots to talk to humans has gained traction. At the same time, the use of messaging apps has become more prevalent among businesses for messenger marketing and messenger customer support.

The most popular tools for the messenger marketing have been bot builders like Chat Fuel & ManyChat. These tools work decently for high volume, low margin marketing efforts but aren't exactly suave conversationalists. They present users with clickable buttons in a messenger, and that's about it.

Dialogflow

That is where Dialogflow comes in. Dialogflow is a Natural Language Processor (NLP). Although Dialogflow can give users options to click, like other bot builders, the true beauty of the tool is that a Dialogflow Chatbot can recognize natural language and decide how to respond to the human using Artificial Intelligence.

Dialogflow allows you to create a series of responses, then add training phrases to these responses. So when a user sends a message, Dialogflow uses machine learning to process the text sent, decide which response is the best match, and sends the response. Each of these responses are called intents.

The Basics: Dialogflow Intents

The buildings blocks of a Dialogflow agent are intents. Each intent contains training phrases and a response. Think about each Dialogflow intent as an answer your bot can deliver. If you want to build a Dialoglow chatbot that can give seven different answers, you're going to need seven intents.

A Dialogflow Intent is composed of training phrases and responses.
Dialogflow Intent: Training Phrases & Responses

To trigger a response, the user is going to have to send a message that is close to one of the training phrases you have entered. This is where artificial intelligence and machine learning come in. Because the message sent doesn't have to be an exact match. Dialogflow will check in real time if the message the user sends is similar to any of the training phrases you have created. If it matches closely, Dialogflow sends the response to the user.

Advanced Dialogflow: Entities and Fulfilment

You might be thinking. If I need seven different intents for seven different answers, I'm going to need hundreds of intents to build the chatbot I am thinking of. This is where Dialogflow Entities & Dialogflow Fulfilment come into play.

Dialogflow Entities

Dialogflow Entities allow you to recognize and pick out key pieces of information, data like colors, cities, product names, and more. So if your bot is asking a person about their favorite color, you're won't need to create a dozen intents to recognize a dozen colors, you'll need one.

This is how Dialogflow Entities Work
Dialogflow Entities

How is that possible? Dialogflow has built-in system entities to recognize the most common items like countries, phone numbers, emails, etc. If you want Dialogflow to recognize your product names, you'll be able to create a list of custom entities.

Using custom entities, you'll be able to create one intent that recognizes that a user is asking about the price of a product, and you'll know which product they're asking about. The question then becomes, where do you put the response? There is no place in responses to add different answers for different entities. This is where Fulfilment comes in.

Dialogflow Fulfillment

Dialogflow Fulfillment enables you to connect a service to your Dialogflow agent to does things like retrieve dynamic responses or trigger an action in your ERP.

How to connect Dialogflow Fulfilment via webhook.
Dialogflow Fulfilment Webhook

To enable Dialogflow Fulfillment, you'll need to connect your service using a webhook and activate fulfillment for the intents that require it. The fulfillment logic should be built in the service you connect.

How to activate fulfilment for your intent
Intent Fulfilment

Dialogflow is a very powerful tool. You might even be thinking, what do I need respond.io for?

Why You Need A Dialogflow CRM

Dialogflow is an extremely powerful Natural Language Processor (NLP), that is where it excels. Creating an interface for business is where it lets you down. Dialogflow does not provide:

  • a conversation history
  • a way to save user information
  • a way to hand over a conversation to a human
  • or a way of showing your clients how well your bot is performing.

In short, Dialogflow sees users, but businesses want to know about their contacts.

Dialogflow Training

Dialogflow allows you to see conversations history on the Training screen. The Training screen is optimized to a chatbot. This is where you can let the agent know if the responses it delivered were correct or incorrect, and if the entities were extracted correctly.

You can train a Dialogflow agent using the Dialogflow Training module.
Dialogflow Training

Training is a fantastic feature, but it doesn't give much information about the conversations of any individual contact because the chats are anonymous and session based. From the training screen, you won't be able to tell if it is the same contact that had ten different conversations or ten contacts that had ten conversations.

Dialogflow History

Dialogflow also provides a history screen. The history screen is a slight improvement over training. It can show sessions filtered by dates and displays the responses that were sent instead of the intent that was activated as the Training screen does.

You can view the historical conversations of your Dialogflow Agent in Dialogflow History.
Dialogflow History

Once again, this information is sessions based and anonymous, so there is no way of knowing which contact the agent was having a conversation with.

Dialogflow Analytics

Dialogflow Analytics are designed to provide information in aggregate. You'll be able to find out the number of sessions and queries, the most popular intents and the session flow all for a given period of time.

Aggregate Dialogflow Agent Information is viewable in Dialogflow Analytvics
Dialogflow Analytics

These figures are a little better to show a client. However, the essential items remain unfulfilled. There is no way to see a single users chat history, no way to turn users into contacts by collecting and saving information about them and no way to message a user back if the bot fails.

In the next few sections, we'll be going over strategies and integrations that make it easier to fit a Dialogflow agent into your business activities by using respond.io as a Dialogflow CRM.

Using respond.io as a Dialogflow CRM

The way you use you configure respond.io and Dialogflow is going to depend on what you would like Dialogflow to do for you. In the next few sections we're going to how to best connect Dialogflow, your channels and your integrations.

Then we will present a few very simple use cases for Dialogflow and finally we will discuss how to set up an advanced agent that can handle tons of queries, capture information about contacts, record that information and hand off to a human when the Dialogflow agent cannot handle the query.

The Setup: Connecting Dialogflow, Messaging Apps and Integrations with respond.io

respond.io is designed to be at the center of your chatbot infrastructure. Once you've created your respond.io account, you can connect Dialogflow, messaging channels, as well as Chatbase & Zapier integrations.

Rocketbots works like a Dialogflow CRM designed to allow you to integrate Rocketbots, Dialogflow, messaging channels and other integrations.
respond.io Dialogflow CRM

Dialogflow CRM Setup: Connecting Dialogflow to respond.io

To set up a Dialogflow CRM infrastructure, connect Dialogflow to the respond.io Space first. To connect Dialogflow, retrieve the Dialogflow Integration JSON file from the Dialogflow Console, then upload it to your respond.io Space. Here is a step by step guide:

To navigate to your service account open settings in the Dialogflow console > click the service account link.

To navigate to your service account open settings in your Dialogflow console then click on the service account link.
Navigating To The Dialogflow Service Account

To create the JSON key, find the Dialogflow Integrations row in the service accounts table > open the action menu > click Create key.

To create your JSON key find the Dialogflow Integrations row in your service accounts table > open the action menu > click Create key.
Creating a Dialogflow Service Account Key

Then choose the JSON key type > press Create.

To create your JSON key find the Dialogflow Integrations row in your service accounts table > open the action menu > click Create key. Then choose the JSON key type > press Create.
Creating a Dialogflow Service Account Key

To upload the key to respond.io navigate to Settings > Connect Dialogflow.

To upload the Dialogflow Service Account key to Rocketbots navigate to Settings > Connect Dialogflow.
Uploading The Dialogflow Service Account Key To respond.io

Then drag and drop the JSON key.

To upload the key to Rocketbots navigate to Settings > Connect Dialogflow. Then drag and drop the JSON key.
Uploading The Dialogflow Service Account Key To respond.io

Congrats, the respond.io Space is now connected to your Dialogflow Agent.

Pro Tip: You can use the respond.io Space to test your Dialogflow agents, automations and surveys by simulating a conversation in the messaging module.

You can use Rocketbots to Simulate a Conversation with your Dialogflow Agent
Simulating a Conversation on respond.io

Prefer to complete the Dialogflow Integration tutorial via video? Here it is.

Connecting Dialogflow to respond.io

Dialogflow CRM Setup: Connecting Messaging Channels

The next step in setting up a Dialogflow CRM is to connect messaging channels. Once the messaging channels are connected, users will be able to chat with the connected Dialogflow Agent, a contact will be created for every user that chats and their chat history will be saved under their contact details. Below we've listed the channels we support and directed you to the relevant documentation for connecting each channel.

To Integrate Dialogflow With A Website through respond.io, use our Web Chat widget. Since there is no Web Chat option provided directly by Dialogflow, we created a Dialogflow website integration of our own by providing a web chat to our users. Docs are available here.

To Connect Facebook Messenger check out our Facebook Messenger docs here. Although there is a direct Dialogflow Facebook Messenger integration, you'll want to connect through respond.io to see your chat history. To connect to Facebook Messenger you'll need a Facebook page, you can check out our guide on creating a Facebook page here.

To Connect WhatsApp choose between two of our Dialogflow Integrations with WhatsApp. Each works a little differently. Please review both Dialogflow WhatsApp integration options, Chat API, and Twilio WhatsApp before proceeding.

To Connect WeChat check out our WeChat docs here. To use our Dialogflow WeChat integration, you'll need a WeChat Official Account. You can check out our guide to creating a WeChat Official Account here.

To Connect LINE check out our LINE docs here. To use our Dialogflow LINE integration, you'll need a LINE Official Account. You can check out our guide to creating a LINE Official Account here.

To Connect Telegram check out our Telegram docs here. To use our Dialogflow Telegram integration, you'll need a Telegram Bot. You can check out our guide to creating a Telegram Bot here.

To Connect Viber check out our Viber docs here. To use our Dialogflow Viber integration, you'll need a Viber Bot. You can check out our guide to creating a Viber Bot here.

To Connect SMS check out our Twilio SMS docs here. To use our Dialogflow Twilio integration, you'll need to buy a number on the Twilio platform.

To Connect Twitter DM check out our Twitter docs here. To use our Dialogflow Twitter DM integration, you'll need to set up an app on Twitter. There are detailed instructions in the docs.

To Connect Slack check out our Slack docs here. To use our Dialogflow Slack integration, you'll need to set up an app on Slack. There are detailed instructions in the docs.

Phew, that was a lot of channels. 😅

Now that your messaging channels are connected let's connect some additional integrations that will help to improve your agent and move the data you collect to an outside CRM.

Dialogflow CRM Setup: Chatbase & Zapier Integrations

Although you could stop with channels, Chatbase and Zapier will power up your Dialogflow agent even more.

With Chatbase, you'll be able to see in-depth analytics regarding your Dialogflow agent sessions flow. It's a fantastic tool to help improve your agent over time.

With Zapier, you'll be able to push data you collect about contacts in respond.io to an outside CRM with simple one-click integrations.

Dialogflow CRM Setup: Connecting Chatbase to respond.io

We're not sure why there isn't a one-click Dialogflow Chatbase integration as both are Google products ¯\_(ツ)_/¯. So we made a straightforward integration ourselves. To connect Chatbase, you'll need to create an account, create a bot on Chatbase, and copy the API key to your respond.io space.

To create a bot on Chatbase create an account on Chatbase then press add new bot.

To setup a Dialogflow Chatbase integration, you'll first need to create a bot on Chatbase.
Creating A Bot On Chatbase

Then fill in the information required by Chatbase.

Keep in mind the reporting paths for sites feature will be deprecated by Chatbase, so respond.io does not currently support it.

To setup a Dialogflow Chatbase integration, you'll first need to create a bot on Chatbase and fill in the required details.
Creating A Bot On Chatbase

To retrieve the API key press continue and it will become available on the next screen.

To setup a Dialogflow Chatbase integration, you'll first need to create a bot on Chatbase and fill in the required details, then retrieve the API key.
Retrieving The API Key From Chatbase

To paste the API key navigate to Settings > Chatbase > Connect.

To enable the Dialogflow Chatbase Integration paste the API key by navigating to Settings > Chatbase > Connect.
Adding The Chatbase API Key To respond.io

Then paste the key > Connect.

To enable the Dialogflow Chatbase Integration paste the API key by navigating to Settings > Chatbase > Connect, then paste the key and press connect again.
Adding The Chatbase API Key To respond.io

Congrats, you've just completed your Dialogflow Chatbase integration via respond.io.

Now you'll be able to see a detailed set of aggregate analytics about your Dialogflow Agent, similar to the Analytics that can be found on Google Analytics.

An image of the sample analytics that can be found after completing the Dialogflow Chatbase Integration.
Sample Chatbase Analytics

Now that you've mastered the art of Dialogflow Agent aggregate analytics time to zoom in to contact data.

Dialogflow CRM Setup: Connecting Zapier to respond.io

The beauty of chat, whether with automation or live chat, is that you can collect a fair amount of data about your contacts over time. At some point, you'll want to move that data to another system. Since there is no Dialogflow Zapier integration, we created a Zapier integration with respond.io.

To connect respond.io to Zapier, you'll need to create a Zap.

To create a Zap log in to your Zapier account > then use our early access link to find the respond.io app on Zapier.

Then select a trigger.

To create a Dialogflow Zapier integration with Rocketbots, you'll need to create a zap then select a trigger.
Selecting a Trigger

The New Contact trigger will pass the information to Zapier when a new contact is created. The New or Updated Custom Field trigger will pass information to Zapier every time a value in the custom field of your choice is changed or added.

Now that you've selected your trigger you'll need to connect Zapier to your respond.io account.

To retrieve the Zapier integration token from your respond.io Space navigate to Settings > Integrations > Zapier > Connect.

To create a Dialogflow Zapier integration with Rocketbots, you'll need to retrieve the Zapier token from your Rocketbots Space
Retrieving the Zapier Token

Then paste the token > press Yes, Continue.

To create a Dialogflow Zapier integration with Rocketbots, you'll need to paster the Zapier token from your Rocketbots Space
Pasting the Zapier Token

If you've selected the new or updated custom field trigger, you can select additional data to be passed. Along with the value of the updated custom field, you can pass data from other custom fields and tags.

To select additional fields chose them from the dropdown.

After creating the Dialogflow Zapier integration with Rocketbots, you'll be asked if you want to pass data from additional fields.
Selecting Additional Fields

Done, now you can create the Zap action. The action will determine the service you pass the data to and how the data is passed.

If you've got any questions our Zapier integration documentation here.

Now that you've got you're Dialogflow CRM set up it's time the explore different use cases and the magic you can create with them.

5 Simple Ways To Use respond.io with Dialogflow Integration

We've always wondered why Dialogflow hasn't considered business needs like the need to know, understand, and further interact with customers or even be alerted when something goes wrong. Here are five simple ways to increase the power of your customer chats with repsond.io and Dialogflow:

  1. Use Dialogflow To Automatically Tag Contacts
  2. Send a Dialogflow Broadcast
  3. Unsubscribe Dialogflow Contacts from Broadcasts
  4. Create Custom Dialogflow Notifications

1 Record, Attribute & Export Dialogflow History with respond.io

The first time we fired up Dialogflow, back in the API.AI days, we noticed even if we built the best chatbot ever, it would be nearly impossible to show a client the success we had achieved. Furthermore, it would be even more difficult to explain when something went wrong.

The critical question was, how can we provide clients with Dialogflow agent performance transparency? It's easy with respond.io. Create a space, connect Dialogflow, then connect the clients messaging app business accounts.

With respond.io connected, there is no need for a Dialogflow export history function.

There is no need for a Dialogflow export history function. Just connect to Rocketbots with our Dialogflow integration and you'll have your chat history shown per contact.
respond.io Attributes Dialogflow Chat History

With our respond.io & messaging app integrations, the entire Dialogflow chat history is recorded and attributed to the relevant contact. All you need to do is invite your clients to the platform.

Since all our plans have unlimited users, and the Dialogflow integration included, creating transparency for clients is as easy as a few clicks.

To invite your clients navigate to Settings > Users > Add User.

Instead of exporting your Dialogflow Chat History for clients, just connect to the Rocketbots platform, invite your clients as a user and let them explore your Dialogflow agent conversations.
Adding A User To respond.io

Then chose their access level.

Instead of exporting your Dialogflow Chat History for clients, just connect to the Rocketbots platform, invite your clients as a user and let them explore your Dialogflow agent conversations.
Adding A User To respond.io

That's all, now that you've created a user account for your client, there is no longer a need to export Dialogflow chat history. Now your client can access any conversation your Dialogflow agent has had with the user and even know which contact they had the conversation with.

2 Use Dialogflow To Automatically Tag Contacts

Now it's one thing to allow your client to sift through all the conversations, but that takes a long time, especially if you have a successful Dialogflow agent. Wouldn't it be fantastic if you could automatically add tags to contacts based on their interests?

With Dialogflow Developer Entities & respond.io Dialogflow Parameters, you can do just that.

To create Dialogflow Develop Entities navigate to the Dialogflow Console > Entities > +.

To create contact tags based on Dialogflow Developer Entities first create your entities list.
Creating Custom Entities

I've used custom entities to list the cars that my dealership client sells. Now let's create an intent with relevant training phrases.

To create contact tags based on Dialogflow Developer Entities first create your entities list, then add training phrases with the Dialogflow Developer Entities highlighted.
Creating Training Phrases With Custom Entities

I've added some training phrases and annotated my entities. Now, I'll use the RB_ADDTAGS to send that tag in respond.io.

To create contact tags based on Dialogflow Developer Entities first create your entities list, then add training phrases with the Dialogflow Developer Entities highlighted, then add RB_ADDTAGS to the parameters
Adding A Rockebots Tagging Parameter to Dialogflow

Now, let's test our conversation.

To create contact tags based on Dialogflow Developer Entities first create your entities list, then add training phrases with the Dialogflow Developer Entities highlighted, then add RB_ADDTAGS to the parameters, then test the converation.
Testing the Conversations

It's as simple as that. If a contact chats about one of the products, a tag will be added to their profile in respond.io. Enabling your client to receive robust contact interest analytics on the respond.io dashboard, something that can't be done with Dialogflow Analytics.

One last thing, if you don't want to use Dialogflow Developer Entities, simple tags can be used as below.

This shows how two simple tags can be sent from Dialogflow to the relevant contact in Rocketbots, creating powerful Dialogflow Analytics
Sending Two Tags from Dialogflow to respond.io

In this case, two tags will be added to your respond.io contact: BMW X5 & Pricing.

Now that your chatbot client is automatically tagging their contacts based on product interests, wouldn't it be great if you could send mass messages to contacts based on their tagged interests?

3 Send a Dialogflow Broadcast

You've used Dialogflow to tag all your contacts with their product interests, now wouldn't it be great if you could send mass messages to contacts tagged with BMW X5? Too bad Dialogflow Broadcasts don't exist. respond.io to the rescue, send the broadcast from respond.io.

To send a broadcast navigate to the Broadcast Module > Add Broadcast > fill in your broadcast preferences.

There is no way to send a Dialogflow Broadcast from the Dialogflow console, but you can send a broadcast to your Dialogflow users from Rocketbots.
Sending a Broadcast

Using a respond.io broadcast, you'll reengage the users tagged by your Dialogflow agent. This way, you can send contact that is specifically tailored to encourage that contact segment to respond.

The broadcast content builder allows a message which includes text, images, files, multiple choice questions, or even surveys. To learn more about the capabilities of chat broadcasts on respond.io, check out our broadcast documentation.

4 Unsubscribe Dialogflow Contacts from Broadcasts

Now that you have a way to create Dialogflow Broadcasts you'll want to manage the user experience of your contacts. Even though you're sending perfectly targeted messages to small groups of contacts, some users will still want to stop receiving broadcasts, and they will type "STOP".

We've created an easy way for you to make sure these users never receive another broadcast using the Subscription Parameter. The Subscription Parameter allows you to unsubscribe a respond.io contact from all future broadcasts.

To use the Subscription Parameter navigate to the Dialogflow Console > open a Dialogflow Intent > add "STOP" to your training phrases > add RB_SUBSCRIBE to Dialogflow Parameters > set the value to false.

When using Rocketbots to create Dialogflow Broadcasts you will occasionally see users who type stop, this image shows how you can use the RB_SUBSCRIBE Parameter to Dialogflow Parameters
Using The Subscription Parameter to Unsubscribe Contacts from Broadcasts

Once the contact has sent "STOP" they will be unsubscribed from all broadcasts, but they will still be able to converse with the Dialogflow Agent.

Here's a tip. Create a custom field for subscription status, so you can check if a contact has unsubscribed. Alternatively, you can create a custom notification to notify you when someone unsubscribes.

5 Create Custom Dialogflow Notifications

A very successful Dialogflow Agent will have hundreds or thousands of contacts chatting daily. In some situations, you'll want to be alerted when an intent is triggered. A contact completely unsubscribing from broadcasts could be one of these cases.

Using the Notification Parameter, you can send a notification to the respond.io Platform with a specific message.

To create a custom Dialogflow Notification navigate to the Dialogflow Console > open a Dialogflow Intent > add RB_NOTIFY to Dialogflow Parameters > set the value to the notification you want to send.

The image shows how you can create a Dialogflow Notification by using the RB_NOTIFY parameter and the notification you want to send in the value of your Dialogflow Parameters.
Creating Custom Notifications

When creating a notification message, you can use dynamic variables to send the contacts name, phone, email, and other custom fields you create in the respond.io platform.

We've covered a few simple ways to power up your business messaging with Dialogflow and respond.io.

Now, let's see how a fully fledged hybrid human + AI sales and support business messaging system would look like with Dialogflow and respond.io CRM.

Build Hybrid Human + AI Sales & Support Messaging Using respond.io as A Dialogflow CRM

Building reliable hybrid human + AI sales & support business messaging involves a few moving parts, including humans. In the next section, we'll describe how to get everything working well together by exploring a car dealership user case.

We'll show you how to reliably onboard contacts, guide them, achieve a human handoff to a clients staff member:

  1. Use respond.io Automations to Onboard New Contacts
  2. Handling FAQs & Using respond.io As A Dialogflow CMS
  3. Fallbacks & Building a Dialogflow Human Handoff

1 Use respond.io Automations to Onboard New Contacts

We've tried building contact onboarding using Dialogflow before, and everything works well when using a simple greeting message. However, when collecting data, it's simpler to make a rules-based automation on respond.io.

You can build an onboarding conversation in respond.io by creating a survey to collect email and phone. Then create an automation to trigger the survey for every new contact.

To create the onboarding questions navigate to Surveys > Add Survey > add the questions.

Sometimes collecting information in Dialogflow especially when onboarding contacts can be a pain, sometimes it is easier to make a Rocketbots survey
Creating an Onboarding Survey

We've created a simple survey asking a contact for their email, phone number, and set them to be collected in the relevant field. Now, let's automatically send the survey to every new contact.

To automate the onboarding survey navigate to Automations > Add Rule > use Conversation Start as a Trigger > add 3 Actions: send message, send survey, and send message.

Sometimes collecting information in Dialogflow especially when onboarding contacts can be a pain, sometimes it is easier to make a Rocketbots survey then trigger it for all new contacts with an automation rule
Creating An Automation

Above, we've created an automation rule that helps with a few things. First, it will welcome the contact with a greeting. Then it will serve the survey to the contact. Lastly, it will give them a multiple choice question.

We've left the last part as multiple choice (instead of survey) because we don't need to collect the data nor force them to answer the question. We want the answer to the multiple choice question to be sent to Dialogflow.

If the contact clicks show me cars or service appointment, they will trigger the appropriate intent. These types of questions are the perfect opportunity to use Dialogflow Fulfilment to reach our to an outside service and bring back a carousel of cars or allow the contact to book an appointment.

Let's say the contact doesn't cooperate and asks a question instead. Let's say it's a FAQ too. What's the best way to handle it when using Rockebots as a Dialogflow CRM.

2 Handling FAQs & Using respond.io As A Dialogflow CMS

If you're familiar with Dialogflow, you've probably used it to answer frequently asked questions. Remember, every time a contact sends a new message, respond.io will automatically mark that contact as pending until a human, an automation or Dialogflow marks the contact done.

To mark a contact as done from Dialogflow navigate to the Dialogflow Console > open the intent > add RB_MARKDONE to Parameter > set the value to false.

When using Rocketbots as a Dialogflow CRM, you should add the Marked Done Parameter to all intents that do not require human attention, so contacts do not get stuck in pending.
Marking Contacts As Done

To keep contacts organized in respond.io add the Marked Done Parameter to the intents which successfully answer contact questions. That way, contacts who have been successfully answered not to pollute the pending list.

Another benefit of using respond.io as a Dialogflow CRM is the ability to have a simple Dialogflow CMS. When building a Dialogflow Agent for a client you'll want your client to be able to change the response for some intents. This can be achieved by creating a Snippet in Rockebots, then using the Snippet Parameter in Dialogflow.

To create a snippet in Dialogflow navigate to Snippets > Add Snippets > create the Snippet > save > then copy the Snippet ID from the Snippet table.

You can use Rocketbots as a Dialogflow CMS by using a Snippet and the Snippet Parameter to deliver responses.
Creating a Snippet

Each Snippet you create has a permanent ID but respond.io users with the manager access level can change the message it delivers. If your client needs to change the opening hours they are sending to users, they can do so from the Snippets module.

For a Dialogflow Intent to send this Snippet you'll need to add the Snippet ID as a parameter.

To add the Snippet Parameter and ID navigate to the Dialogflow Console > open an intent > add RB_SNIPPET to the Parameter > set the value to the Snippet ID.

You can use Rocketbots as a Dialogflow CMS by using a Snippet and the Snippet Parameter to deliver responses.
Adding Snippet ID to a Dialogflow Intent

Excellent, now you've got yourself a miniature Dialogflow CMS where you can edit the Dialogflow Agent for your client, and they can change responses when needed.

3 Fallbacks & Building a Dialogflow Human Handoff

Initiating a Dialogflow human handoff is quite easy when using respond.io. If you want to build a human handover you'll need to add a talk to human prompt in fallback. Then build a talk to human intent using the Bot Status and Notification Parameters.

To create a talk to human prompt navigate to the Dialogflow Console > open the Fallback Intent > add talk to human as a quick reply in the response.

To create a Dialogflow Human Handover first modify the fallback intent
Adding a Talk to Human prompt in the Fallback Intent

Once you've added this prompt to your fallback Intent, create an intent where the handover can happen. The Intent should include Talk to Human in the training phrases and contain your Bot Status and Notification Parameters.

To add Bot Status & Notification Parameters navigate to Dialogflow Console > open the Intent> Add RB_BOTSTATUS to Parameters with false as the value > Add RB_NOTIFY to Parameters with the desired notification message as the value.

To create a Dialogflow Human Handover first modify the fallback intent, then create a talk to human intent.
Creating The Handoff Intent

It's best to add a response to this intent that tells the contact what is going on. Something like, someone will be right with you. Once this intent is triggered, a notification will be sent to platform users in the dashboard and as an email notification.

This is how your Dialogflow Human Handoff Notification will look in the platform.
Handoff Notification

Once the platform user has been notified and helped the contact, they can turn the bot on again from the messaging module.

Phew, we're finished. Using the techniques described in this post, you'll be able to build a fantastic agent with Dialogflow Human Handoff capabilities.

Further Reading

Iaroslav Kudritskiy
Chief Operating Officer
Iaroslav Kudritskiy is the Chief Operating Officer and co-founder of respond.io. He is a graduate of the MBA program at the Chinese University of Hong Kong and his previous roles include positions at Kodak Alaris, Xaxis and Light Reaction.
Tags
Copied to Clipboard!

Ready to get started? ✨

  • Unlock the power of respond.io to grow sales and delight customers.
  • 7-day free trial
  • No credit card required
  • Cancel anytime
Sign Up Free
  • Experience a personalized demo with us
  • Discover why 10,000+ businesses choose us
Book a Demo