
As always, it’s been an action-packed month for the respond.io team. We were awarded three new badges on B2B software platform G2, including Best Estimated ROI in Customer Communication Management. 🏆 Plus, we’re now on Threads! Give us a follow for quality memes and insightful articles on business messaging.
And now, let’s show you what we’ve been up to, from the new respond.io mobile app to redesigned experiences for email and Workflow Templates.
Chat on the Go with Respond.io's New Mobile App
At long last, respond.io has a new mobile app! 🥳 Get ready for a great messaging experience that lets you connect with customers anytime and anywhere.
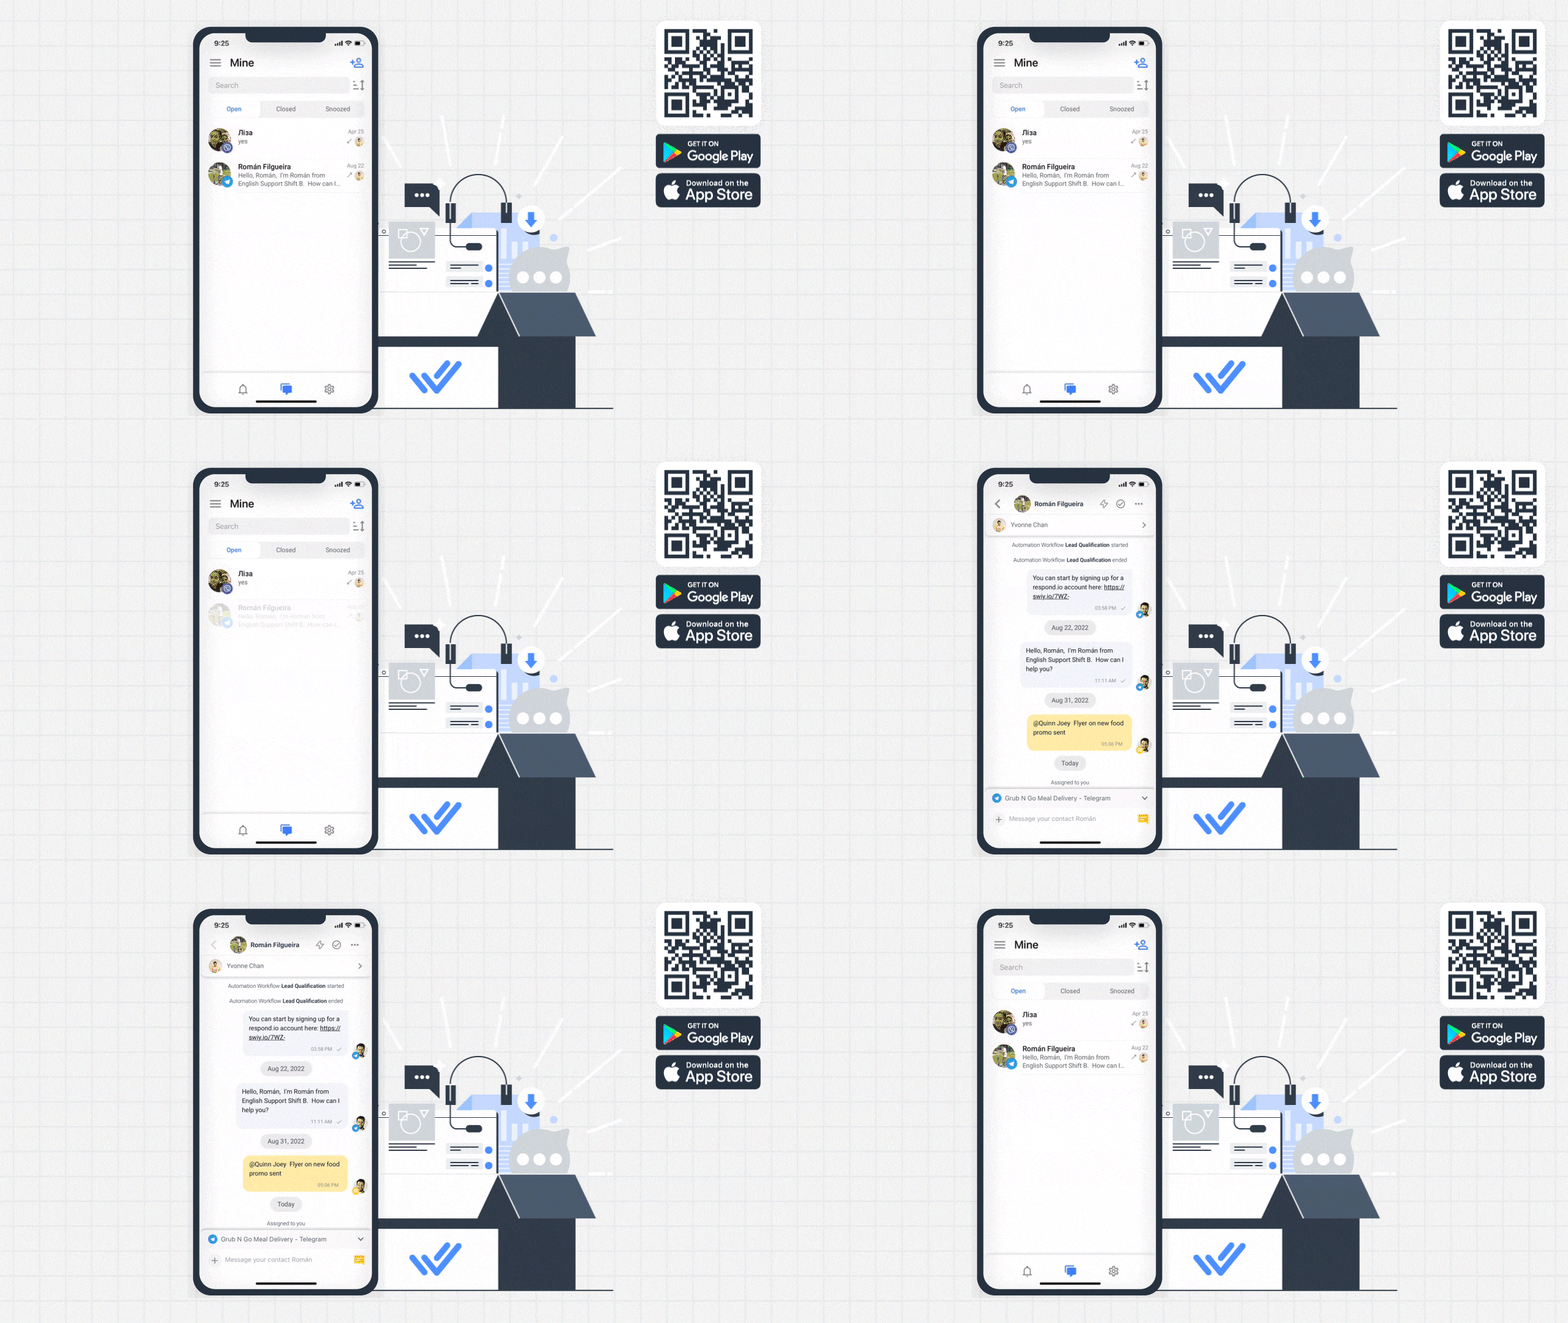
This initial release is centered on the agents who rely on respond.io to read and respond to messages on every channel. Let’s run through the features that make the new app reliable, efficient and easy to navigate.
Connect with Customers Anytime and Anywhere
The Messages Module is still our top priority. The app opens directly to this module and displays your Contact list, which changes according to your selected inbox. You can create a new Contact, switch between Team, Custom and Shared inboxes via the sidebar, as well as filter, search by Contacts or sort messages to find a Contact or conversation.
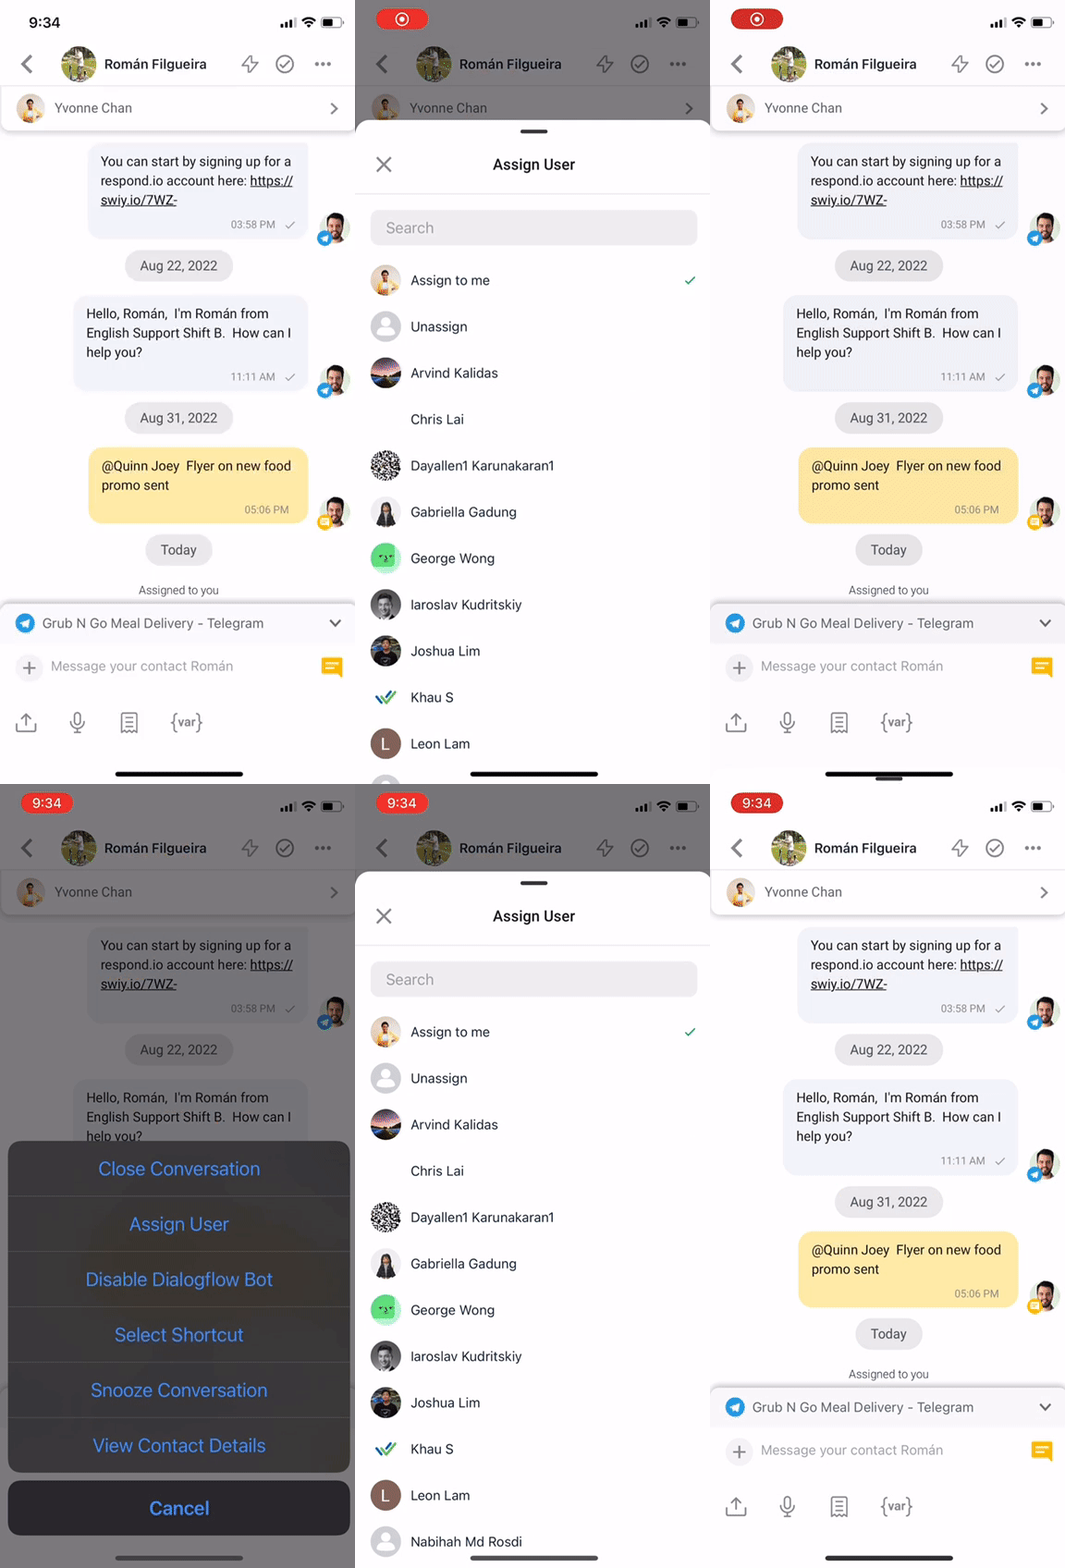
The same messaging flexibility and convenience you enjoy on desktop are available on the app so you can chat, collaborate and launch automation easily. Among others, the app allows you to:
Assign Contacts to an agent
Send Snippets, voice notes or files such as invoices, catalogs or guides
Tag colleagues in Comments
Start a Workflow via Shortcuts
Personalize messages with Dynamic Variables
Snooze or close conversations with closing notes
Enable or disable a Dialogflow Bot
View or edit a Contact’s details
In other words, you can deliver the same customer experience on the go as you could on desktop.
Configure Your Notifications and Settings for a Tailored Mobile Experience
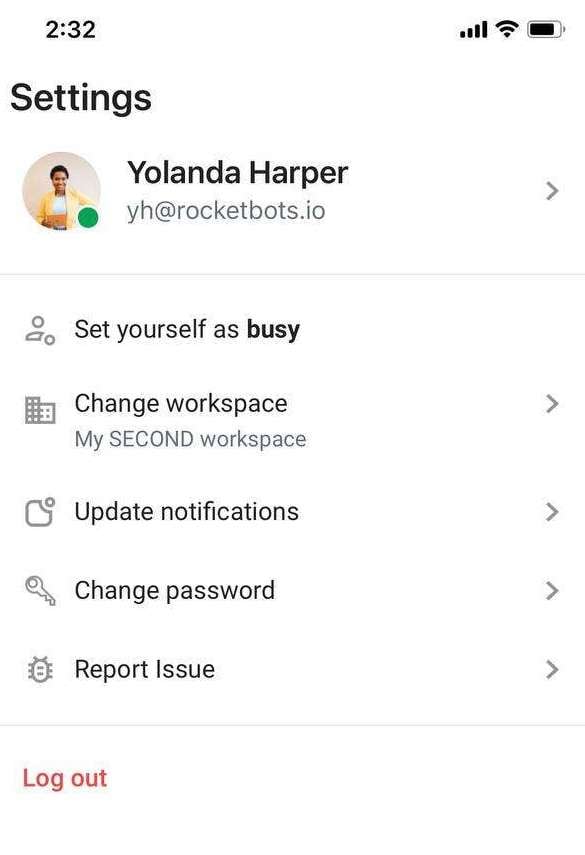
Create the respond.io experience you want. The Settings menu for the initial release focuses on personal settings, allowing you to edit your user profile and status, switch Workspaces, change your password, or update your mobile notification preferences.
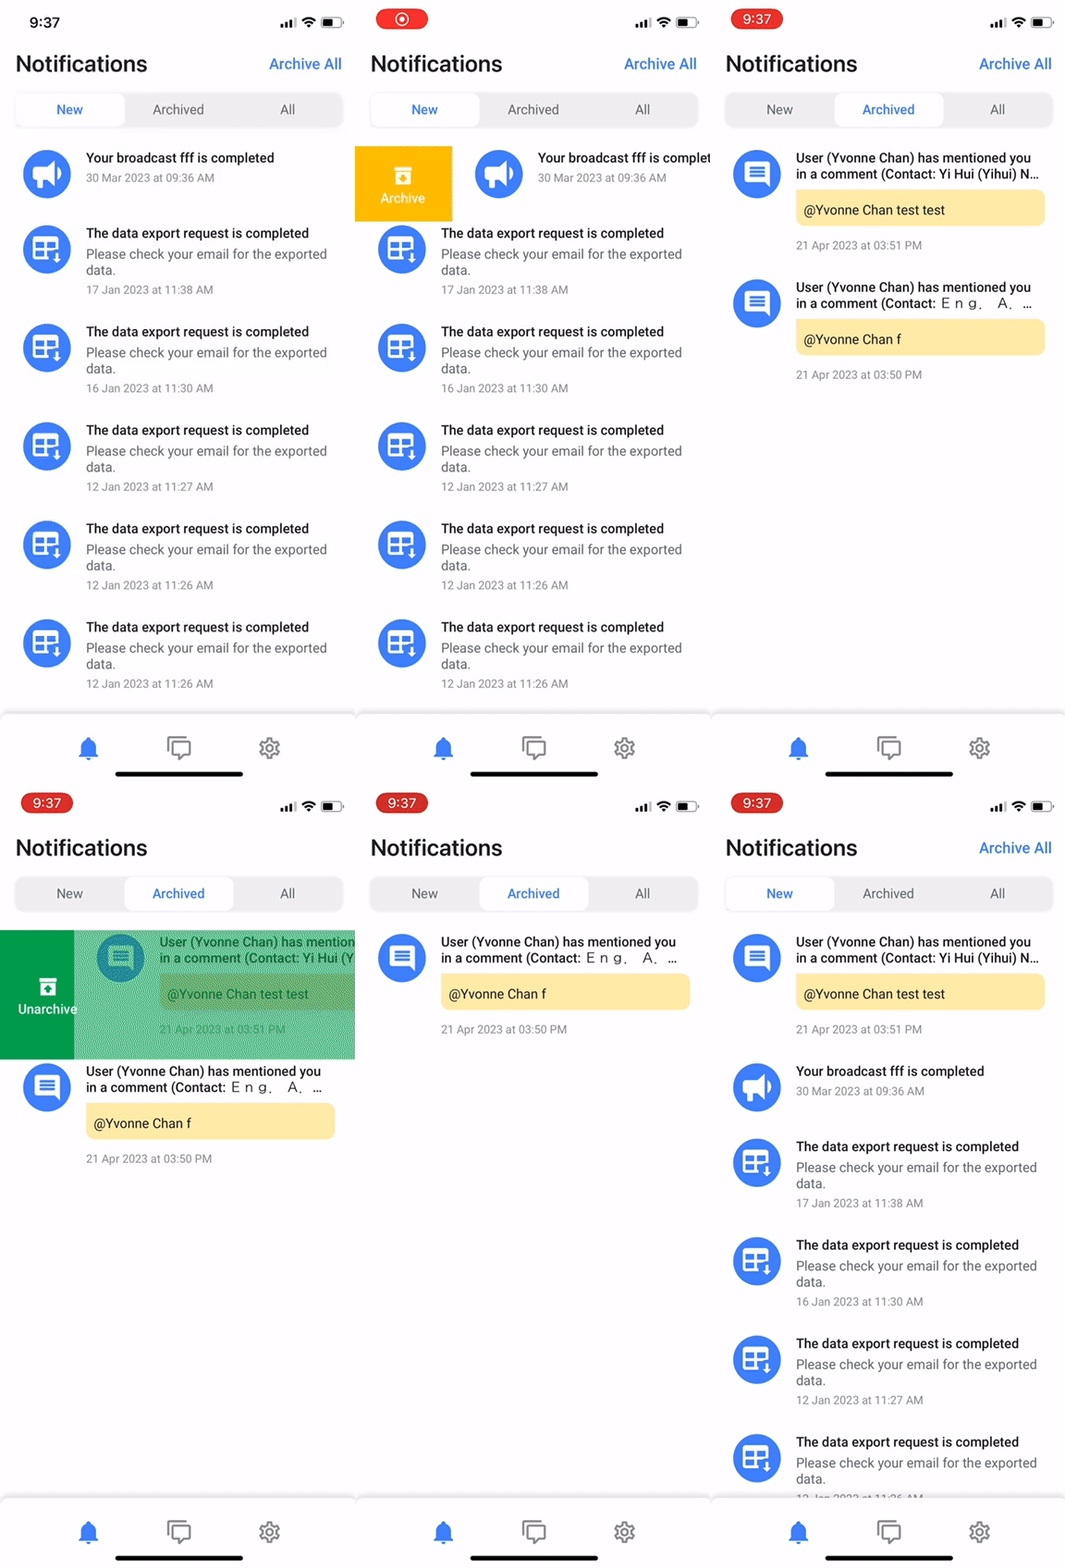
While the notification setting in the Settings menu allows you to adjust your alerts and push notifications, the type of notifications you receive are configured in the Notification Center.
Here, your notifications are organized into New, Archived and All Notifications. This essentially allows you to treat the center as a task list: Archive notifications that don’t require action, so you only see items you need to follow up on.
Get the full details about the mobile app in the respond.io Help Center. More features will be launched soon and you can help us prioritize your needs by requesting or upvoting new features. For access to additional features in the meantime, use respond.io via the web browser on your phone or desktop.
Ready to make your respond.io experience mobile? Download the new app now by searching for “respond.io - Inbox” in the Apple App Store or Google Play Store. To create a new account, sign up for a respond.io account on the desktop to get started.
Update your device software to the latest version (Android 10 and above, iOS 16 and above) for an optimal user experience. Please report any issues you encounter while using the in-app bug report button or contact our support team with any inquiries.
Improved Email Experience on Respond.io
You wanted a better email experience, and we delivered. Respond.io is now optimized for email, giving you the same experience of sending emails as your native email channel. Check out some of the improvements below.
Better Email Management and Formatting
Previously, achieving the same formatting as native email channels was not possible on respond.io. For instance, emails received on respond.io’s Messages Module didn't include the email subject, which made it challenging for agents to identify which email they were replying to.
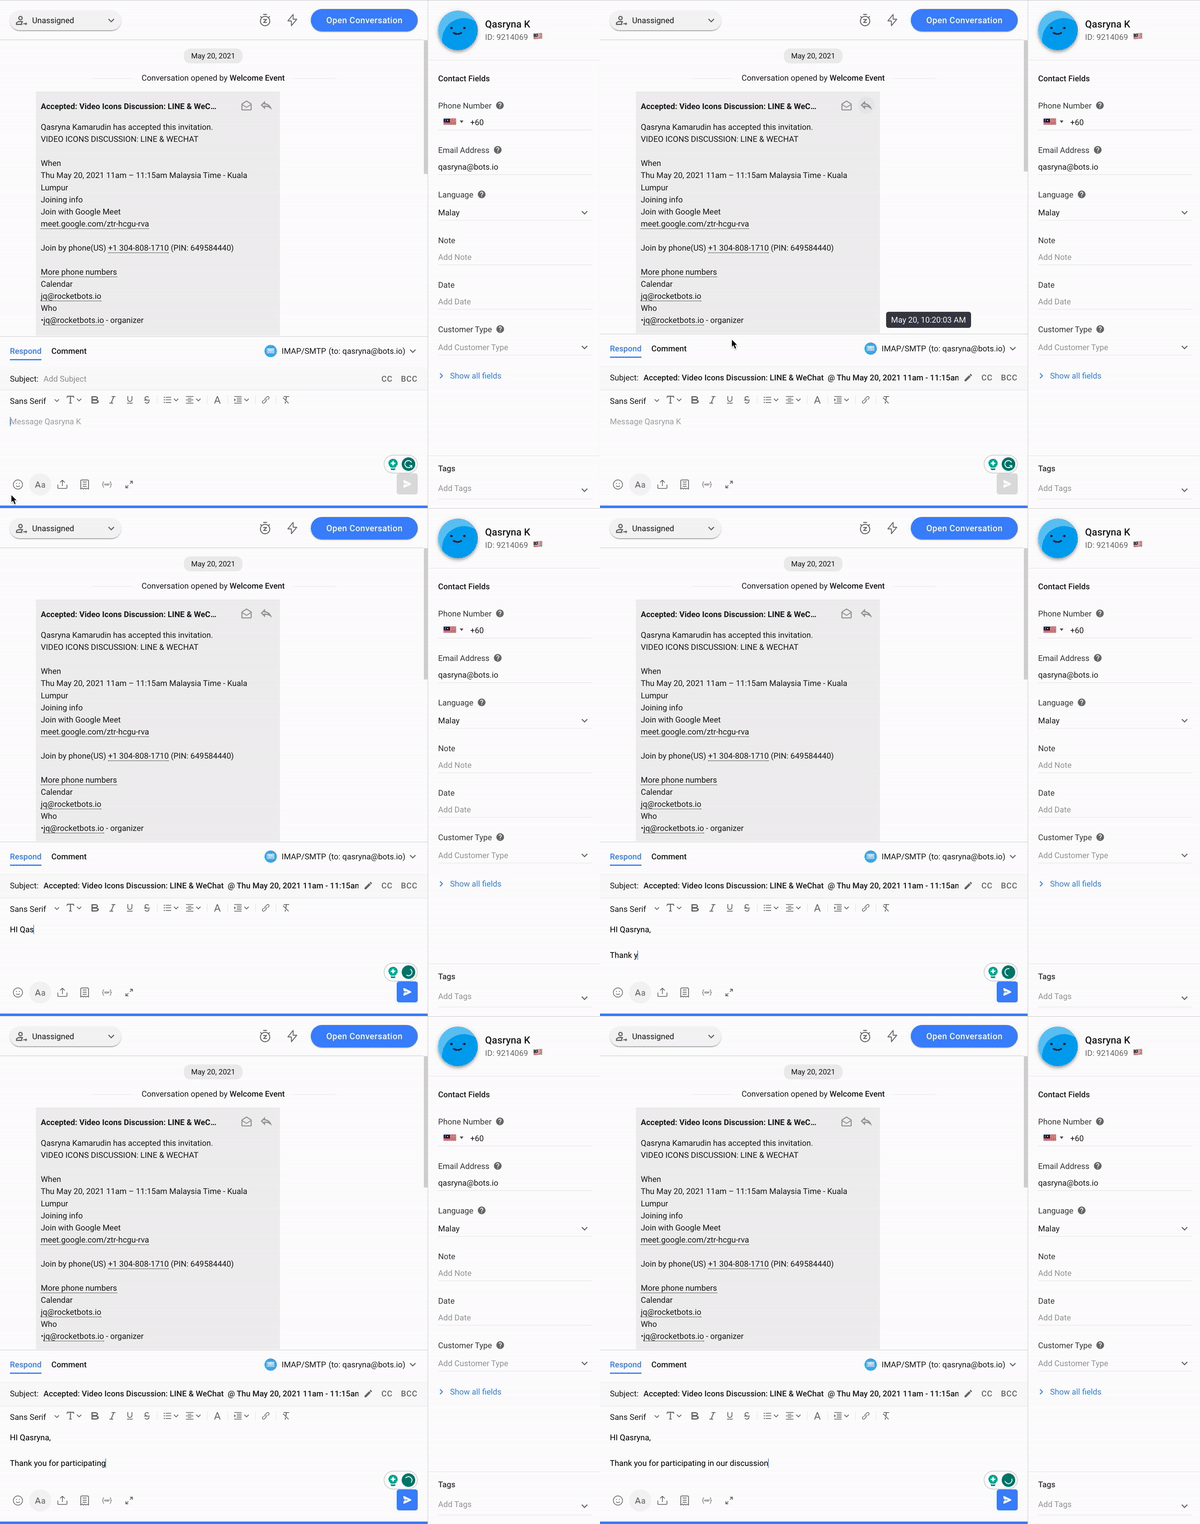
Additionally, on the customer's side, replies were not organized in the same thread within their inbox and instead appeared as new emails. Now, you can:
See email subjects in your Messages Module to reply to specific emails.
Use the Email Composer to compose and format emails according to your preference, just like in your native email channel.
Ensure your emails retain the formatting you apply, allowing contacts to view them exactly as you intended.
CC and BCC stakeholders in all emails or on an ad hoc basis
How’s that for a more natural email experience?
Improved Brand Recognition and Credibility
Here’s another pressing issue we solved. Before, customers couldn’t instantly recognize emails from your business as the sender’s email address was displayed in the customer’s inbox instead of the sender’s name and organization.
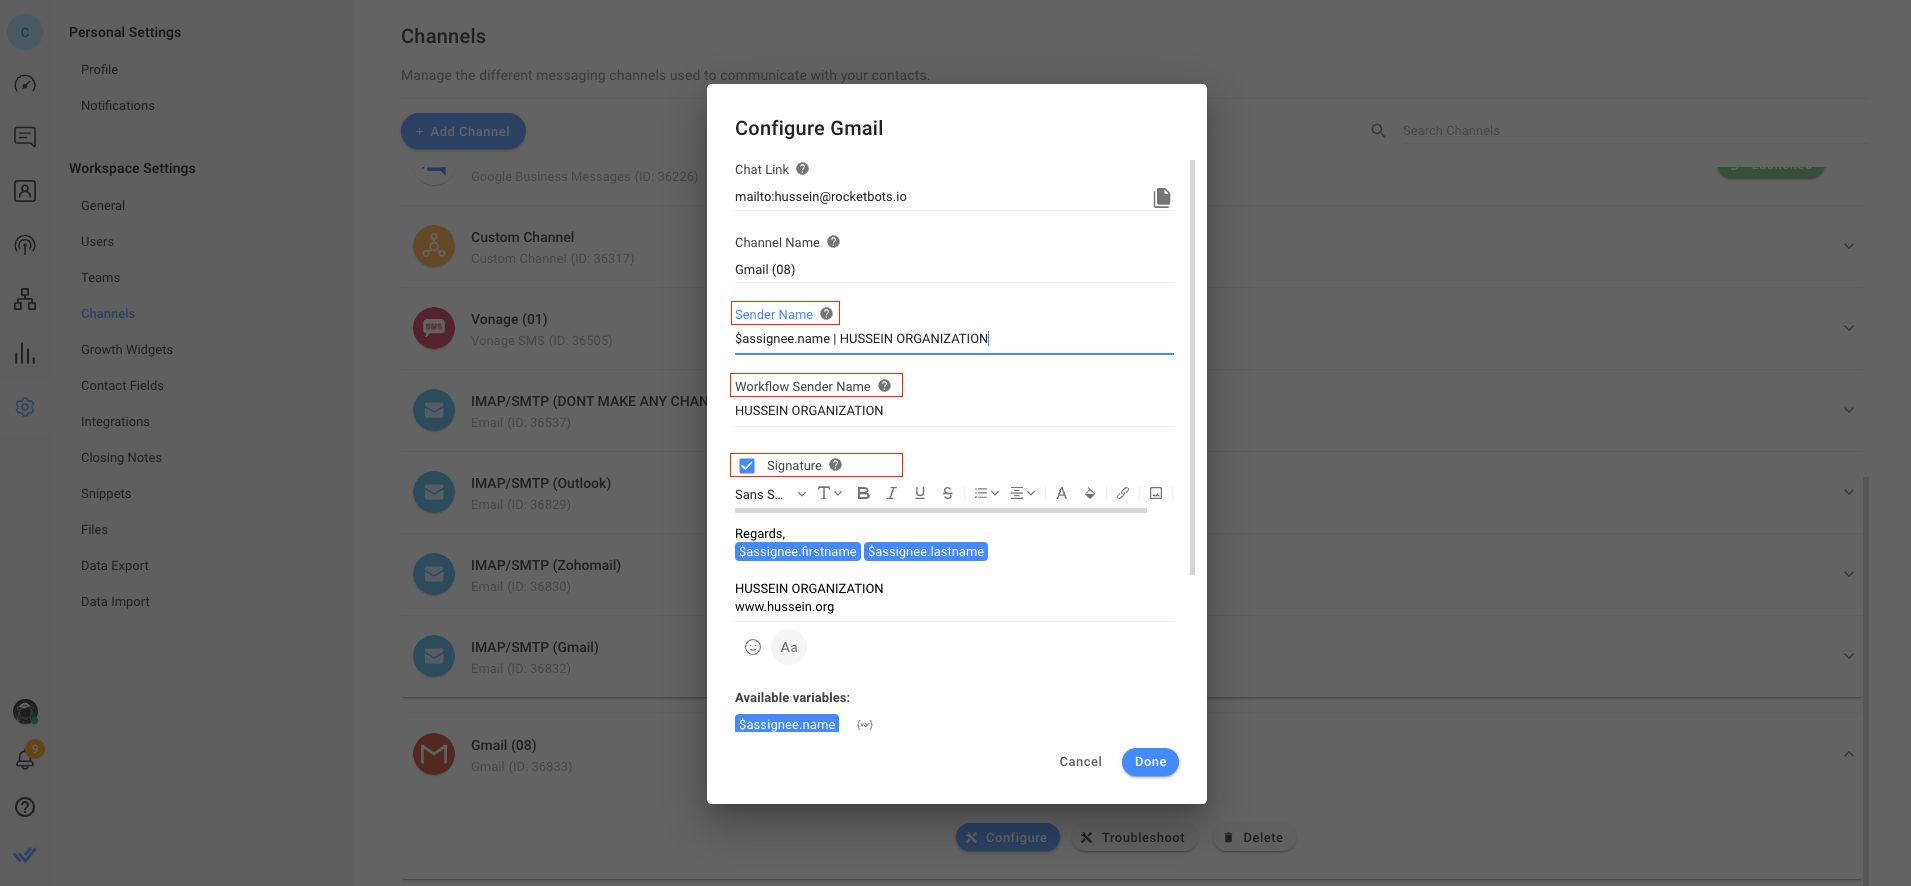
This often led to customers doubting the legitimacy of the email, resulting in them ignoring you or marking your emails as spam. To avoid this, you can now specify the sender’s and your company’s name in Settings so customers can immediately identify you in their inbox or email notifications.
You can also add a custom signature with your company details to enhance brand presence and establish credibility.
Compose and Send Emails Automatically with Workflows
Previously, there was no option to include an email subject when sending emails using the Workflows Module. Now that respond.io mirrors your native email channel experience, you can apply similar formatting when automating emails using Workflows.
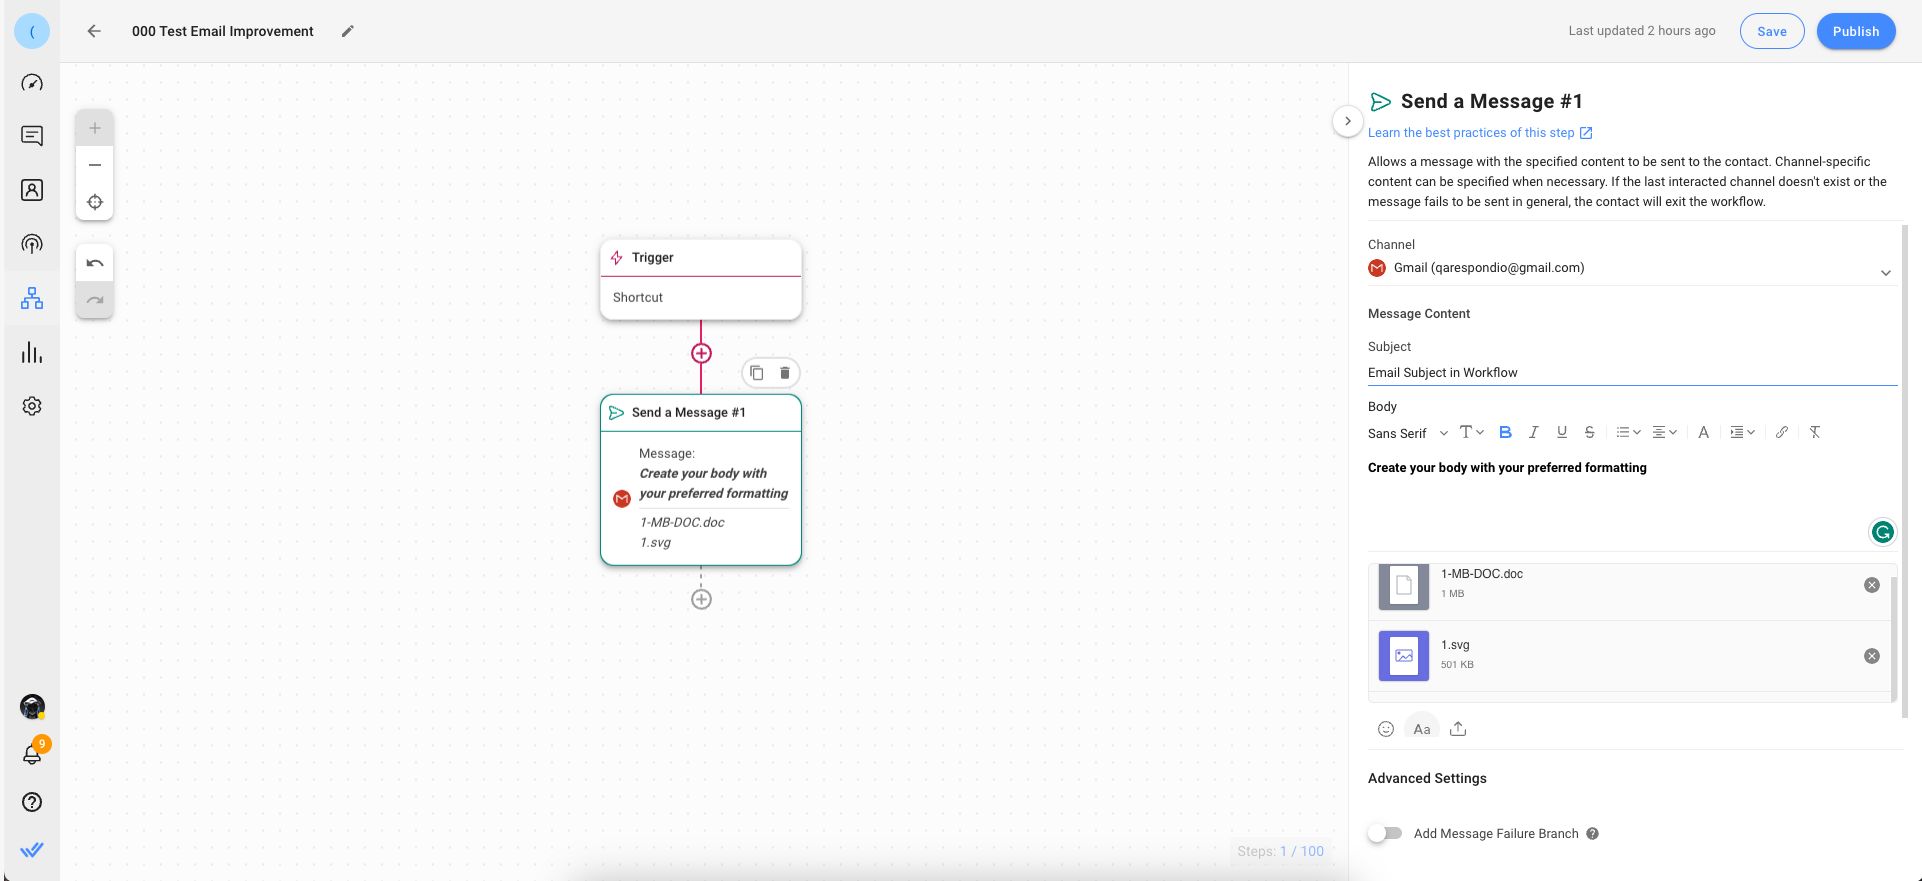
To maintain consistency across all emails sent from respond.io, you can compose and format your email using the Send a Message Step in the Workflows Module and ensure the sender’s name & email signature are included in all emails sent using Workflows.
All About Workflow Templates
Firstly, the Workflow Templates page has undergone a complete revamp! 🏗️ We’ve replaced the previous icon-based templates with visually representative images that indicate the purpose of each template so you can identify and locate your desired template at a glance.
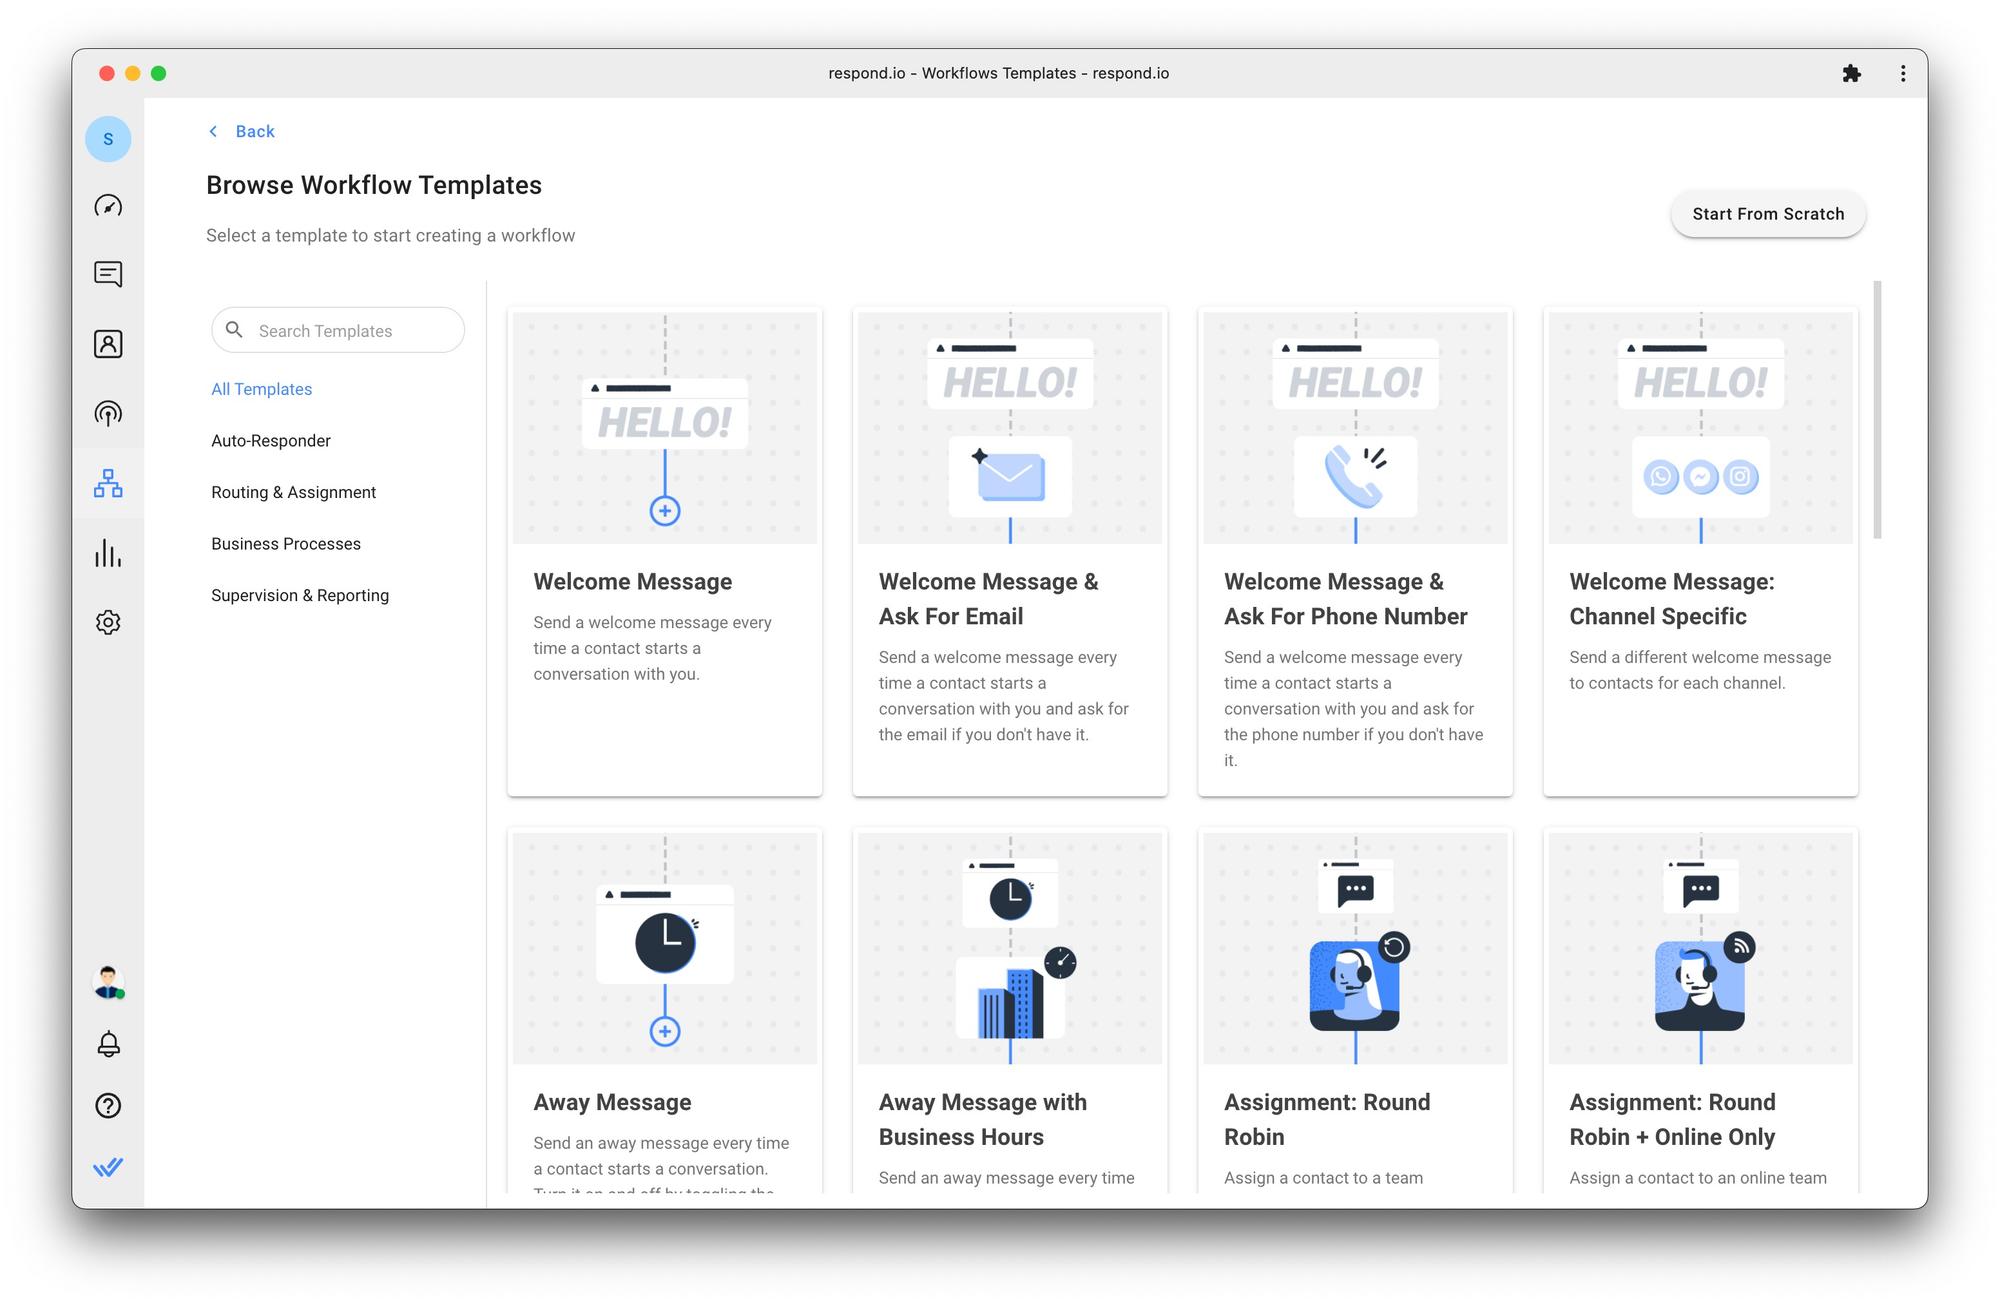
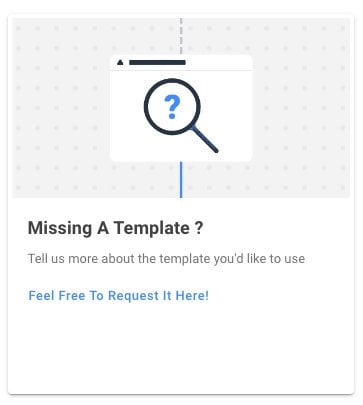
Need a template that aligns with your specific business processes? We've got you covered! You can now submit your template request. Just scroll to the bottom of the Workflow Templates page and fill in your request.
Now, let’s take a look at what’s new in terms of templates.
New Workflow Template Preview Page
Previously, the only way to understand a Workflow Template was to go through its setup in the Workflow builder and not only understand how it worked but also imagine how this could be applied to your specific use case.
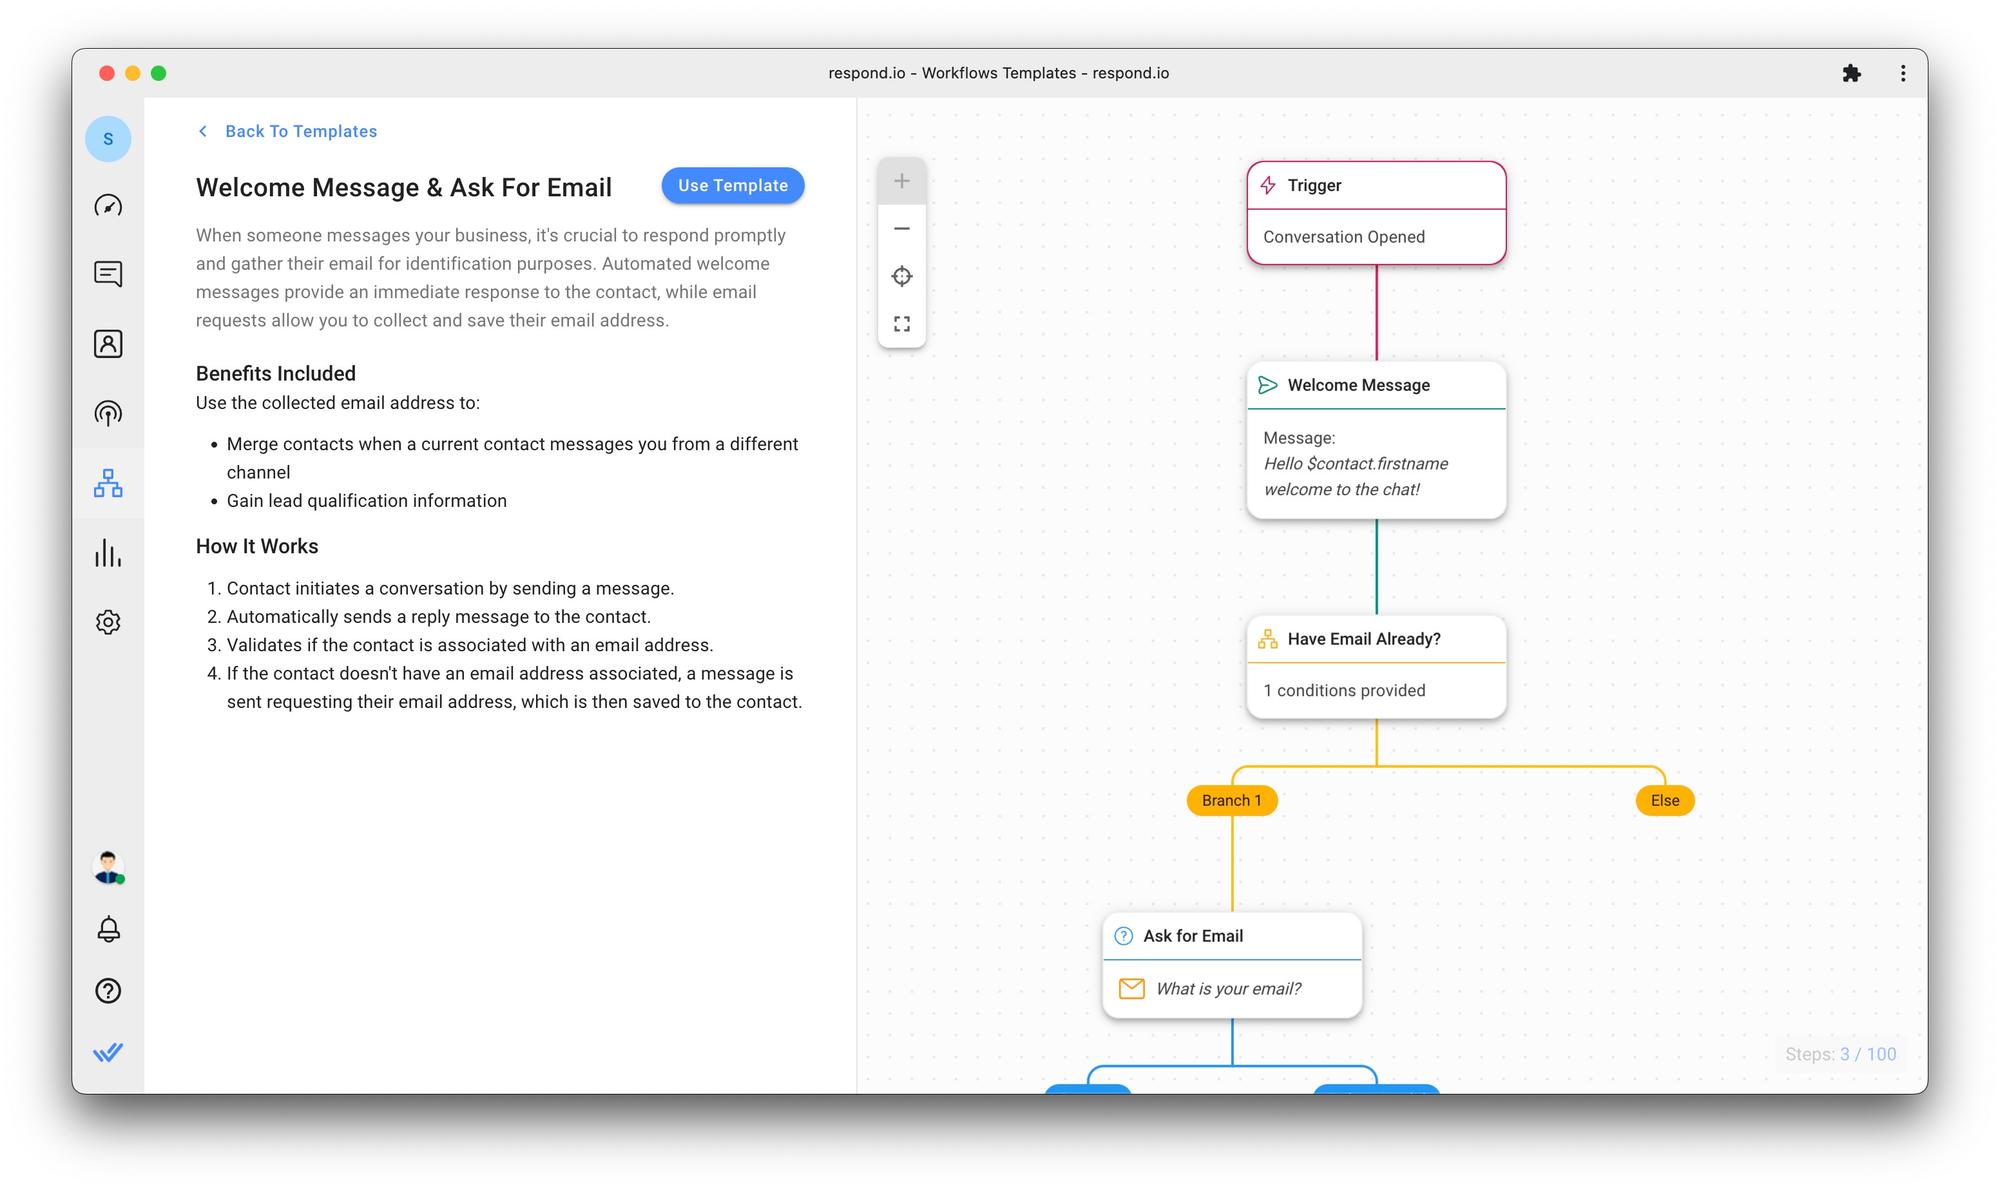
Now, we've added a new Workflow Template preview page tp provide insights into the Workflow’s functionality and its benefits. Best of all, you can get a full preview of the Workflow before creating it. To use a template, click the "Use Template" button at the top of the preview page.
Expanded Workflow Templates Collection
In addition to the enhancements mentioned above, we're excited to introduce new Workflow Templates. 🥳
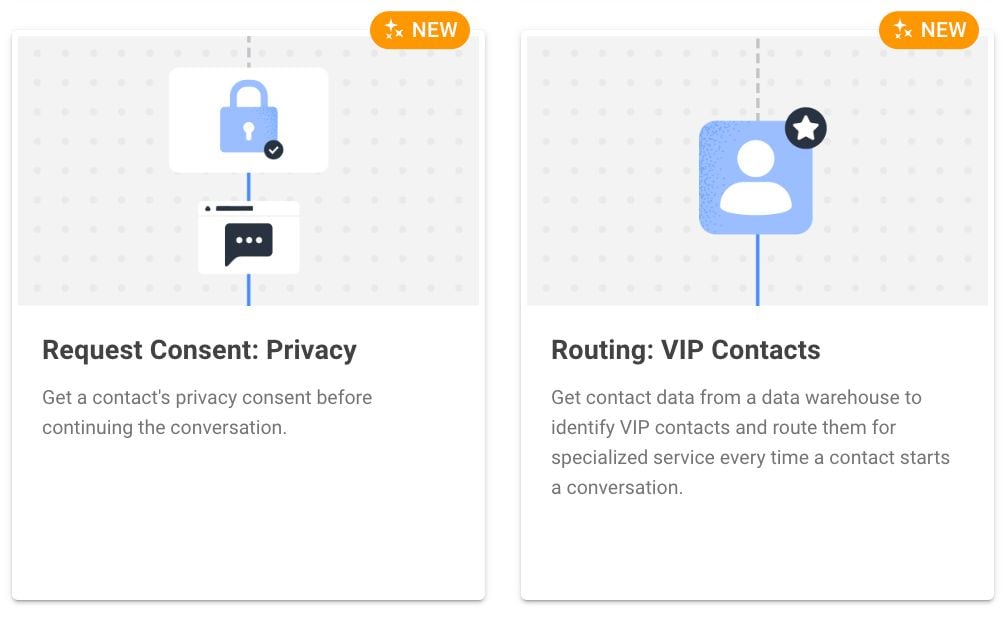
Check out the four new templates we’ve added to our collection:
Request Consent: Privacy: Obtain privacy consent from contacts to ensure compliance and mitigate potential conflicts.
Routing: VIP Contacts: Identify VIP contacts from your data warehouse and create personalized customer journeys for them.
Routing: New & Returning Contacts: Distinguish between new and returning Contacts when they start a conversation to send them on different customer journeys.
Mark Contact as Spam: This Shortcut-triggered template labels fake or inauthentic Contacts as Spam and closes the conversation
Ready to automate more business processes? Give the new template browser and selections a try. 💪
More Flexibility and Precision with These Workflow Improvements
Templates aren’t the only Workflow elements to get an upgrade. We’ve also improved niggling issues and added new functionalities for greater flexibility and precision when using Workflows.
Message Failure Branch for Send a Message and Ask a Question Steps
In the past, when a message failed to send during the Workflow's Send a Message or Ask a Question Steps, the Contact would exit the Workflow. To prevent this, we have introduced a new Failure Branch for the Send a Message and Ask a Question Steps.
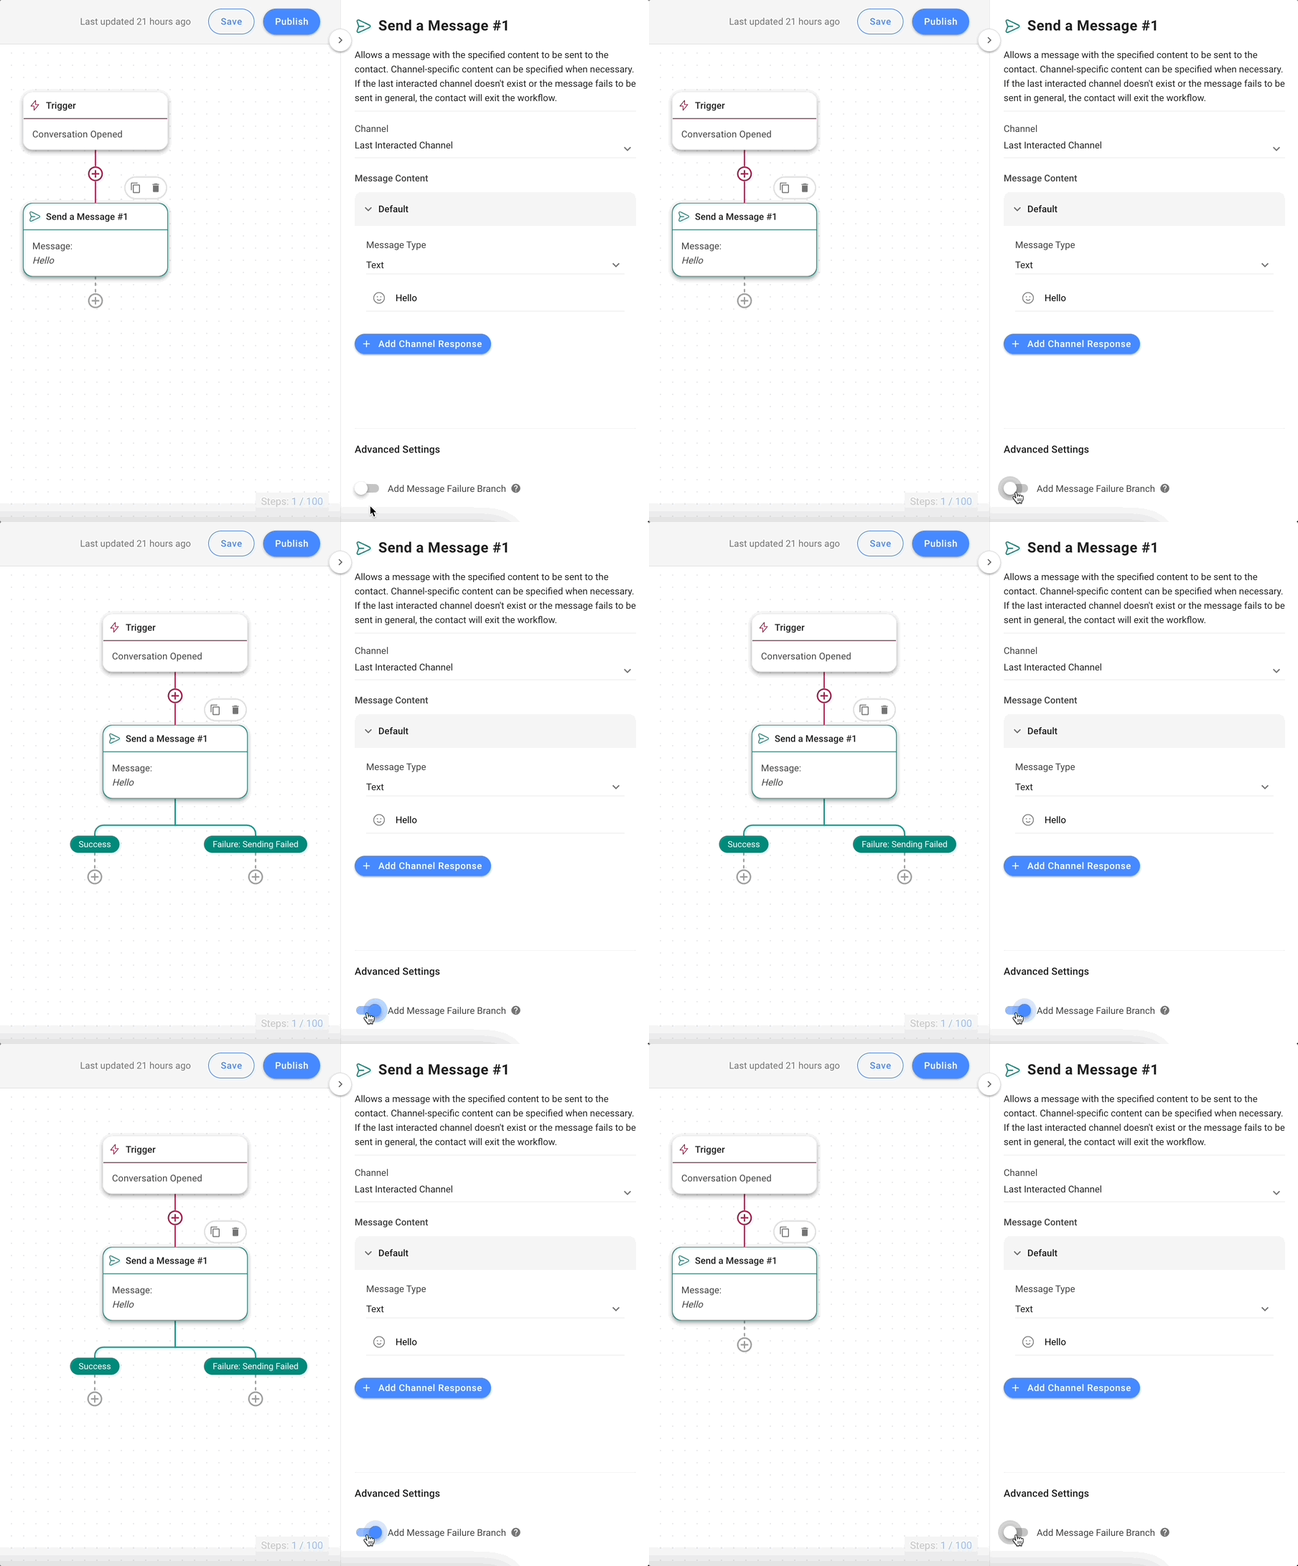
To activate the Failure Branch, navigate to the Advanced Settings section of your Send a Message or Ask a Question Step and toggle on the option Add Message Failure Branch.
Now you can tailor your Workflow to handle scenarios in which messages are unable to be sent. This ensures Contacts receive the necessary attention, instead of having them exit the Workflow and wonder why you’re not responding.
Date & Time Step Improvements
Previously, when configuring business hours in the Date & Time Step, the maximum allowed end time was 23:59. This resulted in a one-minute gap between 23:59 and 00:00. For businesses that operate until midnight or overnight, this caused a one-minute Workflow disruption when transitioning to the next day.
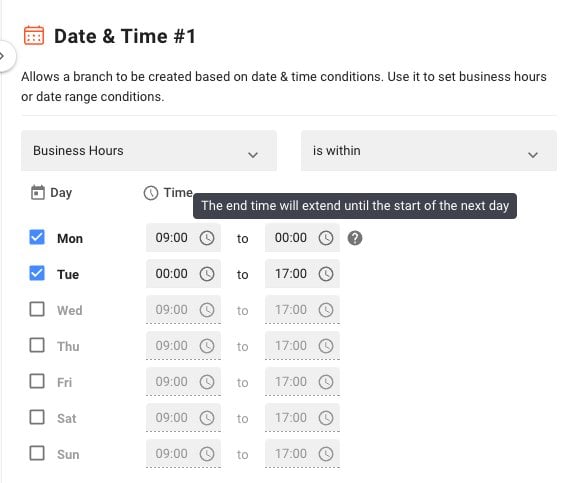
Now, you can select 00:00 as the end time while also choosing 00:00 as the start time for the following day. As a result, Workflows can run uninterrupted throughout operating hours.
New Workflow Trigger Variables
We have added 19 additional Trigger variables to enhance the Conversation Opened and Conversation Closed Workflow Triggers, providing you with plenty of new possibilities for your Workflows.
The new Trigger variables include $conversation.category, $conversation.summary, $conversation.assignee_team, $conversation.first_assignee and more. To view all the available Trigger variables, visit our Help Center.
New Search Functions for Segments and Inboxes
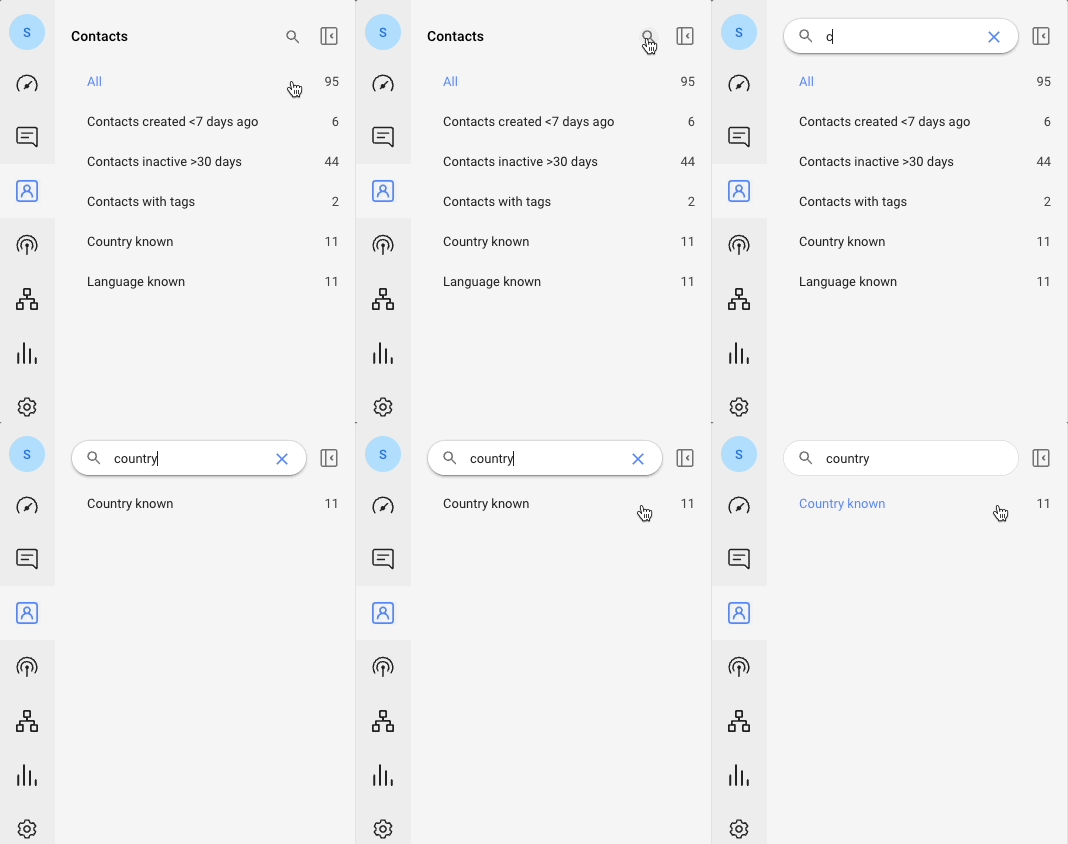
Check out these two highly-requested updates: New search functions to make searching for Segments and Inboxes easier than ever.
Searching for a specific Segment in the Contacts Module can be a hassle, especially when there are numerous Segments to go through. To address this, we’ve added a search function to the Segment list. Just enter a keyword or Segment name in the new search bar and it should pop up.
Finding the Inbox you want in a crowded Inbox sidebar is also time-consuming. No more scrolling through the entire sidebar: The new Inbox search function enables you to locate any Team or Custom Inbox quickly. Simply enter the Inbox name, and voila!
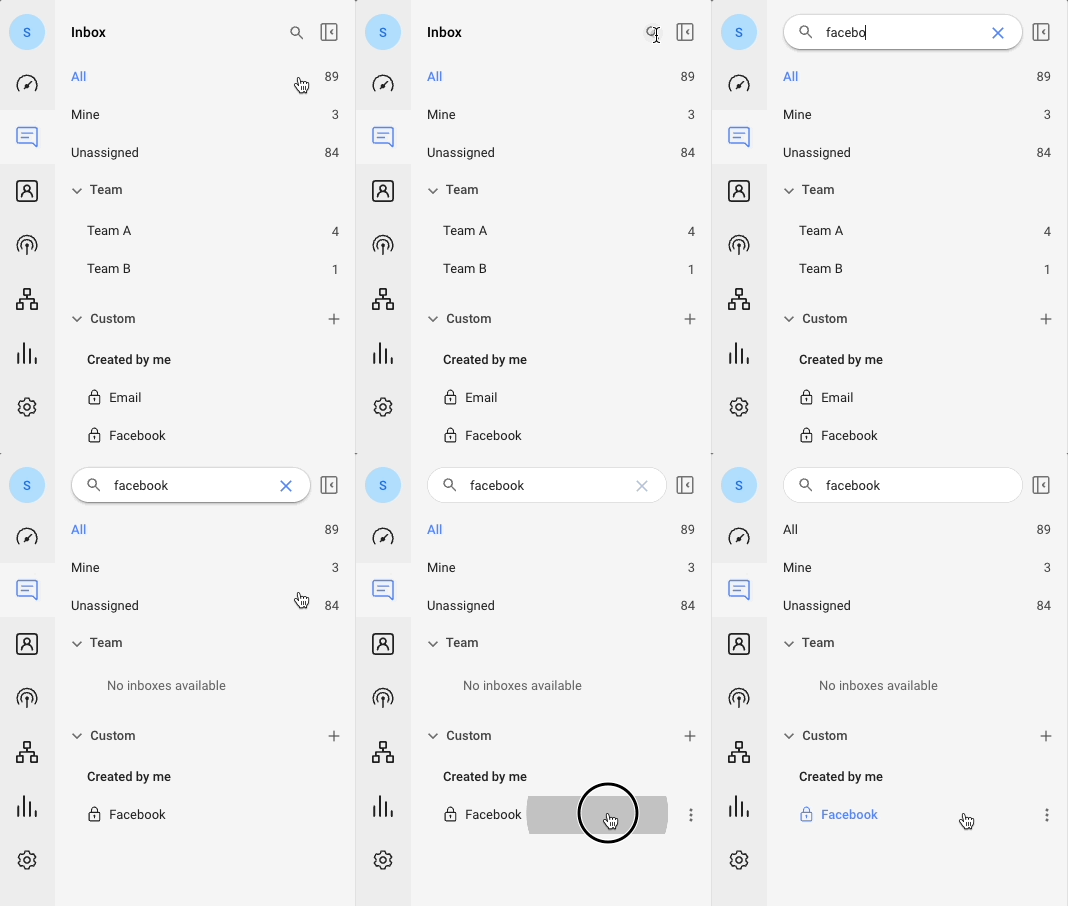
These updates should make day-to-day tasks that much quicker, giving you more time to focus on the work that truly matters.
New Indicator for Images and Files that are Converted to Links
When you send images or files that exceed a Channel’s size limits, they will be converted into links and sent to the Contact.

Previously, these images and files were displayed in their full form in the Messages Module, but were converted to links on the customer’s end. This resulted in a discrepancy between what agents and customers see.
To align this behavior so agents can see the exact message a contact receives, images and files that exceed a Channel’s size limits will now be displayed as links in the Messages Module.
Turn customer conversations into business growth with respond.io. ✨
Manage calls, chats and emails in one place!


 Electronics
 Fashion & Apparel
 Furniture
 Jewelry and Watches

 Afterschool Activities
 Sport & Fitness
 Beauty Center
 Dental Clinic
 Medical Clinic
 Home Cleaning & Maid Services
 Photography & Videography
 Car Dealership
 Travel Agency & Tour Operator


